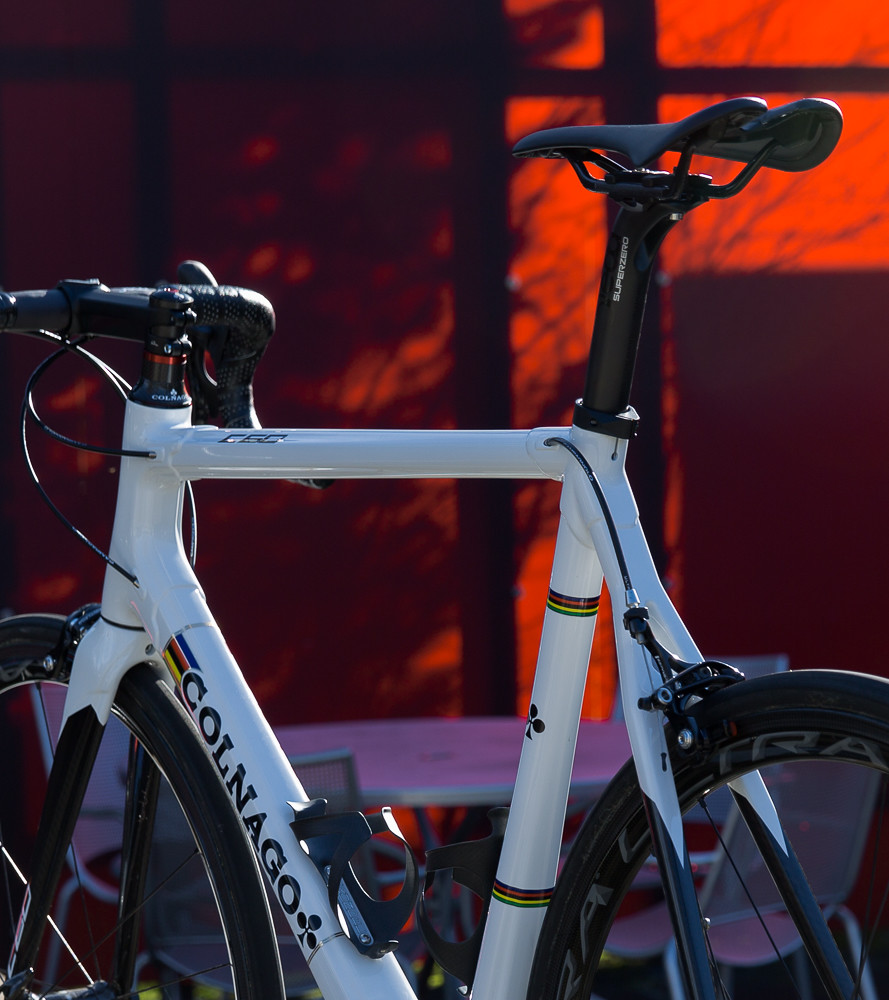
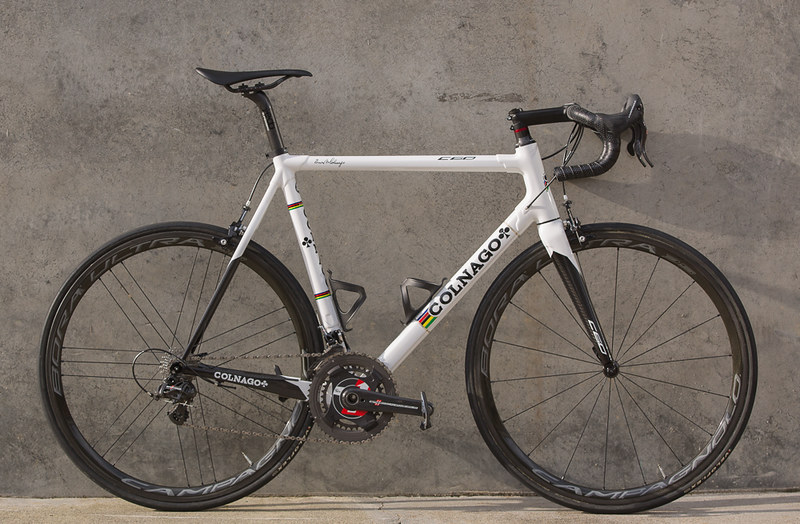
The full pic...
The Fit:

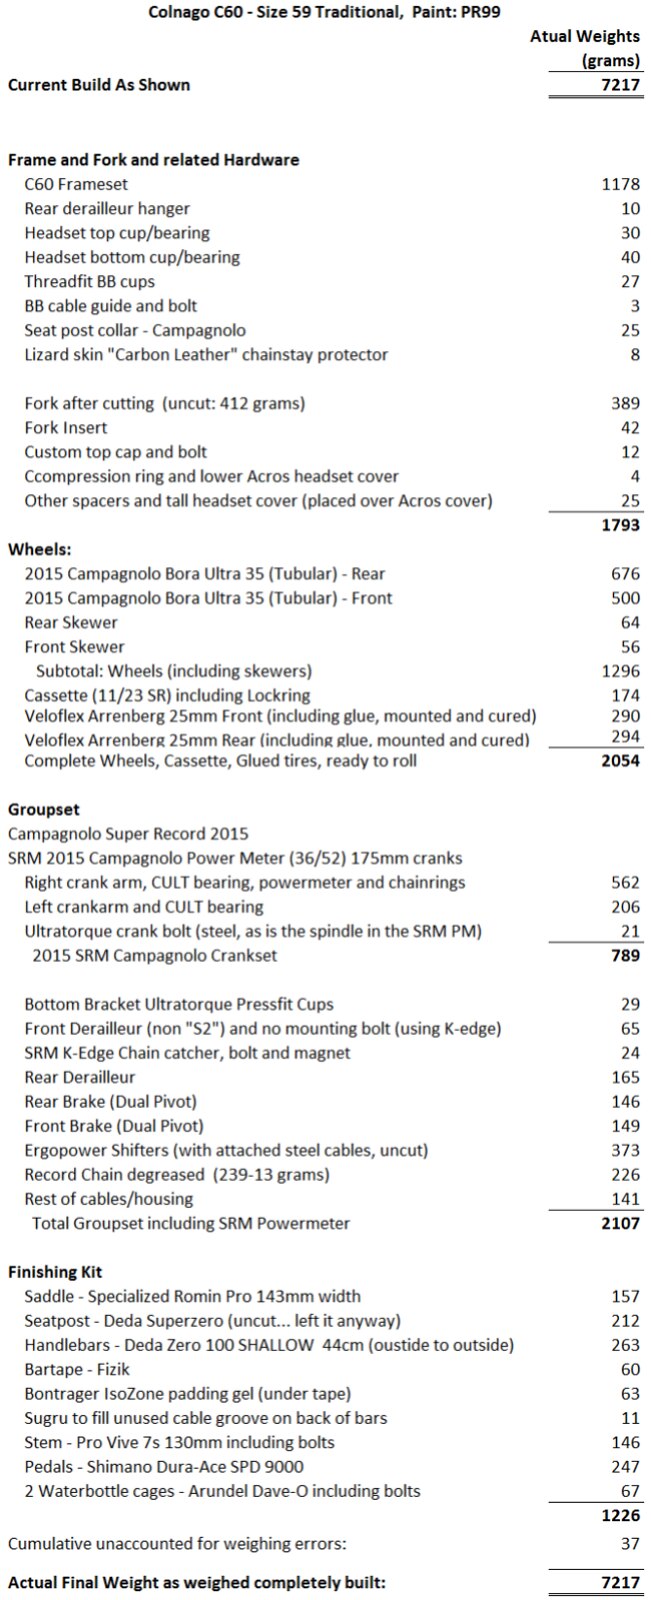
The Build List...
Rather than just throw out some closeups of the finished build, which I'll eventually get to, I thought I'd take you through much of the build process this time around, from beginning to end. I'll do this as I sit down at the computer over the next few days. I've taken a bunch of pics, etc., so by the end of all this every minute detail of this build will be here. I'll continue to add to this post, and will answer any questions as they come up.
The Story:
So, suffice to say that it was a completely random stroke of luck that I ended up with this frame. Last March or so, I was looking for frames for a couple of folks and got a hold of a complete list of available frames from Colnago America. I scanned the list and noticed one line with a PR99 color code and thought it had to be a misprint since they weren't even doing the C60 in this color scheme as far as I knew. I called to confirm that this wasn't a misprint, and sure enough, they had it sitting on their desk and sent me a pic. I asked if I could get it in Traditional 61 and they said No, that was all they had (it was a 59 Traditional). I asked what the backstory was behind it... was it a special order for someone who didn't want it or what? They said no back story, it just came with a shipment of frames they got. So I told them to ship it out, as I know enough about Colnago that if you come across a special paint in your size, or close enough to work, that you might as well get it if you think that at any time in the future you might possibly be getting one. So, this was the frame that made me pull the trigger. So, that's all I really know about the frame and its origin. I'm lucky to have it.
The Build:
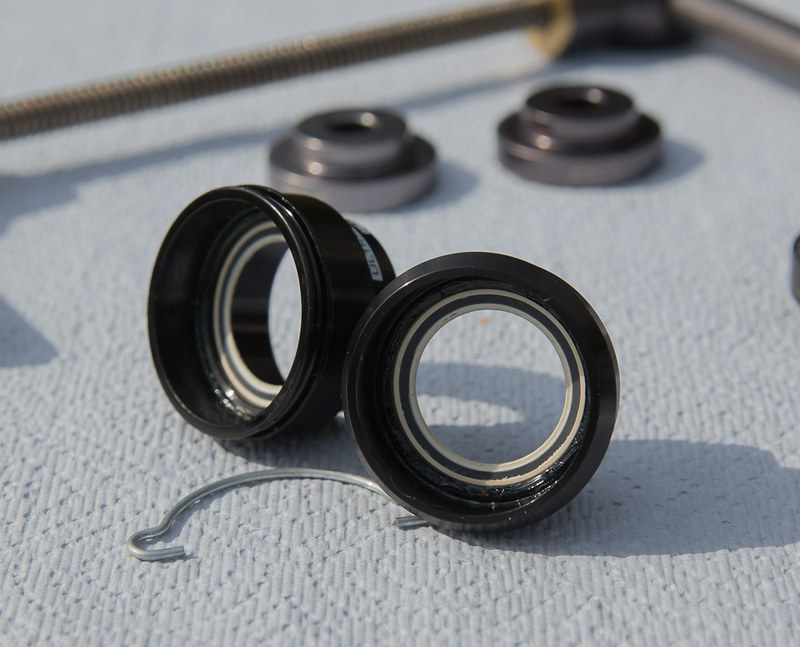
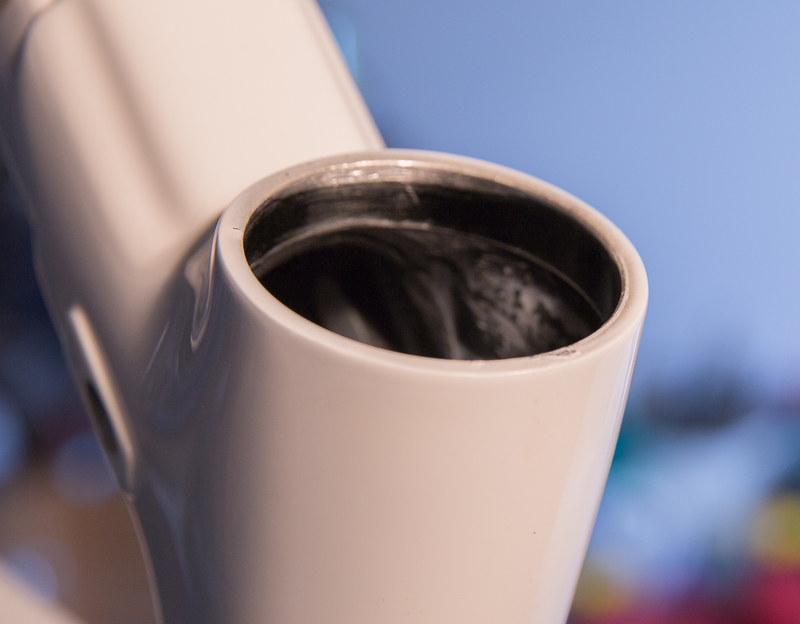
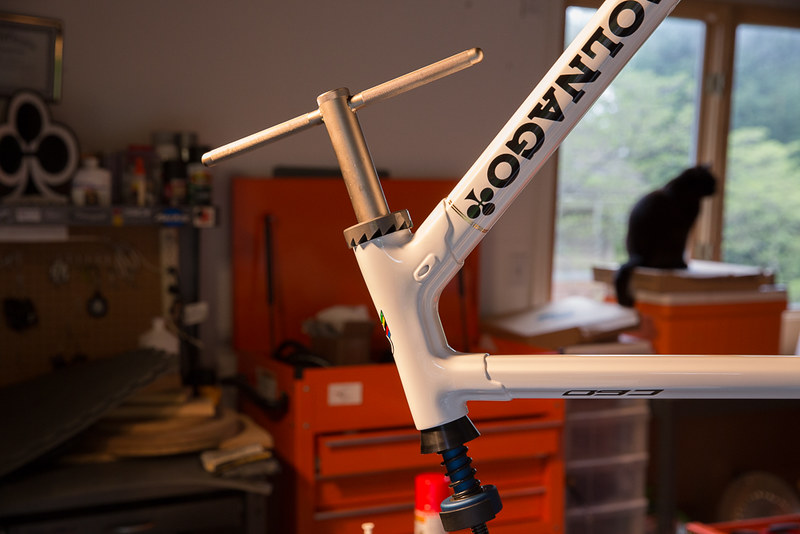
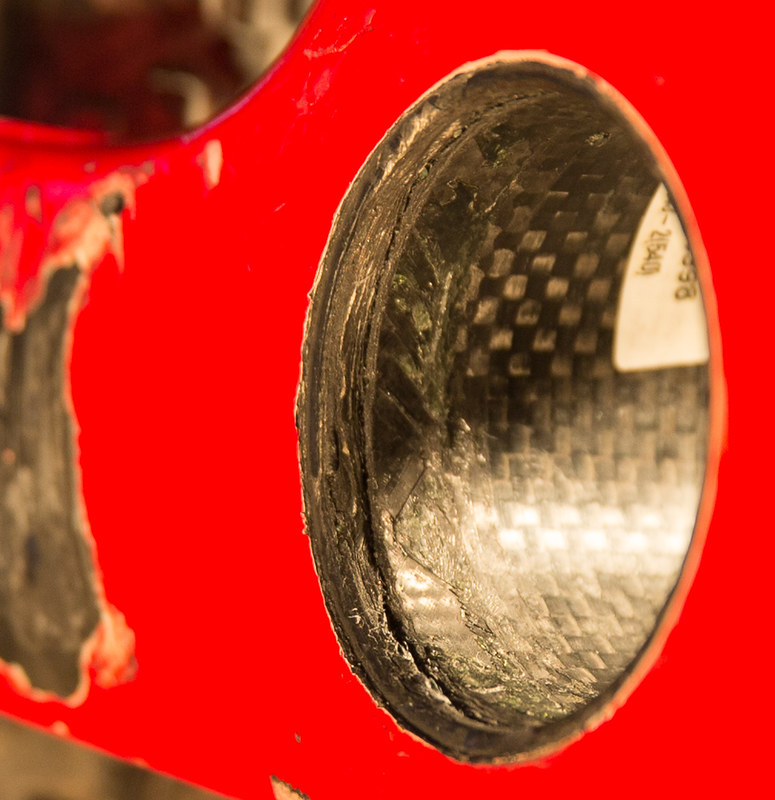
Ok, upon taking delivery of the frame, I noticed the headset bearings were already in the frame right out of the box. They are supposed to be, but I kind of assumed they'd be pressed in cups with slipfit bearings like in my C59 at first, and was curious why they hadn't fallen out. Turns out they use an Acros high quality headset that have the bearings prepressed into cups, then the cups are pressed into the headset. Ok... but the lower one seemed just a tad rough to me. A bit like a misaligned pressfit bearing in a bottom bracket shell. Anyway, long story short, that would never do, so out they came so I could inspect things and maybe just press them in again carefully thinking that had somehow just got pressed in a bit askew. Well... the paint is so thick, and they get painted prior to pressing in the cups, that a ridge of paint had dried under the lower cup....
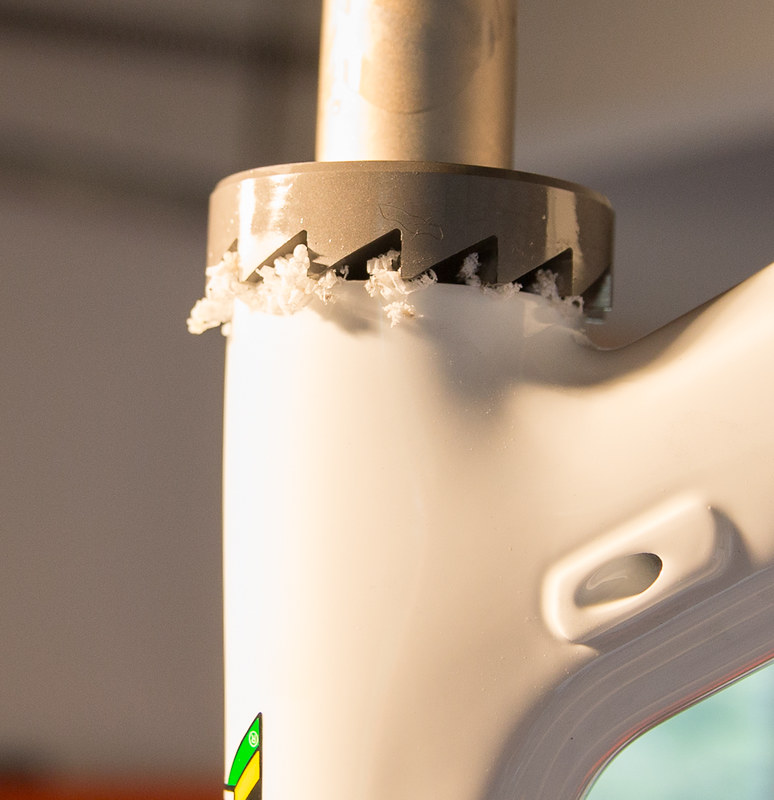
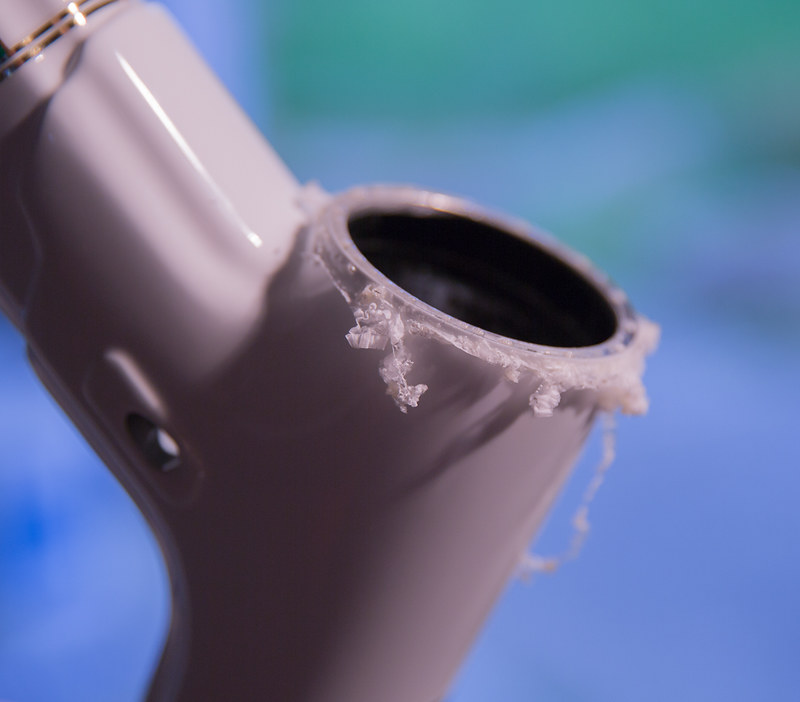
Note the ridge of paint along the lower right edge of the headset. While we're at it, notice the alloy rings about a centimeter deep into the headset. Makes for a good pressfit of the headset cups... so long as the ends are perfectly faced... Clearly, as a minimum I needed to face the headtube to remove the excess paint etc...
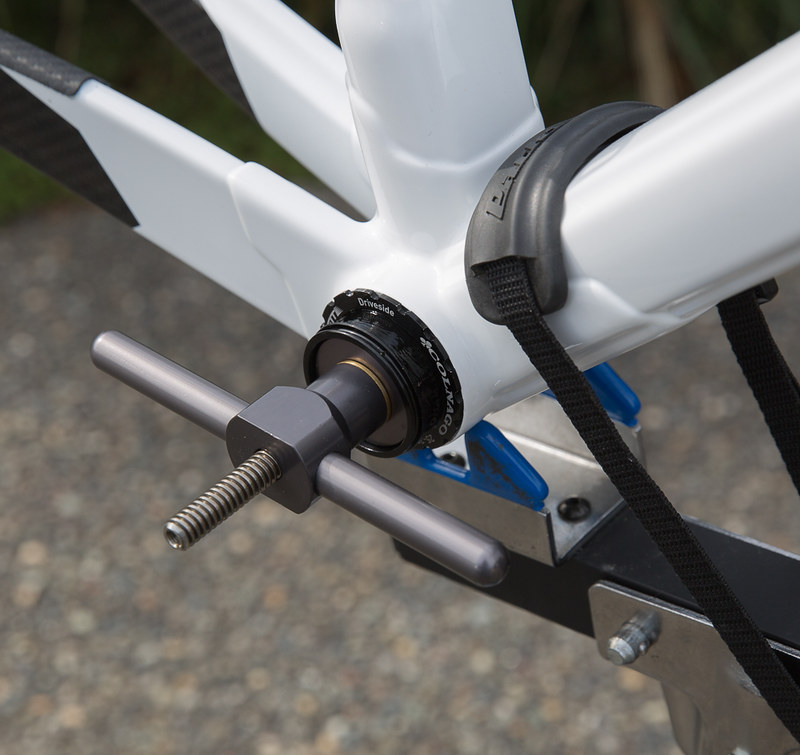
Facing process.... While I've never built a Colnago where I haven't faced the BB shell, since the move to pressed in headset cups/bearings from the factory I have not faced a newer (since the EPS model) headtube until now... or even removed the cups/bearings on any C59 or EPQ. Models prior to the EPS used an external headset. These are much the same in principal, just a little cleaner in that they are buried in the headtube. Colnago could have done a better job of marketing this, as I think it's a significantly better design than just carving/molding a race into a carbon shell that you just pop a couple slip fit bearings in, and then squeeze everything together with preload. The logo on my C59 top tube says C-HS, spelled out underneath as "Colnago Headset System". Kind of a silly graphic especially when virtually no one knew what was special about it and it appeared that they were just adopting an "integrated headset" like everyone else had seemingly already done. And really, there wasn't anything "special" except that it was not at all a case of adopting the "integrated headset" trend. Rather, it retained the durability and longevity that external headsets enjoyed, versus the "new standard" of just dropping the bearings directly into your frame shell, which could be subject to wear and damage.
Setting up...
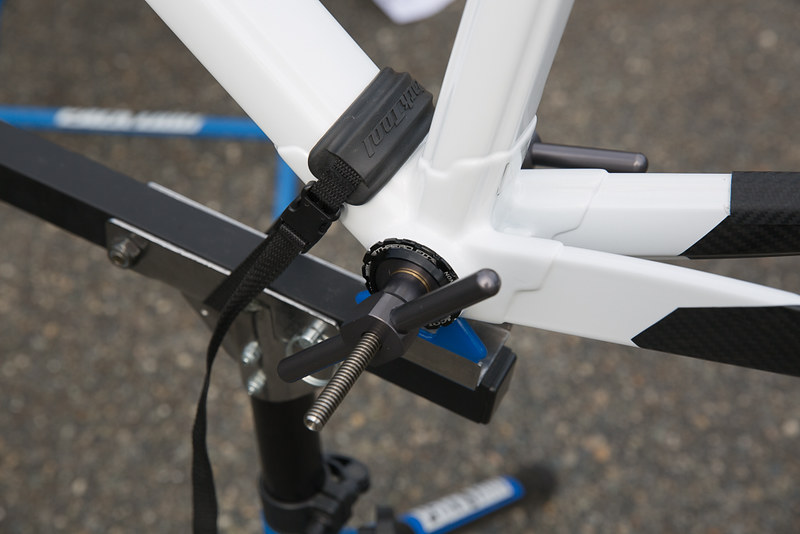
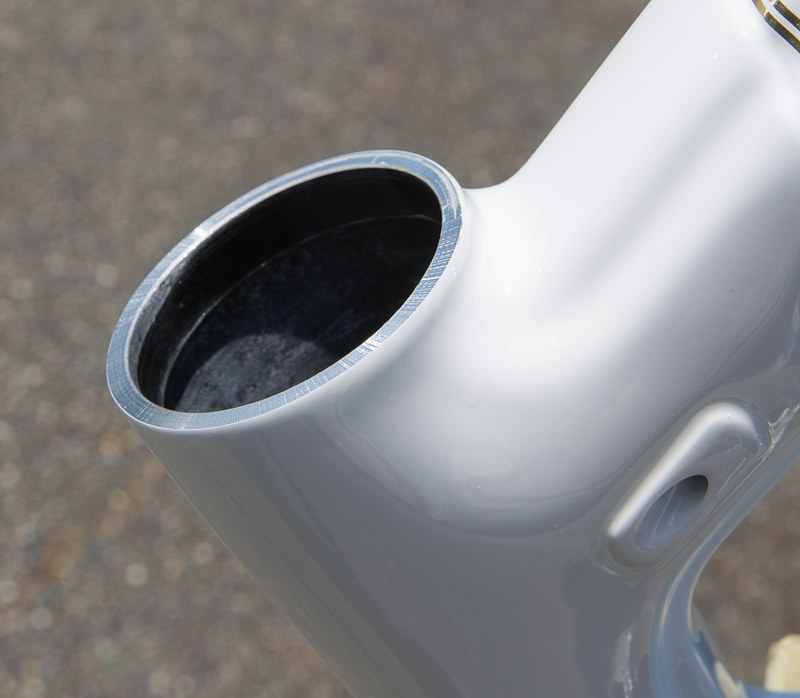
The actual facing operation...
Checking progress...
Final Result... smooth and square... repeated the process for the top of the headtube, although it probably wasn't necessary.
I forgot to photograph the pressing in of the headset cups, but once in they were perfectly silky smooth, and I was now completely happy. I used Morgan Blue Aquaproof Paste as an anitseize compound between the headset cups and the inner diameter of the headtube.
So, now that I was satisfied that all was good with the headset area, I wanted to turn my attention to the Bottom Bracket. I understand fully how the new Threadfit System works etc., but this is the first time I've had one in my hands to be able to do what I want with it. Having experienced a whole lot of anguish fixing bikes with pressfit bottom brackets... and having just had to face the headtube, I wanted to make sure that the threadfit cups in the BB were actually sitting on edges of a square, faced, BB shell. So...
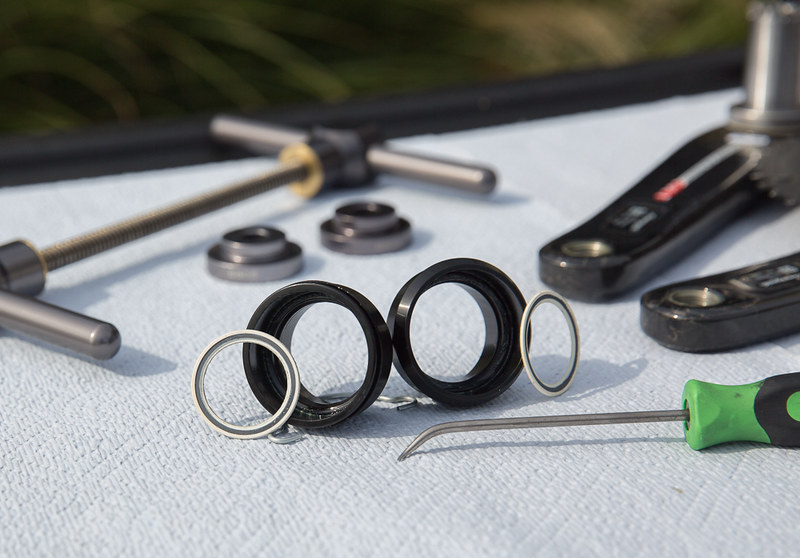
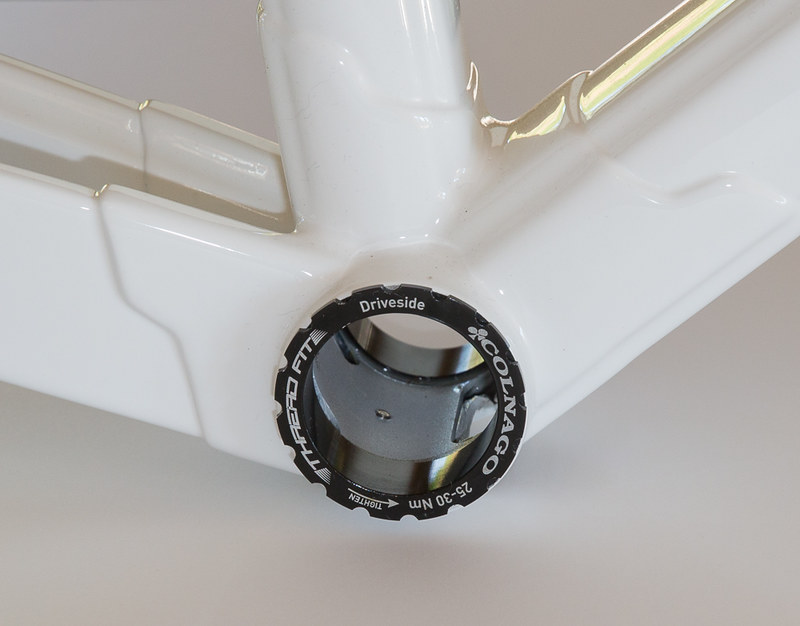
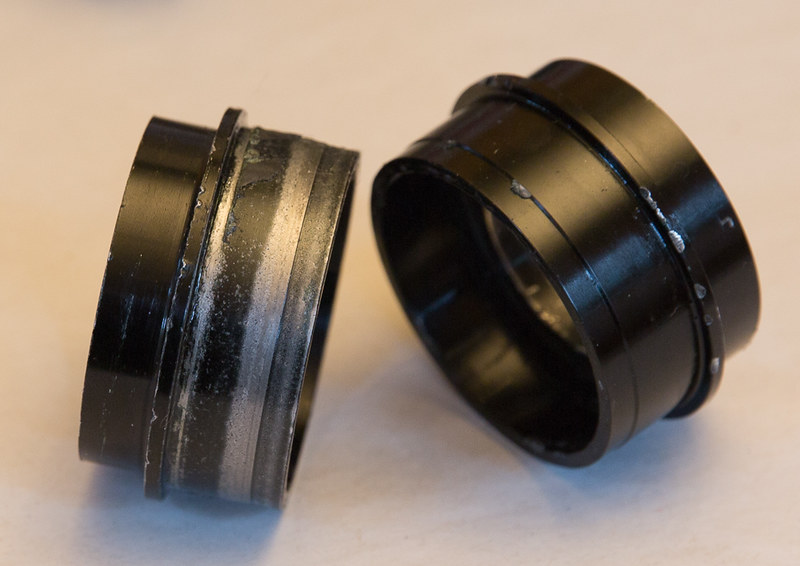
Down to the BB shell... First the Threadfit cups have to be removed. There's a special tool to do this that was initially supplied with C60's when you bought them. Now it's a special order item, which makes sense since most people would not be removing the cups on anywhere near a regular basis... But inquiring minds want to know... so...
A shot of the shell before removing the Threadfit cups... very clean and I checked tolerances with a really good set of Vernier calipers and was very pleased, especially compared with most carbon shells that take pressfit BB's...
Here's a pic (not mine) that I found of the actual alloy sleeve that gets bonded into the C60 BB lug... and the tool to remove the Threadfit cups...
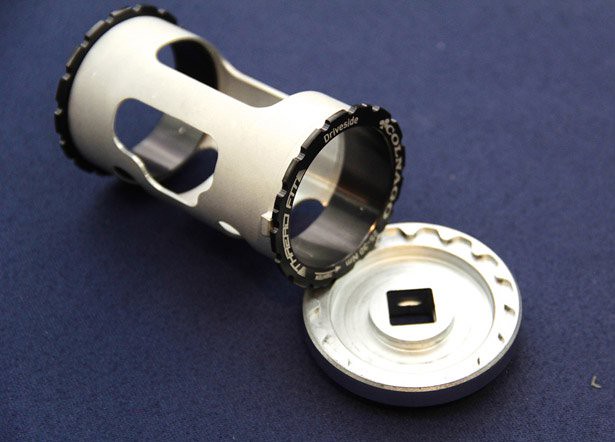
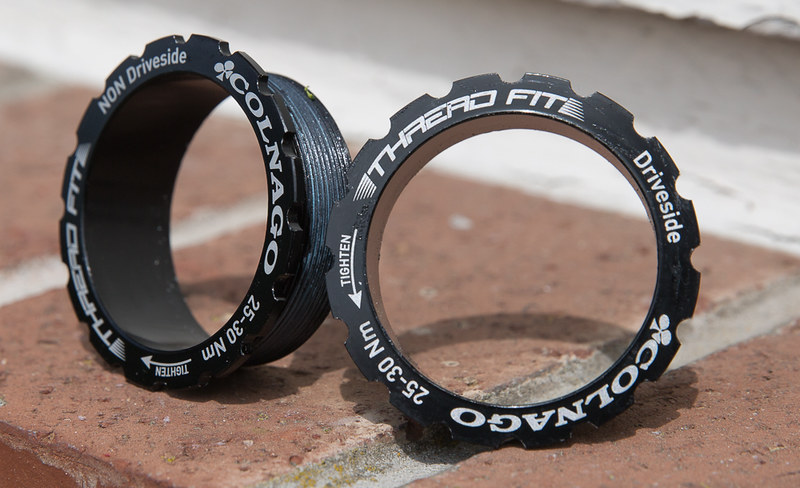
The Threadfit cups themselves...
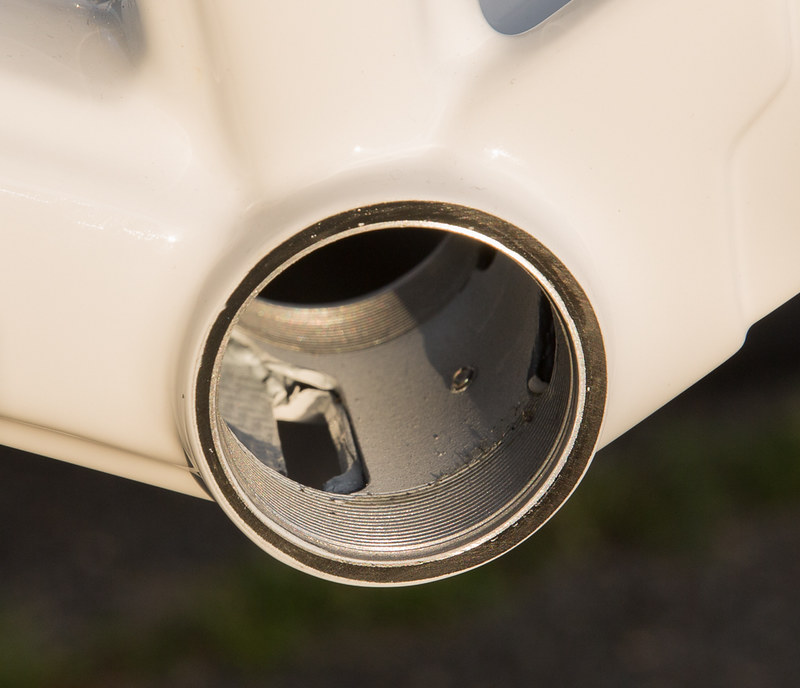
Pleasantly confirmed that both sides of the BB shell were clean and faced properly underneath the Threadfit cups...
Drive side... notice the two notches which ensure there's no chance this alloy sleeve is going to come loose and start spinning in the shell..

and Non-Drive side.... clean as a whistle as well...
Ok... once I confirmed all was well here, I coated the threads with the same paste as the headset, to prevent any oxidation etc, since these cups will probably only get removed very rarely, if at all, then torqued them back into the shell. Ok, the heavy lifting of inspecting and prepping a new frame is largely done.
But before I move on, I want to spend a moment just to say how impressed I am with this setup compared to most other big manufacturers of carbon frames. It's no secret that I have a disdain for bottom bracket shells that are not up to snuff and creak more often than not. With Colnagos Threadfit system... 1) the sleeve is bonded to the BB lug, and then Threadfit cups are threaded into it. It is not moving. It is alloy. It is much easier to manufacture to fine tolerances with alloy than carbon, at least judging by the crap out there these days. 2) It is threaded. Praise whoever almighty!! Threaded. Let me say that again. It's threaded. Ok, "so what" you might ask, you're still pressing in some kind of adapter into that smooth shell. And that is true. However, the Threadfit cups themselves are alloy and very tightly machined... again I took the calipers to them and was impressed. So, while you still have to press in whatever BB solution you want to use (I used the Campagnolo Cups for Ultratorque cranks), the whole assembly is solid and reliable, and hopefully creak free if installed properly. The Threadfit cups are actually another layer between the BB solution and the frame, but if they ever get damaged, they can easily be replaced rather than having your entire frame rendered a throwaway. Someone asked "well why do you need the Threadfit cups at all... why not just thread a BB directly into the alloy sleeve." Good question and it could probably be done, but what manufacturer is going to produce a BB just for the small numbers of Colnagos with the Threadfit system out there. Probably none. So... in my opinion, Colnago's Threadfit System is making the best of a bad situation bestowed upon us in the form of the Pressfit Bottom Bracket that we've all come to know and love. Ugh!
Before I leave this area, I wanted to share what can happen with a pressfit BB that gets pressed into a raw carbon shell.
The shell...
The cups that ended up spinning and grinding away the shell edge as well as "coning" the cups themselves...
For a more complete description of the debacle above... here's a link...viewtopic.php?f=3&t=135742&hilit=praxis&start=105#p1270718
Ok... now to press in the Campy Ultratorque cups... (to be continued in a separate post, as I can see this is going to get unwieldy for me very quickly if I keep coming back to this one to edit it)...