

Trek Y Foil 77. An iconic classic brought bang upto date.
Moderators: MrCurrieinahurry, maxim809, Moderator Team


Visit starbike.com Online Retailer for HighEnd cycling components
Great Prices ✓ Broad Selection ✓ Worldwide Delivery ✓
www.starbike.com

Wow amazing work 

Ti or dye!
The Weenie formally known as CAADHEAD
The Weenie formally known as CAADHEAD

How did I miss this one?
This is a real Odysee for a bike lover. I enjoyed and suscribed to it.
Love the rusty look on the fixie,too.
This is a real Odysee for a bike lover. I enjoyed and suscribed to it.
Love the rusty look on the fixie,too.
Kuota Kom Evo
viewtopic.php?f=10&t=111825&p=955235#p955235" onclick="window.open(this.href);return false;" onclick="window.open(this.href);return false;
SOLD
viewtopic.php?f=10&t=111825&p=955235#p955235" onclick="window.open(this.href);return false;" onclick="window.open(this.href);return false;
SOLD
BmanX wrote:1 X 11 or even a 1 X 10 for this project would have been ideal. I love that idea.
Ah yes I did give it some consideration, Im still geared up to 10 speed at present rather than 11 (wheels,cassettes etc)
1x10 would work with one slight problem... my fitness level. I played about with gear charts on my mtb, whichever way I looked at it I just wasnt ever going to climb any hills of any worth on a 1x10 setup. Well I could but i'd have to run it so low I would spin out on the way down. I have a feeling it could be the same issue on a road bike
Guess I just need to get fitter
Last edited by Clannagh on Mon May 04, 2015 9:47 pm, edited 1 time in total.
-
mattythemod
- Posts: 54
- Joined: Mon Jan 20, 2014 5:16 pm
- Location: The Far East
Unreal..cant wait to see the finished result..
-
dereksmalls
- Posts: 2305
- Joined: Tue Aug 02, 2011 9:20 pm
- Location: New Zealand
Love the mod to the bottom bracket, very ambitious
New V old weights:
Both original alloy rear dropouts weighed in at 131g
Both new carbon dropouts together with new alloy mech hanger 74g. 57g weight saving.
Front alloy mech hanger, bottle cage mount and the 'Y Bridge' frame section that they were bonded to all weighed 156g
New Y bridge section together with new moulded in mech hanger weighs in at 71g, 85g lighter. Personally I think aesthetically its a huge improvement. (or will be once finished and looking nice) Im going to mount a bottle elsewhere.
Original alloy English threaded bottom bracket mounted into frame weighed 88g
New carbon moulded in bottom bracket tube weighs only 20g, carbon/resin required to bond it in place adds an additional 15g. Total weight for new carbon bottom bracket section weighs 35g saving 53g
Last edited by Clannagh on Tue May 05, 2015 2:10 pm, edited 4 times in total.
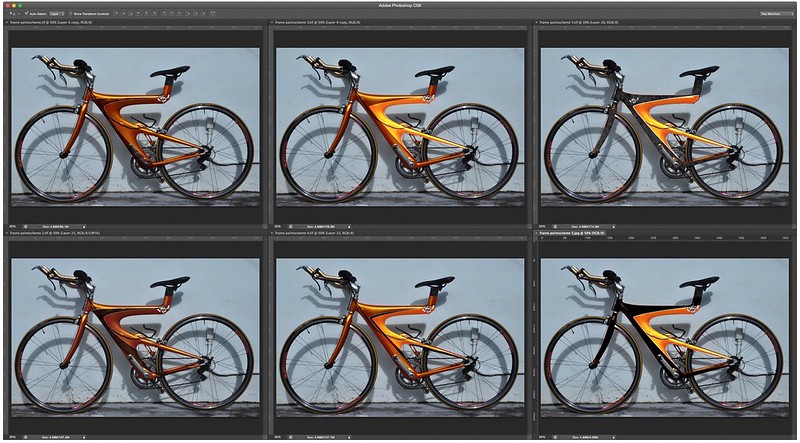
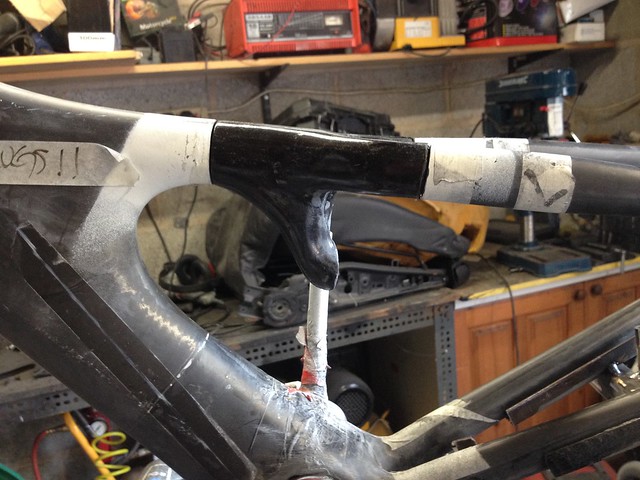
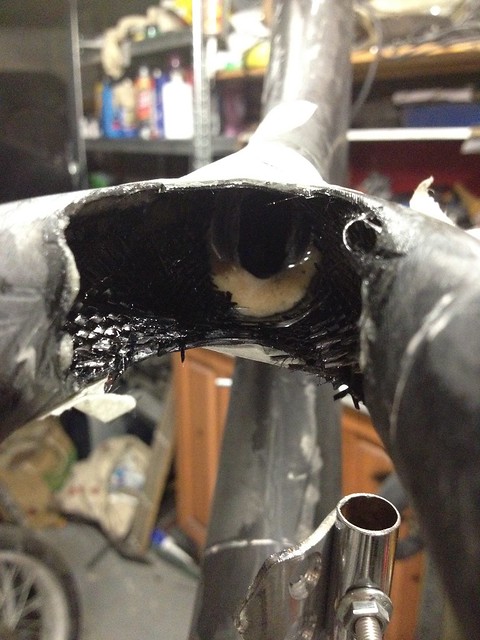
Some considerable work has gone into the rear end. One of my gripes for this frame was that I would catch the edge of my heels on the seat stays, not every time just now again. For whatever reason Trek made the seatstays quite wide, maybe it was due to their shallow angle on this frame design. Perhaps they wanted to be confident of clearance between chain and frame when in highest gear. Anyway I've moved them both inwards by 5mm. This still allows enough clearance for the chain (even more so as Im using a compact front crankset)
You can see by these images their new 'inwards' location. Also you can see how Trek bonded this area of the frame together by the circular joints. Front frame, Y section 'bridge area' and seat stays had male/female joints, they were pushed and glued into place.
Some of these frames were sent back under warranty as cracks appeared in the paint on biggest downtube joint just above the BB area, owners thought their frame was about to split in half. Really all that caused the cracked paint was different levels of expansion between carbon and jointing glue. Having hacked this thing apart that glue is there to stay and would not ever crack or split. Must have caused Trek a few needless headaches at the time... Wait a minute are they back there again with they're huge recall on front quick release axle levers?
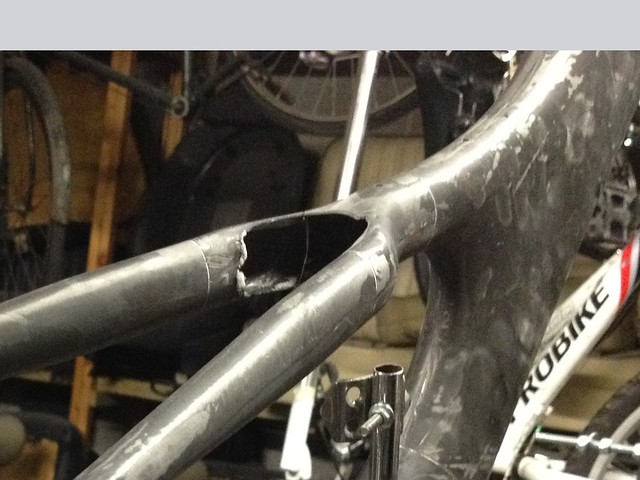
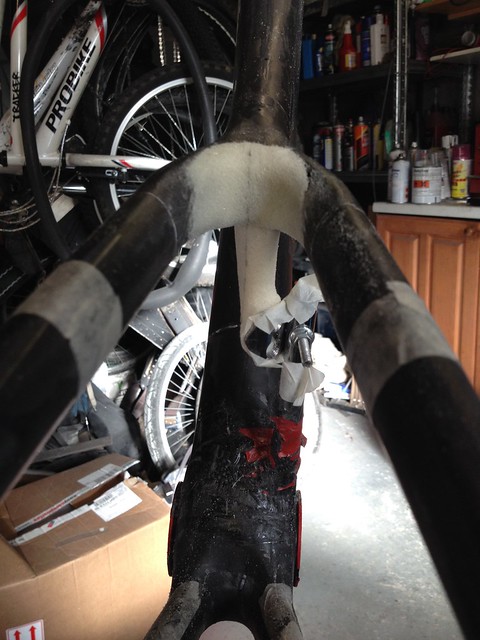
Im also relocating the rear brake caliper for improved aerodynamics and aesthetics. This in turn allowed me to reshape the bridge area that once housed the caliper mounting stud. Also frame mounted cable guides have gone as all cables will be internal routed. I was never keen the way that rear cable meandered its way along the frame eventually arriving at the caliper.
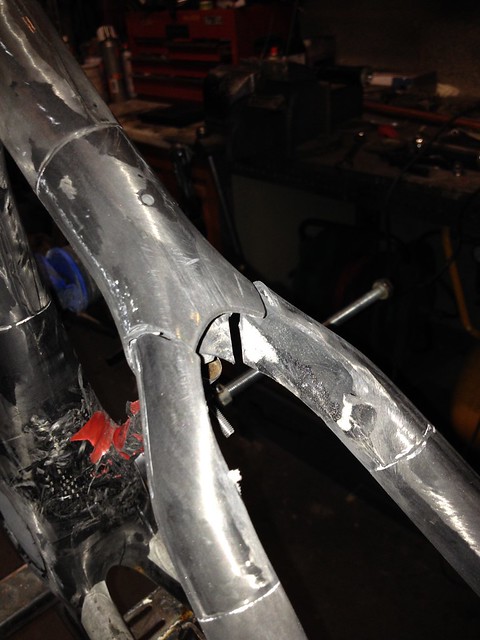
I have used foam core to create new shapes and finished with body filler. Remember this is just the plug for my mould to produce a new carbon section, foam and filler will not form part of the finished frame.
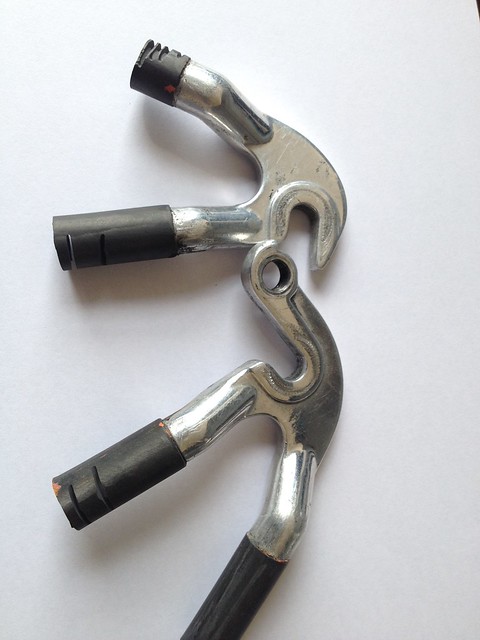
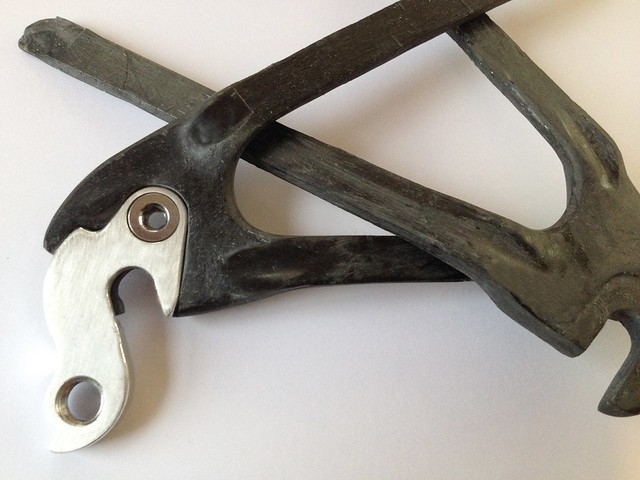
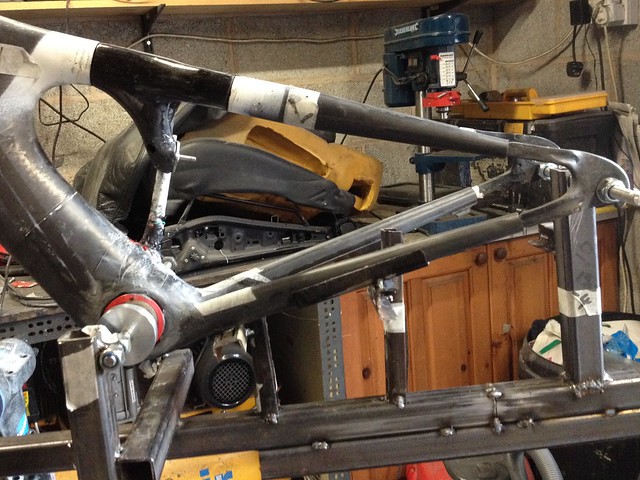
Also here are the rear dropouts in place prior to being wrapped in carbon and becoming 'as one' with the rear forks... Good stuff this carbon
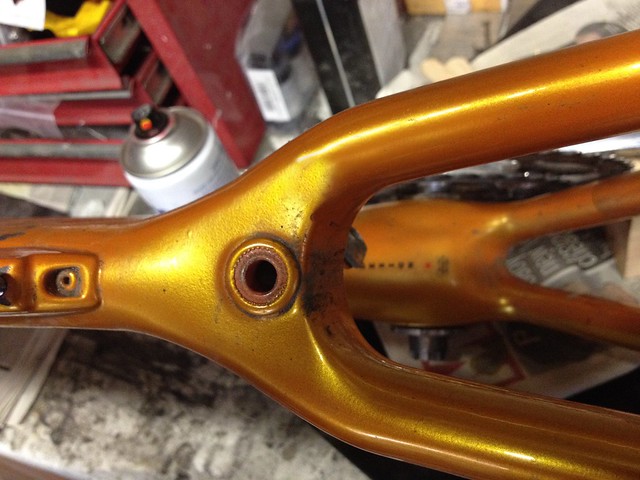

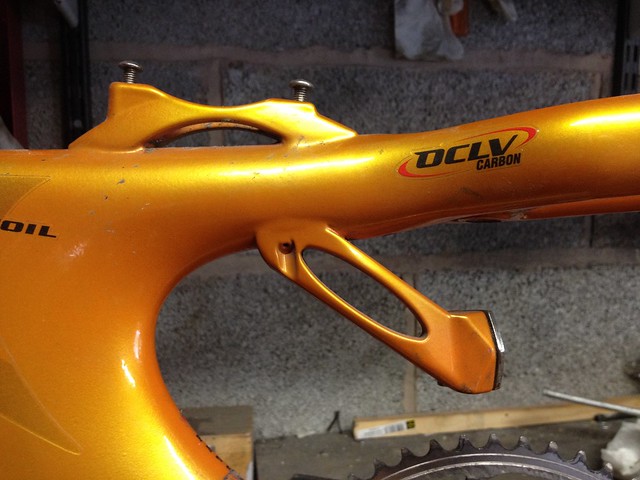
Old brake caliper location and cable routing
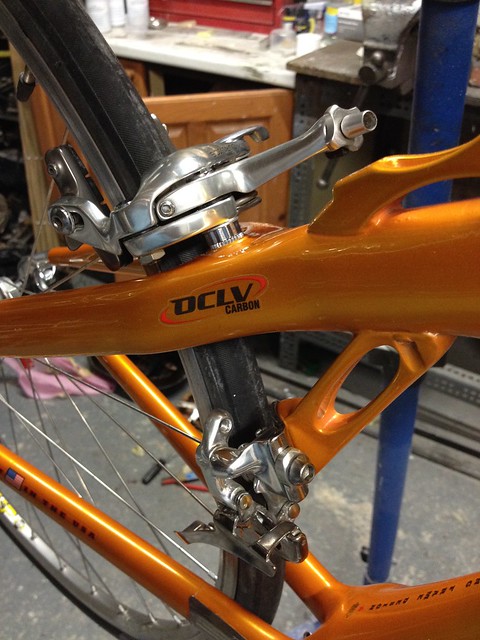

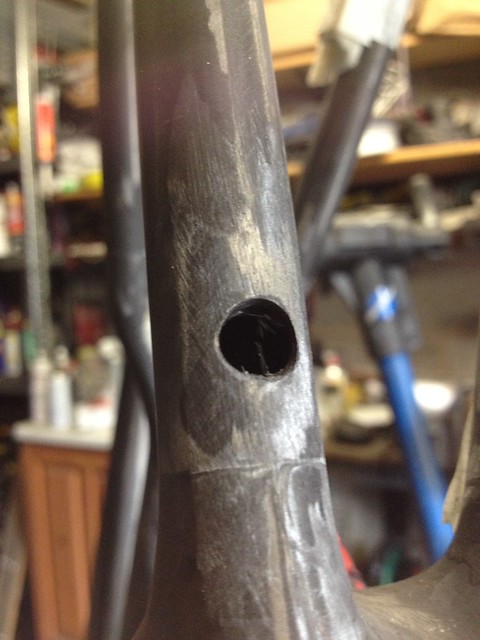
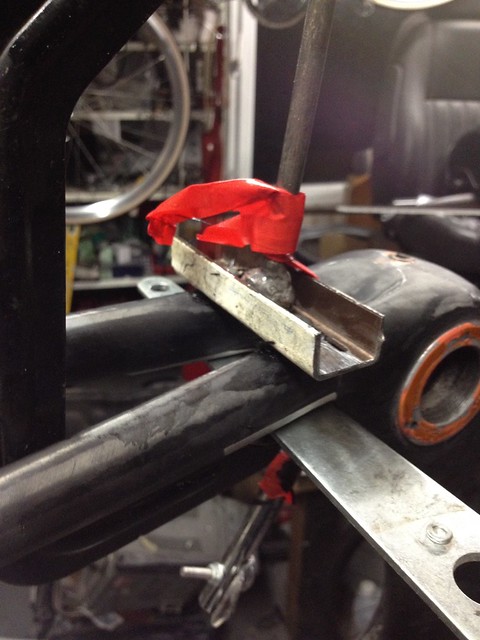
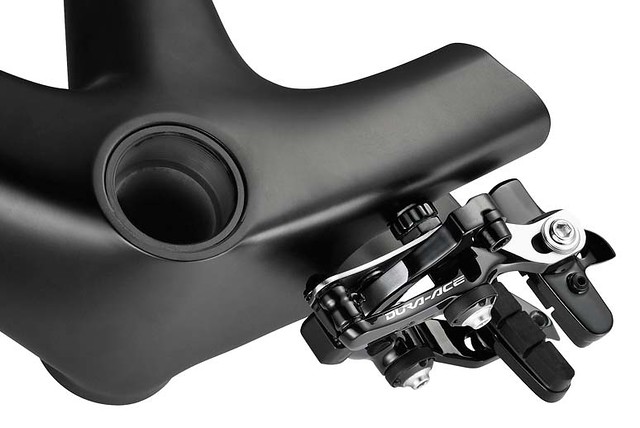
Heres one of the 'new' holes ready for a brake caliper mounting stud, located under the chainstays just behind BB area. Im fitting one of those new fangled Triathlon lower calipers. I made up a metal template/jig to hold both studs in location whilst the carbon cured. Ok it looks Heath Robinson but it works. Last pic is a library image of caliper location. All these aerodynamic enhancements should improve my speed no end
You can see by these images their new 'inwards' location. Also you can see how Trek bonded this area of the frame together by the circular joints. Front frame, Y section 'bridge area' and seat stays had male/female joints, they were pushed and glued into place.
Some of these frames were sent back under warranty as cracks appeared in the paint on biggest downtube joint just above the BB area, owners thought their frame was about to split in half. Really all that caused the cracked paint was different levels of expansion between carbon and jointing glue. Having hacked this thing apart that glue is there to stay and would not ever crack or split. Must have caused Trek a few needless headaches at the time... Wait a minute are they back there again with they're huge recall on front quick release axle levers?
Im also relocating the rear brake caliper for improved aerodynamics and aesthetics. This in turn allowed me to reshape the bridge area that once housed the caliper mounting stud. Also frame mounted cable guides have gone as all cables will be internal routed. I was never keen the way that rear cable meandered its way along the frame eventually arriving at the caliper.
I have used foam core to create new shapes and finished with body filler. Remember this is just the plug for my mould to produce a new carbon section, foam and filler will not form part of the finished frame.
Also here are the rear dropouts in place prior to being wrapped in carbon and becoming 'as one' with the rear forks... Good stuff this carbon
Old brake caliper location and cable routing
Heres one of the 'new' holes ready for a brake caliper mounting stud, located under the chainstays just behind BB area. Im fitting one of those new fangled Triathlon lower calipers. I made up a metal template/jig to hold both studs in location whilst the carbon cured. Ok it looks Heath Robinson but it works. Last pic is a library image of caliper location. All these aerodynamic enhancements should improve my speed no end
People get all stressed out if their Carbon frame gets just a small crack in it and here you are cutting up, drilling into and changing an old school one and putting it back together.
Amazing.
Amazing.
C64 My Sixty 4 SR EPS 12
Visit starbike.com Online Retailer for HighEnd cycling components
Great Prices ✓ Broad Selection ✓ Worldwide Delivery ✓
www.starbike.com


