

I do one really through stress relieve when the wheel is still some under final tension and a couple quick ones (squeezing pairs of spokes) after that.
There has to be enough tension on the spokes so you can momentarily overtension them past what they'd get when fully tensioned. Besides removing windup you're also seating the spokes in the hub and adjusting the elbow bend. But if you wait til the spokes are at full tension then you don't have room to get the wheel true again as you add more tension. Yea you could true it up by loosening and tightening like you would with a finished wheel but I like to make everything come together at the same time- when the wheel reaches final tension it's also true.
For stress releiving I squeeze the spokes together (see Sheldon Brown) and use a screwdriver to force the spoke crossings (also Sheldon). I adjust the elbow bend before that but if it needs more I'll do that too. I sometimes put the wheel on the floor on a pad and gently put side force on the rim (also described by Sheldon) but I'm not sure how good that is for hub bearings.
If the spokes tink when you first ride the wheels then you didn't stress relieve enough.
The twist-resist spoke holder tool I use is really nice but you'd expect that for a tool that expensive. Being spring loaded makes it easy to use.
They come in right and left handed versions depending on how you build wheels. I'm right handed but I use a left handed twist resist. Spoke wrench goes in my right hand.
The wheelbuilding thread
Moderator: robbosmans
Forum rules
The spirit of this board is to compile and organize wheels and tires related discussions.
If a new wheel tech is released, (say for example, TPU tubes, a brand new tire, or a new rim standard), feel free to start the discussion in the popular "Road". Your topic will eventually be moved here!
The spirit of this board is to compile and organize wheels and tires related discussions.
If a new wheel tech is released, (say for example, TPU tubes, a brand new tire, or a new rim standard), feel free to start the discussion in the popular "Road". Your topic will eventually be moved here!
-
bm0p700f
- in the industry
- Posts: 5777
- Joined: Sat May 12, 2012 7:25 pm
- Location: Glermsford, Suffolk U.K
- Contact:
I find wind up rarely an issue even with Laser's. Even when it happens a bit repeated stress relieving get rid of the problem. I did find today on a build on a couple of spokes but no drama and nothing to worry about. If it happens to a big extent then I did not lubriate enough. I sometimes find changing the nipple helps as some nipples or spokes just do not like each other.
I do the first relieve at about 3/4 tension and I do 3-4 rounds to stretch the spokes as much as my hands allow. I normally see a tension drop at this point. I then dish and bring to full tension and true and the stress relieve and if the wheel moves a bit and true and stress relieve again and repeat that process until the wheel no longer moves when loaded. In the end all wheels will settle down and it is ready when stress the wheel does not cause movement. I do not flag spokes to see wind up as I see know need, correct and stress it will settle down in it's own time. I spent nearly 2 hours getting a build with no wind any where (XR-200 with lasers) to settle down and not move after stressing. Sometimes it takes time. On other builds it take no time at all. Generally I find the archetype quick to build with.
You will also doing this know if you are passed the tension limit of the rims as it just won't settle down as the wheel will move after stressing. In this case drop the tension by a quarter turn and see if it settles down.
The main thing is do not panic when building and make small incremental changes.


Visit starbike.com Online Retailer for HighEnd cycling components
Great Prices ✓ Broad Selection ✓ Worldwide Delivery ✓
www.starbike.com
With regards to my powertap g3 and open pro build with 32 spokes, should I use DT competition or revolution spokes? The revs are about 48g lighter, which seems well worth having, but is there going to be a significant strength / reliability trade?

For powertap build, I'd not recommend 100% DT revolution. At minimum you could do Rev on NDS and Comp on DS. Or forego minor weight savings and use Comps all round. Or arguably even better, consider Wheelsmith DB-14
http://www.zedwheels.com - wheels made just for you
Anyone been caught out by having been sent a couple of wrong spoke lenghts in a set ? Just noticed in during my wheel build a few not having the same tension and then measured them against a few others and they were a few millimeters longer.
Sent from my GT-I9305T using Tapatalk 2
Sent from my GT-I9305T using Tapatalk 2
Thanks eric and bm0p700f for some solid info! At this point all parts are in and I hope to start the build sometime next week. Weights are as following:
-20h rim - 482gr
-24h rim - 479gr
-Nipples - 43gr
-Spokes - 213gr
-Hubs - 60gr front and 231gr rear
Looks like the wheel set should be a hair over 1500gr.
-20h rim - 482gr
-24h rim - 479gr
-Nipples - 43gr
-Spokes - 213gr
-Hubs - 60gr front and 231gr rear
Looks like the wheel set should be a hair over 1500gr.

rich00 wrote:Anyone been caught out by having been sent a couple of wrong spoke lenghts in a set ? Just noticed in during my wheel build a few not having the same tension and then measured them against a few others and they were a few millimeters longer.
Sent from my GT-I9305T using Tapatalk 2
It happened from time to time:)
so before build check spokes if they are correct length
-
Zen Cyclery

- Shop Owner
- Posts: 1244
- Joined: Tue Mar 10, 2009 5:27 am
- Location: McCall, ID
- Contact:
@plpete- Usually I find that I end up stress relieving a wheel 6-8 times during a wheel build. After I add tension and make it all the way back to the valve hole I'll stress relieve, then repeat.
You'll know you've stress relieved enough when you deflect the spokes and the wheel doesn't go out of true/dish.
You'll know you've stress relieved enough when you deflect the spokes and the wheel doesn't go out of true/dish.
Great. Thanks Zen! I will be doing the build tuesday evening and will be building with the head mechanic side by side as he has a set to build as well. Very stoked and will try to take some photos of the process.

New wheels, based on NOS campagnolo strada XL rims and novatec hubs, nothing too fancy but it should get me through few winters. Not WW by any standards, only the rear wheel is more heavy than my carbon 24mm wheels lol. They are 36spokes though and still the weight is 1800gr. I dig the looks too, quite retro.


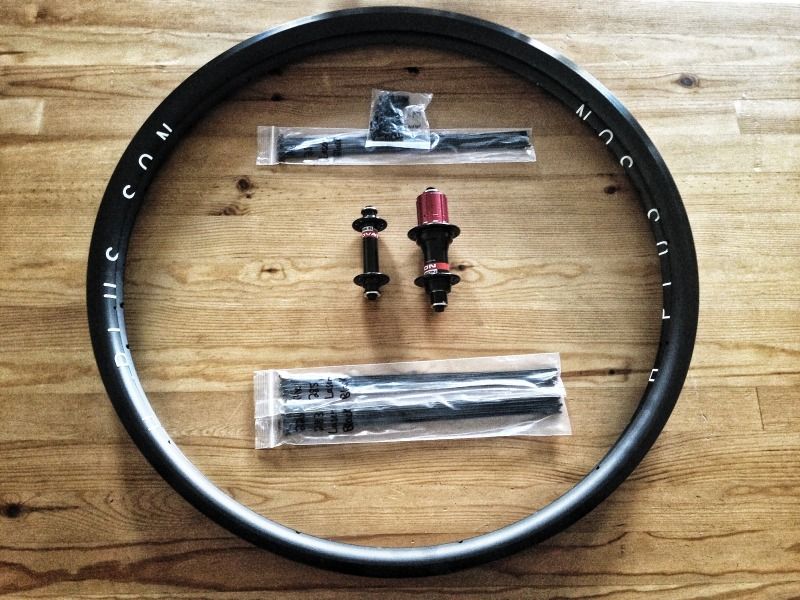
I had the chance to get started on my build last night. Really enjoying the experience so far! By no means should below be used as a guide, as this is my very first build, but just wanted to share with others thinking about building their own wheel set. The process takes a good amount of attention to detail if you want to do a good job. Patience is key too. Before I got started with my own build I helped to cut and thread some blank spokes for another build that my friend was doing with me.
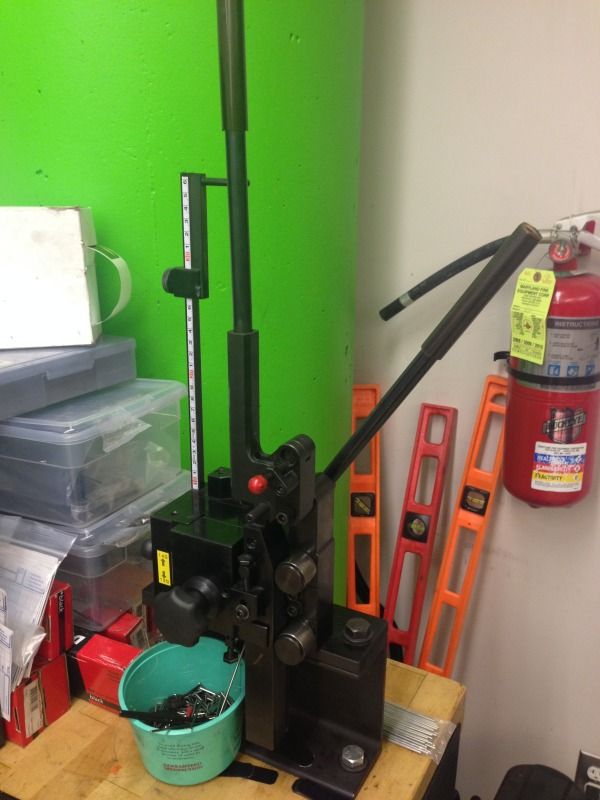
This was a neat tool that cut the spokes to the correct lenght and then threaded them
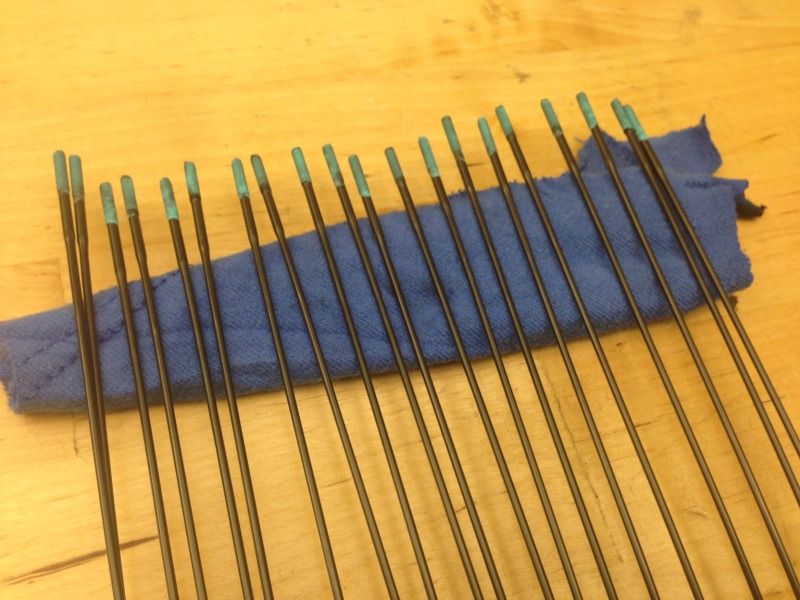
Once I had all the spokes ready I separated the ones for the front wheel build and began to prep them with a spoke-prep compound. The secret is not to use too much as it will make trueing more difficult and make the nipples hard to turn.
Next step was to apply some grease to the spoke holes in the rim where the nipple would sit. This was supposed to help them sit evenly and prevent any metal on metal friction. Trueing should be easier too as the tension gets higher.
Next I began to lace the front wheel. Radial lacing was pretty simple and just as with any lacing getting the key spoke right is the most important part. A little detail that adds an extra touch is lining up the logo on the hub so that it can be seen through the valve hole.
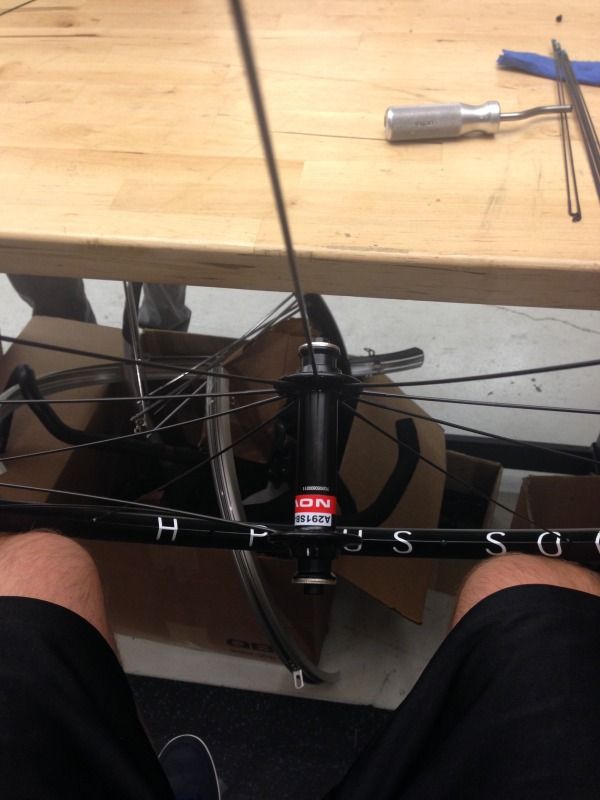
At this point the front wheel was laced but everything was still very loose. I had the nipples screwed on most of the way in so they are just showing one thread of the spoke. Beer helped with the repetitive nature of lacing
Once I finished the front wheel I moved on to the rear which was a 2x lacing on both sides. A tip that I was given was to use two different colors of spoke prep for DS and NDS spokes so you don't make a mistake of using the wrong spoke on wrong side.
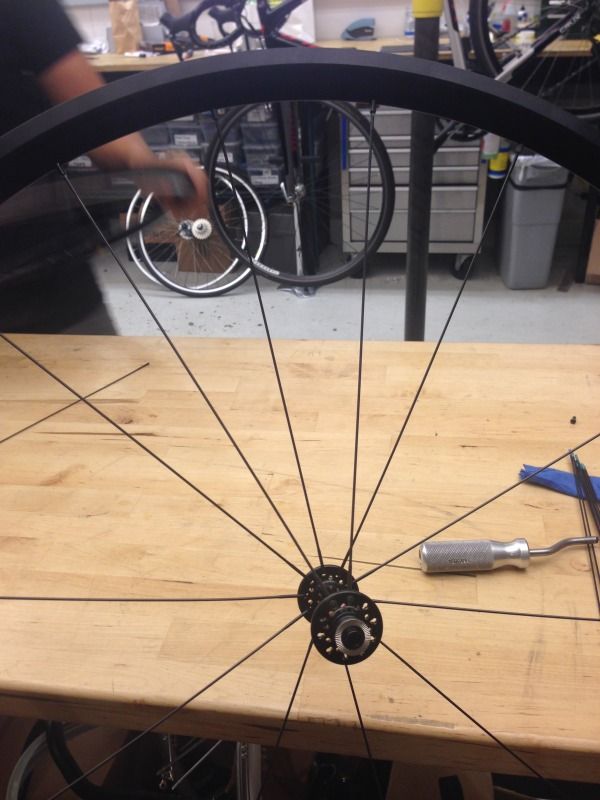
Rear wheel required more attention as the spokes braced at different angles, some spokes had to go in heads in and others heads out and making sure that the spokes cross correctly over and under. Here is a photo of the wheel coming together:
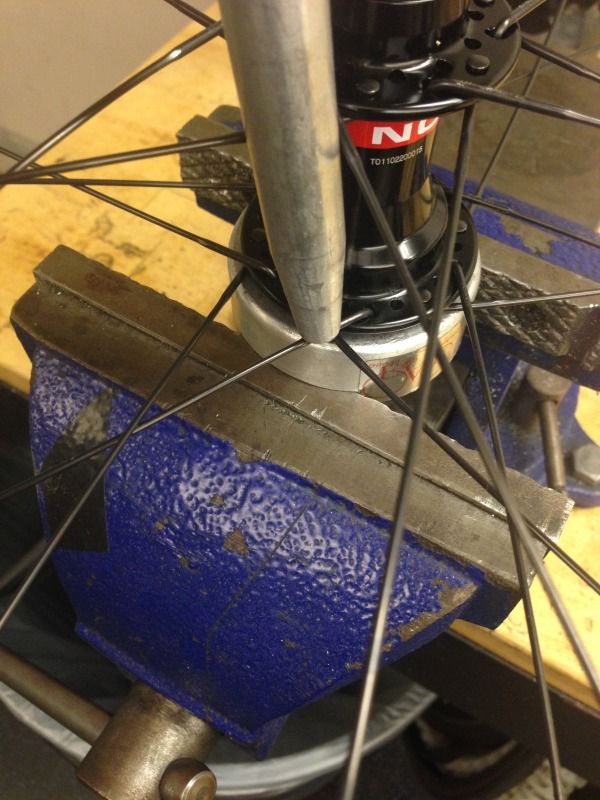
Once both wheels were laced I went ahead and tapped the spokes with a hammer and soft aluminium rod as shown below in order to seat the spokes at the heads. This process was repeated on both sides.
More to come...
This was a neat tool that cut the spokes to the correct lenght and then threaded them

Once I had all the spokes ready I separated the ones for the front wheel build and began to prep them with a spoke-prep compound. The secret is not to use too much as it will make trueing more difficult and make the nipples hard to turn.

Next step was to apply some grease to the spoke holes in the rim where the nipple would sit. This was supposed to help them sit evenly and prevent any metal on metal friction. Trueing should be easier too as the tension gets higher.
Next I began to lace the front wheel. Radial lacing was pretty simple and just as with any lacing getting the key spoke right is the most important part. A little detail that adds an extra touch is lining up the logo on the hub so that it can be seen through the valve hole.


At this point the front wheel was laced but everything was still very loose. I had the nipples screwed on most of the way in so they are just showing one thread of the spoke. Beer helped with the repetitive nature of lacing

Once I finished the front wheel I moved on to the rear which was a 2x lacing on both sides. A tip that I was given was to use two different colors of spoke prep for DS and NDS spokes so you don't make a mistake of using the wrong spoke on wrong side.
Rear wheel required more attention as the spokes braced at different angles, some spokes had to go in heads in and others heads out and making sure that the spokes cross correctly over and under. Here is a photo of the wheel coming together:

Once both wheels were laced I went ahead and tapped the spokes with a hammer and soft aluminium rod as shown below in order to seat the spokes at the heads. This process was repeated on both sides.

More to come...
-
Zen Cyclery
- Shop Owner
- Posts: 1244
- Joined: Tue Mar 10, 2009 5:27 am
- Location: McCall, ID
- Contact:
Looks like an awesome build plpete! The Great Lakes beer is almost as necessary as a spoke wrench  Let us know what you think of the build once you have a chance to ride them!
I actually pulled the instruction manual out of the little ziplock baggie that came with my spoke prep and read it. They recommend dipping it, then tapping the spoke against something hard to fling off the excess. Imagine how much you would waste doing it that way! I find it's easy to just dip one spoke in and get a little bit on it, then roll it against a second spoke's threads to evenly coat each thread with just enough of the compound.plpete wrote:Once I had all the spokes ready I separated the ones for the front wheel build and began to prep them with a spoke-prep compound. The secret is not to use too much as it will make trueing more difficult and make the nipples hard to turn.
That would be very wasteful for sure! What I did was while wearing gloves I would slightly dip the tip of my finger and roll the spoke threads on there. I was able to prep quite a few spokes that way and it looked like I used very little of the compound.
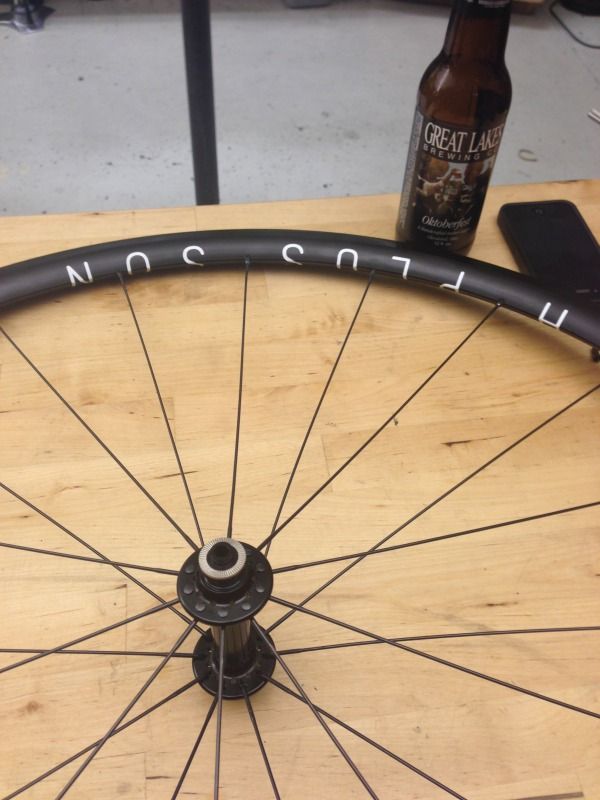
The front wheel is mostly finished and just needs some slight touchups to get the roundness, true and dish perfect. At this point it really takes micro adjustments. The set should come in at exactly 1500 grams.
The front wheel is mostly finished and just needs some slight touchups to get the roundness, true and dish perfect. At this point it really takes micro adjustments. The set should come in at exactly 1500 grams.
Visit starbike.com Online Retailer for HighEnd cycling components
Great Prices ✓ Broad Selection ✓ Worldwide Delivery ✓
www.starbike.com
To continue my wheel build adventure... read on (Part one is on previous page)
At this point i had bot wheels laced and it was time to start bringing them to tension and work on roundness, truing and dishing the wheel properly. Since the front was much easier I decided to tackle it first. With the wheel in the truing stand I went round and tightened all the nipples until I could see one thread showing. Next I started making small adjustments to make sure the wheel was perfectly round. Since all spokes did not have any significant tension I ended up tightening spokes to achieve a round wheel. Once that was done I went around and added a bit more tension since I still had ways to go in that department. Next step was to check the dish. Front wheel was quite easy as the rim sits right in the middle of the hub. Very little adjustment needed to be made in my case. To move the rim to the right you tighten the nipples for right side spokes and same goes for left. Once the wheel was round and dished properly I began to work on making the wheel true. It wasn't too far off but it did need some work. As i could feel the spokes gain more tension I used the deflection meter to see where I was.
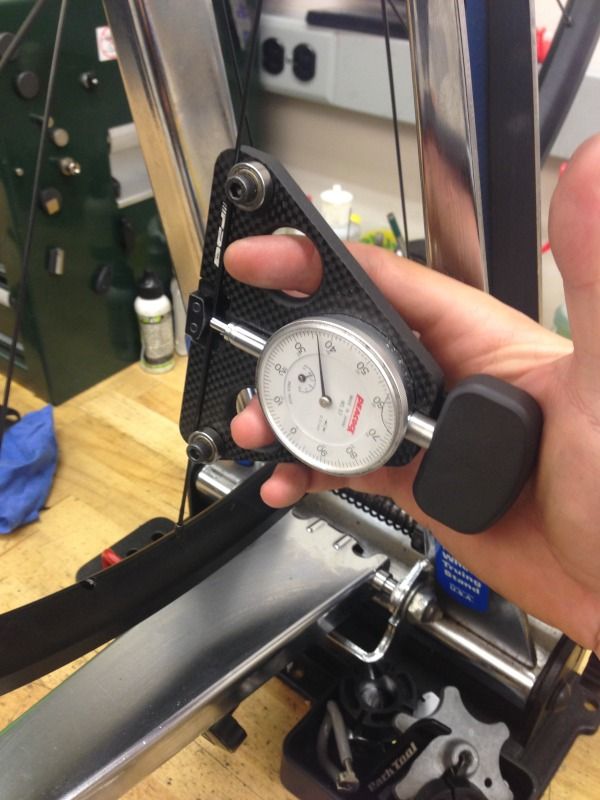
Once I had all the spokes at about 35 on the gauge I was pretty much there. From there on the front wheel just required very small adjustments to maintain the trueness. As the spokes began to gain tension I would stress relieve them by squeezing adjacent spokes together around the wheel. As there was more tension in the wheel I would also lay the wheel flat and with reasonable pressure I would press on the rim while the wheel rested on the hub. This process was done on both sides. I believe that the proper prep, as in greasing the spoke holes and spoke prep allowed the wheel to build without any major issues. The front wheel didn't experience any wind up in the Laser spokes in my case. One or two spokes maybe and only because there was a bit too much spoke prep on the threads. Front wheel done!
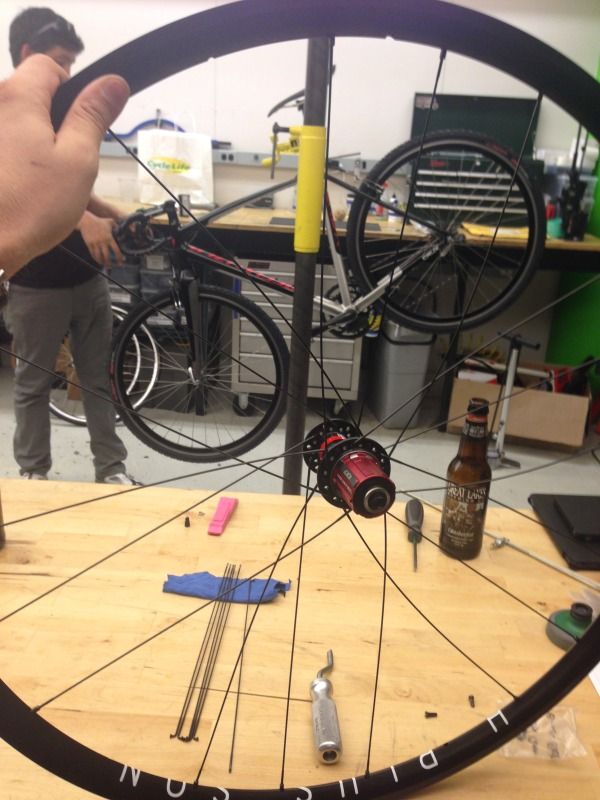
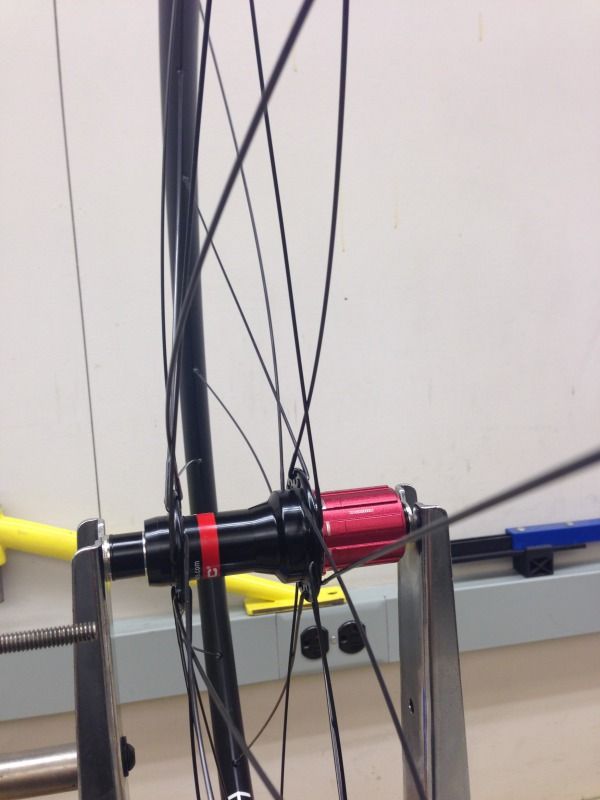
Rear wheel was next. As you can see in the photo, it is fully de-tensioned and all the spokes were quite loose.
In my research for this build I came across the Wheel Fanatyk blog and to my surprise, my mechanic pointed out an entry that described a technique of building the wheel from right to left. This is the blog:
http://wheelfanatyk.blogspot.com/2009/0 ... -rear.html
It sounded like it made sense and that is what I followed. Work on roundness with only drive side spokes and bring them close to proper tension and then true the wheel with non-drive side spokes and bring them closer to tension. The technique worked quite well but somewhere along the way my dish was very out of wack and proved to be the more difficult part of the build. I ended up having too much tension on the NDS which caused the rim to be off true center. I corrected this by loosening the NDS and maintaining the proper tension on the DS. Kind of glad I made this mistake as it was nothing serious and a good learning experience. I ended up learning the the DS is supposed to have most of the tension while NDS falls into place and maintains proper dish. The trusty deflection meter was very useful once again!
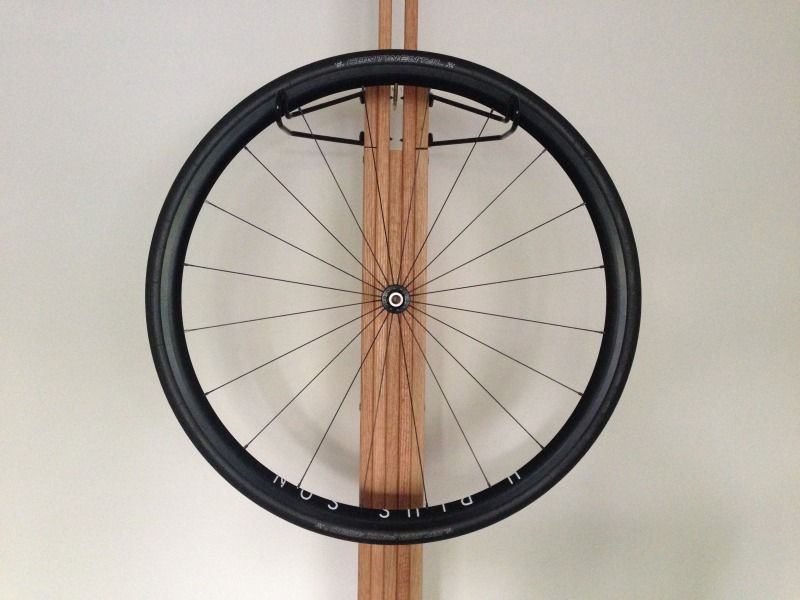
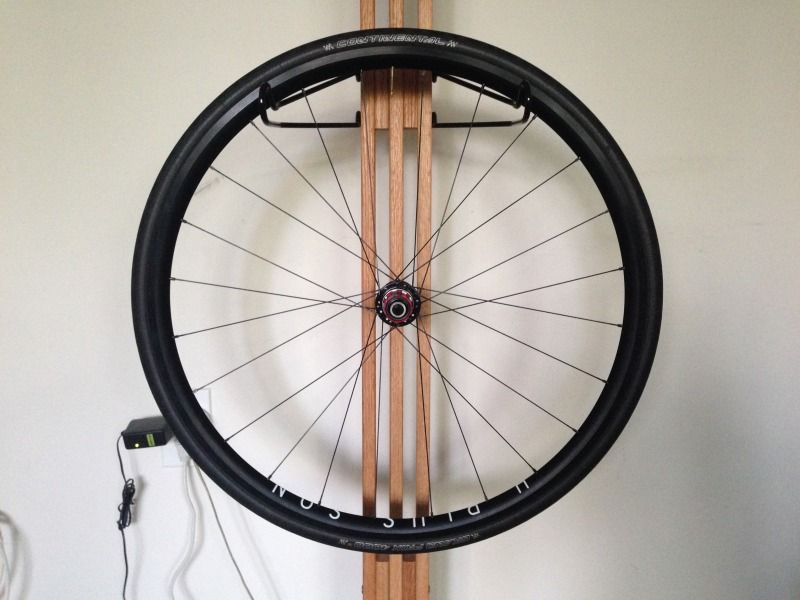
The wheel set without skewers or rim tape came in right at 1500 grams with which I was very happy. I used the trust velox rim tape and threw on an older set of Conti GP4000s tires that I am using for commuting.
Here is the finished product:
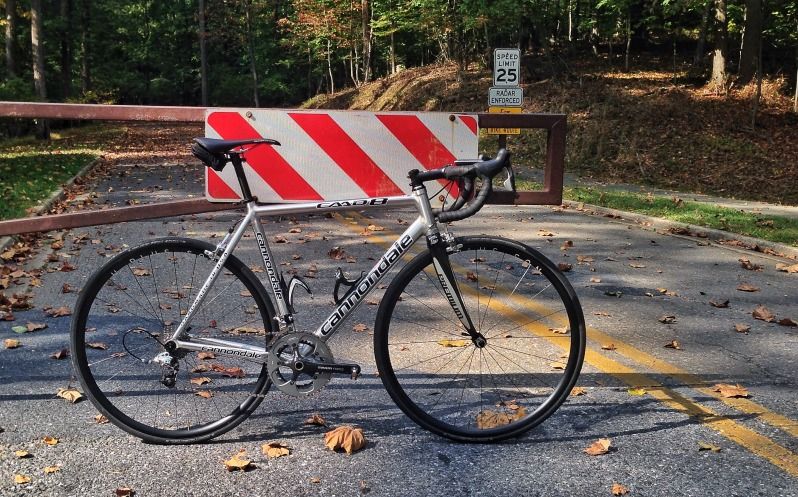
Yesterday I took the wheels out on a longer than expected ride to see how the perform and to see if any issues arise. I ended up riding a bit over 60 miles. Did a bit of flat, fast descents and some punchy steep climbs where I would get out of saddle. In all scenarios the wheels performed great. They were quiet. I couldn't hear the rear hub very well. Super quiet. No pinging came from spokes either. Wheels felt very solid and hugs were smooth as buttah! They may not accelerate and hop forward on steep punchy climbs as my DA C24 wheels but they were no slouch! I was quite pleasantly surprised with overall performance. Another thing that made me quite happy was how comfortable the wheels rode. They extra width and what ever else there was made them a pleasure to ride. They will mostly live on my CAAD8 which is quite a stiff bike and can be harsh riding with the wrong wheels. I rode 60+ miles with the new wheel set and did not feel beat up at all! Something I would not want to do with my old Neuvation wheels which made the CAAD8 a bone shaker. Overall I'm very happy with the end product and learning experience. I plan to ride them for about a week or so and then throw them back in the truing stand to check things over. To end this post, here is a shot of the CAAD8 with the new wheels. I think it looks great and it got a few compliments on the first ride
At this point i had bot wheels laced and it was time to start bringing them to tension and work on roundness, truing and dishing the wheel properly. Since the front was much easier I decided to tackle it first. With the wheel in the truing stand I went round and tightened all the nipples until I could see one thread showing. Next I started making small adjustments to make sure the wheel was perfectly round. Since all spokes did not have any significant tension I ended up tightening spokes to achieve a round wheel. Once that was done I went around and added a bit more tension since I still had ways to go in that department. Next step was to check the dish. Front wheel was quite easy as the rim sits right in the middle of the hub. Very little adjustment needed to be made in my case. To move the rim to the right you tighten the nipples for right side spokes and same goes for left. Once the wheel was round and dished properly I began to work on making the wheel true. It wasn't too far off but it did need some work. As i could feel the spokes gain more tension I used the deflection meter to see where I was.

Once I had all the spokes at about 35 on the gauge I was pretty much there. From there on the front wheel just required very small adjustments to maintain the trueness. As the spokes began to gain tension I would stress relieve them by squeezing adjacent spokes together around the wheel. As there was more tension in the wheel I would also lay the wheel flat and with reasonable pressure I would press on the rim while the wheel rested on the hub. This process was done on both sides. I believe that the proper prep, as in greasing the spoke holes and spoke prep allowed the wheel to build without any major issues. The front wheel didn't experience any wind up in the Laser spokes in my case. One or two spokes maybe and only because there was a bit too much spoke prep on the threads. Front wheel done!
Rear wheel was next. As you can see in the photo, it is fully de-tensioned and all the spokes were quite loose.

In my research for this build I came across the Wheel Fanatyk blog and to my surprise, my mechanic pointed out an entry that described a technique of building the wheel from right to left. This is the blog:
http://wheelfanatyk.blogspot.com/2009/0 ... -rear.html
It sounded like it made sense and that is what I followed. Work on roundness with only drive side spokes and bring them close to proper tension and then true the wheel with non-drive side spokes and bring them closer to tension. The technique worked quite well but somewhere along the way my dish was very out of wack and proved to be the more difficult part of the build. I ended up having too much tension on the NDS which caused the rim to be off true center. I corrected this by loosening the NDS and maintaining the proper tension on the DS. Kind of glad I made this mistake as it was nothing serious and a good learning experience. I ended up learning the the DS is supposed to have most of the tension while NDS falls into place and maintains proper dish. The trusty deflection meter was very useful once again!
The wheel set without skewers or rim tape came in right at 1500 grams with which I was very happy. I used the trust velox rim tape and threw on an older set of Conti GP4000s tires that I am using for commuting.
Here is the finished product:


Yesterday I took the wheels out on a longer than expected ride to see how the perform and to see if any issues arise. I ended up riding a bit over 60 miles. Did a bit of flat, fast descents and some punchy steep climbs where I would get out of saddle. In all scenarios the wheels performed great. They were quiet. I couldn't hear the rear hub very well. Super quiet. No pinging came from spokes either. Wheels felt very solid and hugs were smooth as buttah! They may not accelerate and hop forward on steep punchy climbs as my DA C24 wheels but they were no slouch! I was quite pleasantly surprised with overall performance. Another thing that made me quite happy was how comfortable the wheels rode. They extra width and what ever else there was made them a pleasure to ride. They will mostly live on my CAAD8 which is quite a stiff bike and can be harsh riding with the wrong wheels. I rode 60+ miles with the new wheel set and did not feel beat up at all! Something I would not want to do with my old Neuvation wheels which made the CAAD8 a bone shaker. Overall I'm very happy with the end product and learning experience. I plan to ride them for about a week or so and then throw them back in the truing stand to check things over. To end this post, here is a shot of the CAAD8 with the new wheels. I think it looks great and it got a few compliments on the first ride


