


I links pics. Regular and Mini. [Test report on page 3]
Moderator: robbosmans
-
synchronicity

- Posts: 2027
- Joined: Sun Sep 17, 2006 11:41 pm
- Location: Moruya, Australia
- Contact:


Visit starbike.com Online Retailer for HighEnd cycling components
Great Prices ✓ Broad Selection ✓ Worldwide Delivery ✓
www.starbike.com

synchronicity wrote:Don't ask me how I know.
- Michael
"People should stop expecting normal from me... seriously, we all know it's never going to happen"
"People should stop expecting normal from me... seriously, we all know it's never going to happen"
I had a nightmare installing these this weekend. After 2 days the result was I-links everywhere but the rear derailleur loop, and liners trimmed just after the first frame stop. No matter what I did I could not get the right tension. I thought the liner might have been too long, so I first trimmed it just to stick on about 2mm past the end of the barrel adjuster at the rear der. I tried taking the slack up by turning the adjuster a full turn after setting the cable, which usually works (2010 Force), but even this time there was still a ton of slack that appeared to be coming from where it bent on the bb cable routing guide. Worrying about compressing the liner kept me from manually tugging the slack out a bit. I have the Yokozuna rear loop on for now and will be trying to get a new set of cables for them soon, but can anyone provide details on how they took the slack out when using them with Sram?
The brakes went fine and were super easy, but I would like to add the rear loop on for uniformity's sake and then put in the new cables and liners eventually. As of now my sanity is completely vanished and I would not bother with these again. I've cabled several bikes with everything from regular Shimano cables, to Gore sealed cables and everything in between so I didn't find the process difficult until it came down to taking the slack out.
The brakes went fine and were super easy, but I would like to add the rear loop on for uniformity's sake and then put in the new cables and liners eventually. As of now my sanity is completely vanished and I would not bother with these again. I've cabled several bikes with everything from regular Shimano cables, to Gore sealed cables and everything in between so I didn't find the process difficult until it came down to taking the slack out.
-
Frankie - B

- Admin - In the industry
- Posts: 6573
- Joined: Mon Jun 02, 2003 8:17 am
- Location: Drenthe, Holland
Email sent to Kwalker. If it turns out to help him I need to alter it into a good guide for setting bikes up with I links.
If you want to see 'meh' content of me and my bike you can follow my life in pictures here!'Tape was made to wrap your GF's gifts, NOT hold a freakin tire on.'
-
gumgardner
- Posts: 3496
- Joined: Sat Jan 06, 2007 9:47 pm
- Location: Pittsburgh
Frankie - B wrote:Email sent to Kwalker. If it turns out to help him I need to alter it into a good guide for setting bikes up with I links.
Frankie-B...A guide to set these up would be really helpful. They seem like a pain for some and easy for others.
Anyone know where I can get replacement cables and liners? I've contacted Alligator directly but the response time is slow.
I will heed to the provided advice on the new install and attribute it to a cable tensioning issue.
I will heed to the provided advice on the new install and attribute it to a cable tensioning issue.
-
gumgardner
- Posts: 3496
- Joined: Sat Jan 06, 2007 9:47 pm
- Location: Pittsburgh
Bikey wrote:A table of cable housing weights that I found while researching this:
BRAKE:
Tune "plastic"5mm: 18g/m
Tune "plastic" 6mm : 21.5g/m
Alligator i-Links: 27g/m
Tune "Aluminum" : 37g/m
Nokon (Aluminium outer+Liner): 38,1g/m
Powercordz: 45g/m
Jagwire: 50g/m
Shimano: 53.0g/m
Gore Ride-on: 54g/m
Gore: 57g/m
Shimano XTR : 58.5g/m
SHIFT:
Gleitec U3 : 12.5g/m (not available anymore)
Alligator Mini i-Links(outer Aluminium+Liner): 15,5g/m
Tune "plastic": 18/m
Shimano SP81 Yumeya: 23g/m
Gore Ride-on light (without inner Liner!): 23g/m
Alligator i-Links (outer Aluminium+Liner): 27g/m
Jagwire: 32.0g/m
Shimano SIS : 34.0g/m
Nokon Carbon (Carbon outer+Liner): 35,1g/m
Transfil "flying snake": 36g/m
Nokon (Aluminium outer+Liner): 38,1g/m
Powercordz: 39g/m
Gore Ride-on: 54g/m
Does anyone know the g/m for the Yokozuna?
How do the two compare?

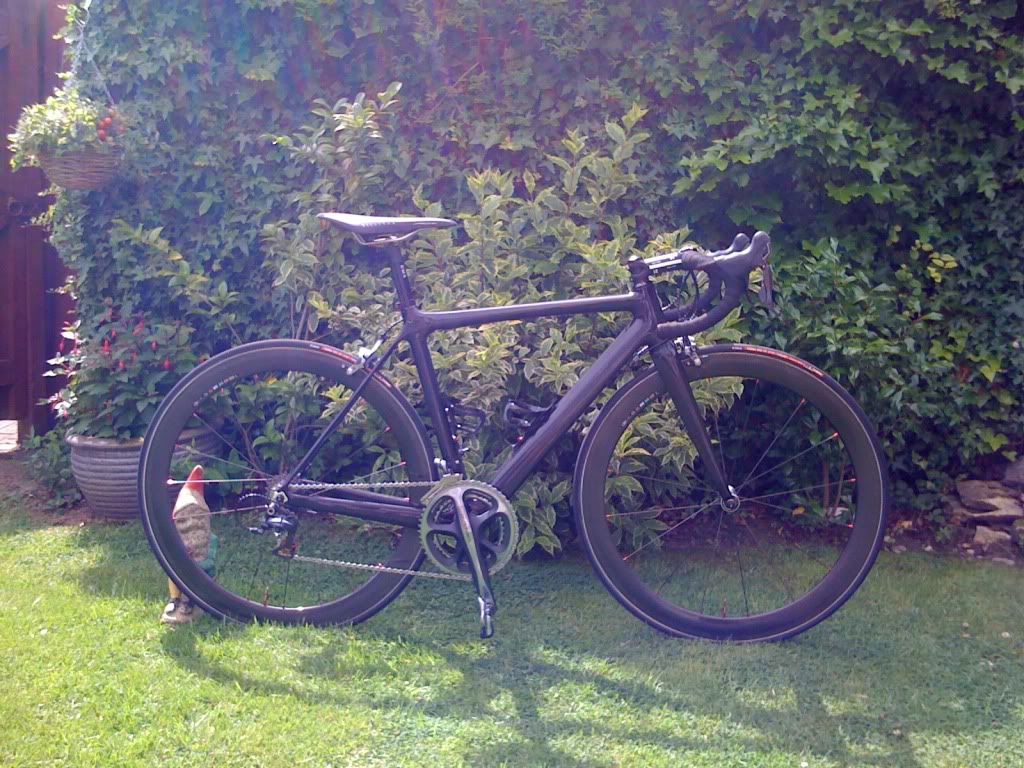
Just thought I'd chime in with a few pics of a recent iLink build I did.
Coming off DA 7900 stock cables, braking and shifting feel butter smooth, and worlds apart from DA.
Installation for me was relatively simple, although extremely time consuming, what with all the trial and error of threading the teflon liners, getting the right lengths and adjusting the links themselves etc... It took me a good 3 hours to get the job finished. For what it's worth, I discarded the provided instructions after about 10 minutes. The process is pretty self-explanatory, but Alligator seem to have made it sound a whole lot more complicated that it actually is!!!
Note in the 3rd from last picture the tension of the inner cable keeping the iLinks tought and away from the frame. This is one feature I love. Gone are those annoying rattles from the cables vibrating against each other/the frame.
Also note in the last picture the length of the teflon liners. I purposely ran mine 1 inch through/outside of the barrel adjusters. My logic behind this was that the inside diameter of the barrel adjuster was almost perfectly matched up with the outside diameter of the teflon liner, meaning that when pulled through, there was enough friction between the two to keep the liner firmly in place and to stop it slipping back through. I also did the same on the other side, as well as on the rear derailleur.
I opted to leave off the orange frame protectors. Well, in all honesty I forgot! In hindsight though they wouldn't have looked right on the bike, so they're in the toolbox keeping the leftover ferrules and iLinks company (PM me if you want them?)
Anyway, onto the pics:
Coming off DA 7900 stock cables, braking and shifting feel butter smooth, and worlds apart from DA.
Installation for me was relatively simple, although extremely time consuming, what with all the trial and error of threading the teflon liners, getting the right lengths and adjusting the links themselves etc... It took me a good 3 hours to get the job finished. For what it's worth, I discarded the provided instructions after about 10 minutes. The process is pretty self-explanatory, but Alligator seem to have made it sound a whole lot more complicated that it actually is!!!
Note in the 3rd from last picture the tension of the inner cable keeping the iLinks tought and away from the frame. This is one feature I love. Gone are those annoying rattles from the cables vibrating against each other/the frame.
Also note in the last picture the length of the teflon liners. I purposely ran mine 1 inch through/outside of the barrel adjusters. My logic behind this was that the inside diameter of the barrel adjuster was almost perfectly matched up with the outside diameter of the teflon liner, meaning that when pulled through, there was enough friction between the two to keep the liner firmly in place and to stop it slipping back through. I also did the same on the other side, as well as on the rear derailleur.
I opted to leave off the orange frame protectors. Well, in all honesty I forgot! In hindsight though they wouldn't have looked right on the bike, so they're in the toolbox keeping the leftover ferrules and iLinks company
Anyway, onto the pics:
KWalker wrote:Anyone know where I can get replacement cables and liners? I've contacted Alligator directly but the response time is slow.
I will heed to the provided advice on the new install and attribute it to a cable tensioning issue.
clee cycles in the uk do -> http://clee-cycles.co.uk/cc/catalog/
On my build I used the liners for the full length of the cable run.
I have used I-links on my DuraAce bike and loved the low weight and the way they performed. When I tried converting the brake cable housing on my Campy 11 setup, I ran into problems. The fattest part of the I-links just will not go past the entrance to the lever body and seat properly. It seems like I might be able to force it really hard to get it in, but I am worried I will never be able to get it back out if I do this. This makes some sense when I saw Frankie measured the outer diameter of the regular I-links at 5.44. The stock Campy housing is only 5.0.
I have searched this and other threads to find a solution to my problem, but can't quite find the information I needed. I did see that bikewithnoname mentioned "on my campag set up I used one of the shorter end peices to go into the shifter (not the lever peice with the alligator logo on it)". Was this for Campy 11 speed? I thought I tried this and the other connectors didn't fit either. Maybe I am just remembering the larger piece with the logo on it.
Any ideas/solutions? Thanks.
Okay, I managed to work a solution out. I didn't want to use a small piece of regular Campy cable housing as an adaptor for the lever body since it is very hard to cut the ends perfectly flush and it isn't compressionless. Fortunately, I had some Nokon housing that I wasn't using. I threaded a "flat" piece followed by three of the "normal" Nokon links onto the I-link inner liner. Then I just threaded the the I-links on, "pointy" end first, after that. Only the very tip of the first I-link piece goes into the lever body and everything seems to sit nice and flush.
I guess this only works if you have some old Nokons laying around, but I hope someone finds it useful.
I guess this only works if you have some old Nokons laying around, but I hope someone finds it useful.
-
prendrefeu

- Posts: 8580
- Joined: Wed Oct 31, 2007 10:32 pm
- Location: Glendale / Los Angeles, California
- Contact:
Frankie-B, that tutorial you mentioned would be really great if you can post it.
Exp001 || Other projects in the works.
I might have to re-read this whole thread but I did not have any trouble installing my I-link mini and regulars and not sure why people are. I will try to go back to the beginning to see if I can help.
BIG DADDY B FLOW
AERO & LIGHT is RIGHT for 2 decades
AERO & LIGHT is RIGHT for 2 decades
For me it was getting the tension right with them since the liners were rather slack. The stock cables aren't too great either- I plan on running Jagwire in my liners. Also, I haven't seen anyone post that they installed them with Sram, which to me can be finnicky. People often over-tension the cables which makes the down shift action very hard. I've found that there is a blend of slack and tension that gives you a very light, smooth shift.
Visit starbike.com Online Retailer for HighEnd cycling components
Great Prices ✓ Broad Selection ✓ Worldwide Delivery ✓
www.starbike.com


