

I can say the only issue I have with my Campagnolo SR crank is the play the bearings have in BB cups. The cups are slightly too big and it will make a clicking noise. I too have thought about some type of Locktite, but I'm afraid of the future disassembly.
Maybe the 3M 53926 Chafe tape is the answer.
Campagnolo UT crankset lateral movement?
Moderator: robbosmans


Visit starbike.com Online Retailer for HighEnd cycling components
Great Prices ✓ Broad Selection ✓ Worldwide Delivery ✓
www.starbike.com
Calnago wrote:I guess I'll just say that you never answered a single one of my questions, the most important being whether you actually sent the crank to Campy so they could have a look at it. Glad it's working for you now. Let's hope it stays that way.
Apologies, I'll take the time to answer your questions:
Thickness of the precision ground SS washer:
1.727mm leaving an axial play in the torqued assy of 0.025mm
Wavy washer:
Was removed, why? Industry standard is to preload deep grove ball bearings radially with correct fitment dimensions. We don't pre-load axially, as it increases friction and reduces bearing life. The reason there are international bearing fitment standards ANSI and ISO is so you can machine or ground shafts and housings to proper fitment dimensions to radially preload, correctly removing radial clearance play in the bearing without stressing it. It also means that when you replace bearings supplied from any quality manufacturer with a bearing part number, you know it will work reliably in your particular assembly, provided your design followed proper best practices.
Pulling the bearings:
I used a Park puller and no it is not possible to pull both the inner and outer race simultaneously. The bearing fit to shaft was not an interference fit, meaning they came off with less axial load than what they will be subjected to in the assembly under working conditions. We know how to inspect bearings. These are CULT referred to as ceramic, meaning the balls are nitrided and run in hard stainless steel races. After 16,000km these bearings show no wear, no issues here.
Relocating the bearing and jeopardizing the hirth joint.
The shaft machined section where the bearing inner mates with the shaft is wide enough to accommodate more than 2mm moving the bearing away from the crank. Jeopardizing the hirth joint? Sigh..... Lets not get into the lateral fixing or pressure force produced by torquing a bolt beyond 40NM. While we can calculate that, let us not waste time as we know it is enough to destroy both cups in the event of placing the two shaft bearings too close together.
Drastic measures to try and "fix" things.
This setup is not really fixable. It is workable by Jury rigging. The reason Campy gets away with this is because it survives a low RPM below 200 with only a few hundred watts applied to it. Any heavier automotive or industrial application, this type of work will self destruct within a few hours. If you look at the poll, the bicycling industry gets away with quite a bit based on the percentage of problems. Was this automotive, it would have been a recall.
Sending crank back to Campy
My attempts to work with Campy were not successful, details in previous posts.
Finally, we can look at this thing two ways:
1.) Campy has a perfect system both in its design and execution. Some consumers report perfect satisfaction with no issues. The fact that there are problems posted all over the internet is simply explained as consumers who are mechanically incompetent.
2.) We can be realistic and accept that if it walks like a lemon and it tastes like a lemon, it is a lemon.
You be the judge of that.
Last edited by Willem on Wed Aug 17, 2016 5:40 pm, edited 2 times in total.
While I bet I'm not close to the biggest campy fan around here, I do think historically it's far better than the other options...and its what I currently use and would recommend.
That said there are issues with UT, (OT) there is no way that press fit cantilever cups is a good design. Yes you might be able to get it to "work" with threaded cups but one you have to design with a wave washer you are asking for issues.
Those defending the design I ask this question, if it was so great why has Campy released two newer different designs? PT and OT. I think Campy knows it not great and don't have anything better to replace it with.. I bet there was a massive internal debate about replacing it with OT but they didn't want the CULT bearings available to other bb30 cranks.
It kills me to say this, I just don't think Campy has the resources (money and people) to compete. Yes the other companies have issues but they both are innovating and I think Campy is just trying to keep up...

Willem wrote:Calnago wrote:I guess I'll just say that you never answered a single one of my questions, the most important being whether you actually sent the crank to Campy so they could have a look at it. Glad it's working for you now. Let's hope it stays that way.
Apologies, I'll take the time to answer your questions:
Thickness of the precision ground SS washer:
1.727mm leaving an axial play in the torqued assy of 0.025mm
Wavy washer:
Was removed, why? Industry standard is to preload deep grove ball bearings radially with correct fitment dimensions. We don't pre-load axially, as it increases friction and reduces bearing life. The reason there are international bearing fitment standards ANSI and ISO is so you can machine or ground shafts and housings to proper fitment dimensions to radially preload, correctly removing radial clearance play in the bearing without stressing it. It also means that when you replace bearings supplied from any quality manufacturer with a bearing part number, you know it will work reliably in your particular assembly, provided your design followed proper best practices.
Pulling the bearings:
I used a Park puller and no it is not possible to pull both the inner and outer race simultaneously. The bearing fit to shaft was not an interference fit, meaning they came off with less radial load than what they will be subjected to in the assembly under working conditions. We know how to inspect bearings. These are CULT referred to as ceramic, meaning the balls are nitrided and run in hard stainless steel races. After 16,000km these bearings show no wear, no issues here.
Relocating the bearing and jeopardizing the hirth joint.
The shaft machined section where the bearing inner mates with the shaft is wide enough to accommodate more than 2mm. Jeopardizing the hirth joint? Sigh. Lets not get into the lateral fixing or pressure force produced by torquing a bolt beyond 40NM. While we can calculate that, let us not waste time as we know it is enough to destroy both cups in the event of placing the two shaft bearings too close together.
Drastic measures to try and "fix" things.
This setup is not really fixable. It is workable by Jury rigging. The reason Campy gets away with this is because it survives a low RPM below 200 with only a few hundred watts applied to it. Any heavier automotive or industrial application, this type of work will self destruct within a few hours. If you look at the poll, the bicycling industry gets away with quite a bit based on the percentage of problems. Was this automotive, it would have been a recall.
Sending crank back to Campy
My attempts to work with Campy were not successful, details in previous posts.
Finally, we can look at this thing two ways:
1.) Campy has a perfect system both in its design and execution. Some consumers report perfect satisfaction with no issues. The fact that there are problems posted all over the internet is simply explained as consumers who are mechanically incompetent.
2.) We can be realistic and accept that if it walks like a lemon and it tastes like a lemon, it is a lemon.
You be the judge of that.
@Willem: Apologies as well if I came off as criticizing your efforts earlier.
I know exactly what you are trying to do. It is the same as the "Rogue Mechanic's" efforts to do away with the wavy washer and remove any sideplay from the system. Your approaches differ in what I think could be a very important way, but I suspect you might know better than I on that point. For instance, where the Rogue Mechanic incrementally takes out play via trial and error using shims of varying thickness till he gets it "just right", he places the spacers between the bearing and the cup, same place that the wavy washer is. Your approach as far as I can tell, is trying to calculate all in one full Hail Mary pass, the exact thickness needed in one washer, then placing it between the crank and the bearing (what did you do about the seal lip by the way, wasn't that interfering with things), essentially relocating the bearing on the non-drive side shaft inward from where it was. So it is not that I would be worried about the two shafts being "too close to each other " as you put it, but rather being too far from each other, since the cups against the bearings would now be the limiting factor of how close they can actually get, not the torque you apply. In any case, I think if I were to go this route, I'd be more comfortable using the Rogue Mechanics method versus your method.
And you're correct in that the Park Puller does not grab the inner race of the bearings at all, but there are only two prongs which I kind of cringe at when removing interference fit bearings that you plan to reuse. I have a puller which fully circles the entire outer race and pulls extremely evenly, and while it doesn't grab the inner race either I feel much better about removing bearings with it than the Park puller if I want to reuse them. Same for pressing them back on... a different proper tool to do it evenly and consistently all the way round.
So, you must have also measured the exact width of the BB shell, correct? And I'm presuming you took into account it's variation from the nominal width of 86.5mm in your calcs? Bascially, you're taking up the 0.8mm tolerance that Campy allows, plus the thickness of the wavy washer fully compressed, plus/minus the difference in actual bb shell width from nominal. And you say you've given yourself 0.025mm to spare when fully torqued.
Ok, then... well good for you if it all works to your satisfaction. But keep in mind that you are dealing with one very specific situation, yours. These things have to work on all frames, not just yours, and the tolerances vary. If only we could get frame manufacturers to produce to such fine tolerances then all would be right with the world. But that's a ship that has long sailed I'm afraid.
I have pondered this issue way too much as well in the past, thinking the wavy washer system is not as good as a fixed mechanical type preload such as in the Shimano cranks or even the Campy Overtorque system. But there are tradeoffs... I kind of like the cranks themselves being fixed permanently to each half of the spindle, mated with the hirth joint in the middle. It's a very simple system to install, and provided the frame is properly prepped to spec and faced, then all is good. And it works.
And you know what, while in theory taking all the lateral play out might be nice (save for thermal expansion etc which may apply in other applications), it is after all, as you point out... a bicycle, where loads are only a few hundred watts and rpms are never over 200. In other words, there comes a point where theory and practice my differ slightly, depending on the application, and that's ok. I've accepted this difference long ago, simply because it works, and I have never seen a problem here that I couldn't remedy. It sounds that you may have had less than an interference fit between your bearings and the Ultratorque shaft from what you describe, and of course anything is possible during manufacture. But all you said about sending it back to Campy for inspection was that your dealings with them were unsatisfactory. While I totally understand how frustrating it can be to have to send in a major necessary part of your bicycle for them to inspect, especially if you don't have another to ride in the meantime, how else are they supposed to see what might be wrong. So, I'm kind of just presuming the answer to my question as to whether you sent it to them, was No. What can ya do. You seemed to have solved it, for your crank, on that specific bike. Great. I wouldn't want to use that crank on any other bike at this point, however. Cranksets out of the box need to work on all the frames they are designed for, and to that end I believe it does that. The drive side clip limits the lateral movement to what Campy has decided is acceptable I suppose, and in the vast majority of cases (100% that I've encountered) it works.
The other thing you never mentioned (or I missed) was what was used, if anything, in between the pressed in adaptor cups and the Colnago Threadfit cups? I hope not grease, since that facilitates movement which in turn... well... you know. So might it be a possibility that there is slight movement between the adaptor cups and the Colnago Threadfit cups. Just a thought.
And then there is the completely obvious, but simple, things that are commonly overlooked because someone has read something on the internet and jumped to the conclusion that the mysterious creak must be coming from the bottom bracket. So, just to cover the bases... I'm going to assume you've checked everything else, and I do mean everything... like pedals, chainring bolts, rear derailleur hanger, cassette lockring... the list goes on. But you get the drift I'm sure.
So best wishes for a continued noise free bottom bracket.
Colnago C64 - The Naked Build; Colnago C60 - PR99; Trek Koppenberg - Where Emonda and Domane Meet;
Unlinked Builds (searchable): Colnago C59 - 5 Years Later; Trek Emonda SL Campagnolo SR; Special Colnago EPQ
Unlinked Builds (searchable): Colnago C59 - 5 Years Later; Trek Emonda SL Campagnolo SR; Special Colnago EPQ
Calnago, no worries and thanks for the reply. I agree with what you said above.
As far as I know, the Rogue mechanic shimmed on thread-in BB cups, between the actual cup rim and the frame. I may be wrong, but I did not see something related to PF systems? The problem with shimming between the bearing and the cup where the wave washer sits is that I could not find a Stainless steel washer with the right OD and ID, which would have meant extra shop time in making one. Also, there is movement and no inner support in that location which stopped me from using extra shop time.
I build all my own bikes and service them, as well as service my own motorcycles which are the latest Superbike technology. I am not comfortable riding stuff that someone else fiddled with. Unfortunately that produces a problem when dealing with a vendor such as Campy, as they get into warranty issues if one does not use their "professional trained techs" So in short, I have a buddy who has a bike shop and between his Campy supplier, him and I we have just gone around in circles. My buddy is the "professional trained tech" as far as Campy is concerned and we made little progress there. So, no. The crank was not sent back. BTW, he replaces BB bearings on Trek like you won't believe. Good business.
My frame came in from the UK, I am in the US in North Carolina and the supplier pressed in the cups using Lithium grease, in the belief that Ernesto's threadfit 82.5 fixes the creaking issue. I will look at this when I get to ever replacing the cups.
As for now, everything is quiet though, so I believe that is not an issue for now. Perhaps it develops later?
I work in a group where we do failure analysis and Reliability Engineering for large industry. Some of the equipment we contract on have individual machines costing more than $20 million, so I see this stuff every day. We detect the start of bearing degradation with vibration monitoring and long before failure, the frequency analysis will tell us if it is bearing wear, or a fitment issue. Any audible noise in a bike BB means there is fretting which is a fitment issue. Unfortunately IMHO the bike BB trend has gone downhill big time.
Where I believe in my case Campy failed is the bearing fit dimensions, both in the cups and on the shaft. This needed a bit more attention. This is hard to solve though if no one can obtain their manufacturing dimensions with tolerances. This could be general or it could be only my early 2015 production. Where I question their design is locating the drive end bearing in place with a spring clip, which is a thin wire, the latter flexing under load, producing lateral movement. If the drive end bearing was firmly fixed, allowing the non drive to float and the clearances were a bit tighter, we would have been in good shape.
Yes, the Rogue Mechanics's method is quite easy to do, although very tedious, because of the threaded BB cups which can be easily removed and add or subtract shims as necessary. With pressfit systems, this is much harder to do as you've noted.
The clip on the drive side is not to "locate" the bearings or even hold them in place (that's the job of the wavy washer on the other side). The clip's job is to prevent excessive lateral movement (I think that amout is limited to 0.25mm). In your world this may be a lot, and I agree it would seem like a lot to me too when perfection would imply zero lateral movement. But I have come to grips with it simply because it seems to work very well. The clip does not actually touch the drive side bearing when torqued down and ideally would never touch it during regular use, but it does limit lateral movement to a specified amount should it move for whatever reason.
Ok, re Colnago's Threadfit system... I do believe it's the best solution thus far to the shitshow of BB intolerances that have been foisted upon us since departing from a simple threaded BB shell. However, it is Colnago's solution to make the best of a bad situation. But whatever system you use, you still have to press in the appropriate adaptor cups into the Threadfit cups. And like any pressfit system, you want to completely eliminate movement between those two interfaces, hence the use of Loctite 609 or equivalent and appropriate primer where necessary. I just want to bang my head againt a wall, or better yet, the mechanics' heads who insist on using grease there. It both facilitates movement where there shouldn't be any, and it also masks any annoying creaking giving you a false sense that everything is ok, until it isnt' again.
I am building my first C60 at the moment, and have checked the tolerances very closely. And they are good, so good in fact, that I suspect maybe even a dry installation of the pressfit cups could work. But on this build, and to test things out, I will be using Morgan Blue's Aquaproof Paste for this application. If I get a hint of creaking, the entire thing will be removed and I will reinstall using Loctite 609 and primer. But I'm more apt to experiment with things on my own bikes than others. I have high hopes for the Colnago system at this point, and will discuss further in my build thread when I create it.
I'll keep my fingers crossed your fix works for you, but tell me, didn't that lip for the weather seal interfere with a solid fitment of the washer you inserted there? I would have though it might. And I still don't like that if that washer is the tiniest bit too thick, then the solid interface at the hirth joint might still be jeapordized a bit, no? And if it's the tiniest bit too thin, then then torqueing to spec is only going to put excessive preload on the bearings. All things considered, I think the wavy washer method is the safest and most foolproof way to go here, while still getting the job done for the intended application.
Colnago C64 - The Naked Build; Colnago C60 - PR99; Trek Koppenberg - Where Emonda and Domane Meet;
Unlinked Builds (searchable): Colnago C59 - 5 Years Later; Trek Emonda SL Campagnolo SR; Special Colnago EPQ
Unlinked Builds (searchable): Colnago C59 - 5 Years Later; Trek Emonda SL Campagnolo SR; Special Colnago EPQ
-
HammerTime2

- Posts: 5814
- Joined: Thu May 04, 2006 4:43 pm
- Location: Wherever there's a mountain beckoning to be climbed
Ha ha, you guys should write a book. It might eclipse War and Peace in length.
Calnago wrote:Yes, the Rogue Mechanics's method is quite easy to do, although very tedious, because of the threaded BB cups which can be easily removed and add or subtract shims as necessary. With pressfit systems, this is much harder to do as you've noted.
The clip on the drive side is not to "locate" the bearings or even hold them in place (that's the job of the wavy washer on the other side). The clip's job is to prevent excessive lateral movement (I think that amout is limited to 0.25mm). In your world this may be a lot, and I agree it would seem like a lot to me too when perfection would imply zero lateral movement. But I have come to grips with it simply because it seems to work very well. The clip does not actually touch the drive side bearing when torqued down and ideally would never touch it during regular use, but it does limit lateral movement to a specified amount should it move for whatever reason.
Ok, re Colnago's Threadfit system... I do believe it's the best solution thus far to the shitshow of BB intolerances that have been foisted upon us since departing from a simple threaded BB shell. However, it is Colnago's solution to make the best of a bad situation. But whatever system you use, you still have to press in the appropriate adaptor cups into the Threadfit cups. And like any pressfit system, you want to completely eliminate movement between those two interfaces, hence the use of Loctite 609 or equivalent and appropriate primer where necessary. I just want to bang my head againt a wall, or better yet, the mechanics' heads who insist on using grease there. It both facilitates movement where there shouldn't be any, and it also masks any annoying creaking giving you a false sense that everything is ok, until it isnt' again.
I am building my first C60 at the moment, and have checked the tolerances very closely. And they are good, so good in fact, that I suspect maybe even a dry installation of the pressfit cups could work. But on this build, and to test things out, I will be using Morgan Blue's Aquaproof Paste for this application. If I get a hint of creaking, the entire thing will be removed and I will reinstall using Loctite 609 and primer. But I'm more apt to experiment with things on my own bikes than others. I have high hopes for the Colnago system at this point, and will discuss further in my build thread when I create it.
I'll keep my fingers crossed your fix works for you, but tell me, didn't that lip for the weather seal interfere with a solid fitment of the washer you inserted there? I would have though it might. And I still don't like that if that washer is the tiniest bit too thick, then the solid interface at the hirth joint might still be jeapordized a bit, no? And if it's the tiniest bit too thin, then then torqueing to spec is only going to put excessive preload on the bearings. All things considered, I think the wavy washer method is the safest and most foolproof way to go here, while still getting the job done for the intended application.
No problem, the seal sits behind the bearing or my case washer stop collar, so there is no interference. In other words, the part of the axle holding the seal is larger diameter than the part the bearing presses on and the washer id is almost the same as the bearing ID. Also, the seal rubs against the cup I believe, so there is no change in position of the seal assembly, as the crank sits in exactly the same position as before. With ceramic bearings, if there is no wave washer and a fractional bit of lateral play, that crank spins forever and once it stops, it swings like a clock pendulum for quite a while.
I have a propensity for carrying spare parts, so I have new cups and new bearings here and I just had a closer look at them once more. Unbelievable, those bearings are not even a sliding fit. They loosely drop in with quite a bit of angular play. I'm trying to have faith in Campagnolo here and figure out how they ever thought this would be quiet once the lubricant is worked out? If you are willing to spend 5 minutes every 600km and lube using a really thick grease, you can probably get away with it. I just did an experiment with the new uninstalled parts and wrapped the bearings with white plumbers tape. They go in nice and snug. No where else in the world is there a bearing retaining specification where the housing is substantially larger in diameter than the bearing outer?
Quite frankly, as this assembly is so light, it is probably safer to have the wave washer in there. If you really stomp on the pedals, due to the moment couple caused by the distance of your pedal center and your bearing vertical or radial line, something has to give. Better the wave washer than something else.
My C60 was quiet for about the first 1,000km, then I had to open and lube every 600km or so.
Interesting, but nothing sounds abnormal or terribly engineered there to me. Just to be sure, the bearings you are using are indeed original OEM Campagnolo CULT bearings, correct? Do you have a proper bearing press to ensure the bearings are pressed back onto the shaft perfectly and evenly? As for the crank spinning "forever and swinging like a pendulum", it should do that with the wavy washer in place and everything torqued down, because neither the wavy washer nor anything else actually comes in contact with the inner race of the bearings. If it doesn't spin effortlessly and swing like a pendulum, something is wrong, wavy washer installed or not.
Yes, the cranks (and bearings) slide into the cups... no extra tools are required for this. I just checked a new superrecord crank, with CULT bearings, and fit it into some new cups. Maybe your standards are different where you work, but the bearing fits perfectly into the cups, not interference at all, nor are they supposed to be. Took a couple caliper measurements and would say they are within .01-.02mm difference. So I guess yes, a wrap of Teflon plumbers tape might make them sung. But I wouldn't go so far as to say the housing is substantially larger than the bearing outer. And if you think that is large, well... you need to check out carbon frame tolerances .
Keep in mind that when both cups are properly installed in the frame (no movement at all) and the crank is fully installed and torqued down, it makes for a pretty robust system. I've no reason to complain at all, and Ultratorque has been out for a long time now. The issues I've seen have in all cases been due to some install error, and in the case of threaded cups... often due to improperly faced frames, or not even faced at all (faced BB shells covered in paint would also fall into that category). Or in the case of pressfit installs, imperfectly aligned cups on either side of the shell. Can't stress enough that if you can get the cups installed perfectly aligned and solid (meaning no movement, either via dry install or with the use of Loctite and primer where necessary), then the crank install is generally trouble free forever. Every now and then sure, you may remove the cranks and clean everything out. I do this in the case of Cult bearings just to blow them out with compressed air and clean everything up and add a couple drops of oil as well as clean the cups and smear some grease on them. Everything needs maintenance now and then, and the Ultratorque system is no different.
I think for your C60 I might want to remove those cups and get rid of the grease they used between the cups and the Threadfit shell. I know that's what I'd be doing, and instead either press them in dry or use Loctite 609 and primer. It would really bug me knowing they used grease there and I would have to redo it. For my own peace of mind.
Yes, the cranks (and bearings) slide into the cups... no extra tools are required for this. I just checked a new superrecord crank, with CULT bearings, and fit it into some new cups. Maybe your standards are different where you work, but the bearing fits perfectly into the cups, not interference at all, nor are they supposed to be. Took a couple caliper measurements and would say they are within .01-.02mm difference. So I guess yes, a wrap of Teflon plumbers tape might make them sung. But I wouldn't go so far as to say the housing is substantially larger than the bearing outer. And if you think that is large, well... you need to check out carbon frame tolerances
Keep in mind that when both cups are properly installed in the frame (no movement at all) and the crank is fully installed and torqued down, it makes for a pretty robust system. I've no reason to complain at all, and Ultratorque has been out for a long time now. The issues I've seen have in all cases been due to some install error, and in the case of threaded cups... often due to improperly faced frames, or not even faced at all (faced BB shells covered in paint would also fall into that category). Or in the case of pressfit installs, imperfectly aligned cups on either side of the shell. Can't stress enough that if you can get the cups installed perfectly aligned and solid (meaning no movement, either via dry install or with the use of Loctite and primer where necessary), then the crank install is generally trouble free forever. Every now and then sure, you may remove the cranks and clean everything out. I do this in the case of Cult bearings just to blow them out with compressed air and clean everything up and add a couple drops of oil as well as clean the cups and smear some grease on them. Everything needs maintenance now and then, and the Ultratorque system is no different.
I think for your C60 I might want to remove those cups and get rid of the grease they used between the cups and the Threadfit shell. I know that's what I'd be doing, and instead either press them in dry or use Loctite 609 and primer. It would really bug me knowing they used grease there and I would have to redo it. For my own peace of mind.
Colnago C64 - The Naked Build; Colnago C60 - PR99; Trek Koppenberg - Where Emonda and Domane Meet;
Unlinked Builds (searchable): Colnago C59 - 5 Years Later; Trek Emonda SL Campagnolo SR; Special Colnago EPQ
Unlinked Builds (searchable): Colnago C59 - 5 Years Later; Trek Emonda SL Campagnolo SR; Special Colnago EPQ
Calnago wrote:Interesting, but nothing sounds abnormal or terribly engineered there to me. Just to be sure, the bearings you are using are indeed original OEM Campagnolo CULT bearings, correct? Do you have a proper bearing press to ensure the bearings are pressed back onto the shaft perfectly and evenly? As for the crank spinning "forever and swinging like a pendulum", it should do that with the wavy washer in place and everything torqued down, because neither the wavy washer nor anything else actually comes in contact with the inner race of the bearings. If it doesn't spin effortlessly and swing like a pendulum, something is wrong, wavy washer installed or not.
Yes, the cranks (and bearings) slide into the cups... no extra tools are required for this. I just checked a new superrecord crank, with CULT bearings, and fit it into some new cups. Maybe your standards are different where you work, but the bearing fits perfectly into the cups, not interference at all, nor are they supposed to be. Took a couple caliper measurements and would say they are within .01-.02mm difference. So I guess yes, a wrap of Teflon plumbers tape might make them sung. But I wouldn't go so far as to say the housing is substantially larger than the bearing outer. And if you think that is large, well... you need to check out carbon frame tolerances
Keep in mind that when both cups are properly installed in the frame (no movement at all) and the crank is fully installed and torqued down, it makes for a pretty robust system. I've no reason to complain at all, and Ultratorque has been out for a long time now. The issues I've seen have in all cases been due to some install error, and in the case of threaded cups... often due to improperly faced frames, or not even faced at all (faced BB shells covered in paint would also fall into that category). Or in the case of pressfit installs, imperfectly aligned cups on either side of the shell. Can't stress enough that if you can get the cups installed perfectly aligned and solid (meaning no movement, either via dry install or with the use of Loctite and primer where necessary), then the crank install is generally trouble free forever. Every now and then sure, you may remove the cranks and clean everything out. I do this in the case of Cult bearings just to blow them out with compressed air and clean everything up and add a couple drops of oil as well as clean the cups and smear some grease on them. Everything needs maintenance now and then, and the Ultratorque system is no different.
I think for your C60 I might want to remove those cups and get rid of the grease they used between the cups and the Threadfit shell. I know that's what I'd be doing, and instead either press them in dry or use Loctite 609 and primer. It would really bug me knowing they used grease there and I would have to redo it. For my own peace of mind.
Good luck with your C60, send us some pics.
PS. Why would anyone want a clearance of 0.2mm between a bearing outer and its housing? It means the bearing outer is moving radially in the housing all the time during load.
No one would want .2mm. Calnago indicated .02mm.
Either way, if you have that much play, you got issues. I would suspect bad cups verses bearings.
I would not get on Campagnolo too much, heck, Boeing could not get their 787 within specs for years.
Either way, if you have that much play, you got issues. I would suspect bad cups verses bearings.
I would not get on Campagnolo too much, heck, Boeing could not get their 787 within specs for years.
Butcher wrote:No one would want .2mm. Calnago indicated .02mm.
Either way, if you have that much play, you got issues. I would suspect bad cups verses bearings.
I would not get on Campagnolo too much, heck, Boeing could not get their 787 within specs for years.
I measured again, closer to 0.15mm
I did this at home, with a digital vernier caliper, so not too many decimals. Perhaps I'll use a micrometer at the shop tomorrow. These are new components, unused, purchased around March 2015. The Cult bearing outer measures 37.00, the housing measures 37.15. This gives us a clearance between cup and bearing of 0.15mm.
One of my Engineers is also a cyclist and he had a SKF rep at the office today. Just sent me an email, to say their SKF equivalent of the normal (no ceramic) bearing is 61805-2RZ. The minimum diameter of the bearing with tolerances should be 36.989mm and the maximum housing (cup) size for the lightest possible application such as a bicycle should be 37.011. That would give us a clearance of 0.022mm at worst end of tolerances. Probable clearance would be in the range of 0.011mm
So, are we missing something here? Why does Campy have the clearance almost ten times what it should be?
Calnago, how did you measure 0.02 - 0.01? Seems like we are looking at totally different components?
Edit: We checked the dimensions this morning in the shop at 25 degrees C with micrometers and with the exception of adding a few decimals, the above measurements stand good.
SKF used an ISO H7 fit for the housing, which is debatable, that is for steel. For lighter alloys we would prefer a tighter fit meaning less clearance.
In short, I am done with this thread, the measurements we have taken clearly predict the outcome of actual performance in the field. Next step is to discuss this first with Campagnolo USA and see what we can do to protect the consumer, spending high dollar on extremely expensive components. The outcome will be interesting, but for now probably better to keep out of online forums.
-
graeme_f_k
- Shop Owner / Manufacturer
- Posts: 631
- Joined: Mon May 26, 2008 12:21 pm
- Location: UK
- Contact:
Willem wrote:Butcher wrote:No one would want .2mm. Calnago indicated .02mm.
Either way, if you have that much play, you got issues. I would suspect bad cups verses bearings.
I would not get on Campagnolo too much, heck, Boeing could not get their 787 within specs for years.
One of my Engineers is also a cyclist and he had a SKF rep at the office today. Just sent me an email, to say their SKF equivalent of the normal (no ceramic) bearing is 61805-2RZ. The minimum diameter of the bearing with tolerances should be 36.989mm and the maximum housing (cup) size for the lightest possible application such as a bicycle should be 37.011. That would give us a clearance of 0.022mm at worst end of tolerances. Probable clearance would be in the range of 0.011mm
So, are we missing something here? Why does Campy have the clearance almost ten times what it should be?
SKF used an ISO H7 fit for the housing, which is debatable, that is for steel. For lighter alloys we would prefer a tighter fit meaning less clearance.
There are a whole bunch of assumptions being made here.
For a start, pretty self-evidently, Campagnolo don't use the standard 61805 dims - I'd hope that SKF rep was a bit more careful in their normal work because 61805-2RZ has nominal dims 37 x 24 x 7 and off the shelf bearings use a set of ISO-generated tolerances according to application, wheras Campagnolo use dims which measure 37 x 24 x 6 +/- ?
None of us actually *know* the dimensional tolerances that Campagnolo work to (I could enquire but it's probably not relevant) but since in this case they are using a bespoke product it's of debatable likelihood that they are using a "standard" set of dimensional tolerances. As an aside, that's one reason *not* to use generics unless the component manufacturer specifically says "yes you can use an ISO-(or whatever)-standard part in this application".
Part of the cost consideration will be around the accuracy of manufacture as no manufacturing process is ever without any variation. You just have to decide, how much do you want to spend controlling variation (tolerance) and what is your acceptable rejection rate on the far side of the factory door?
Upstream of that, in designing an assembly, you then need to ask yourself "how good does this assembly need to be" and "how good is the part that this assembly is going to interface with likely to be" and engineer according to what is a tolerable expected rejection rate.
Given that tolerances in frame manufacture have drifted from the not very good to the frankly appalling range in the last few years, an amount of slop which in other applications and other industries might be unacceptable is probably close to inevitable in ours.
The point is, and Willem actually made it, unwittingly, that the assembly has shortcomings if one where looking to install it in some situations but it is as good as it needs to be, provided that the basic tolerances that are suggested by Campagnolo are adhered to, in the environment it is designed to suit. Yes, you could make it more accurately and you could make it cost 10 times as much but if it's as good as it needs to be, at the application and price point that it is designed for, then it is as good as it needs to be.
If there *is* an issue with an installation, then once again, the rule is simple - return to the manufacturer with an accurate description of the problem and ask them to look and see whether the problem is resident in their product, or the one you are interfacing it with ... they will *know* what their tolerances are and will be best placed to advise. Incidentally, in doing so, you'll be doing a service not only to yourself but also to the customers of that manufacturer at large because feedback from the market loops back into QC. If there is an issue, if a batch of product "x" is out-of-spec, the manufacturer will generally want to know.
A Tech-Reps work is never done ...
Head Tech, Campagnolo main UK ASC
Pls contact via velotechcycling"at"aim"dot"com, not PM, for a quicker answer. Thanks!
Head Tech, Campagnolo main UK ASC
Pls contact via velotechcycling"at"aim"dot"com, not PM, for a quicker answer. Thanks!
Willem wrote:Calnago, how did you measure 0.02 - 0.01? Seems like we are looking at totally different components?
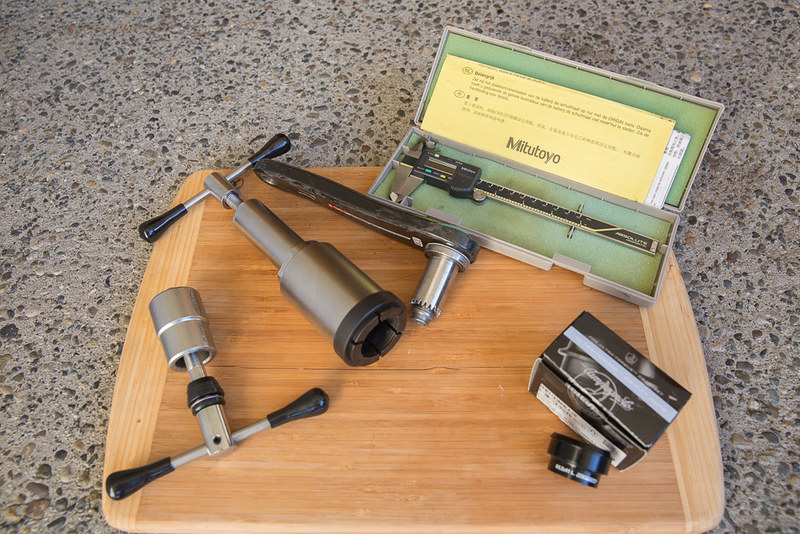
Ok, in the interests of satisfying your one last question, I double checked my measurements this morning as well. And I stand by them. The outer diameter of the bearing I measured is 36.98-36.99mm. The inner diameter of the cup is 37.00-37.01. That's it.
I use very good tools, I am the only one that uses them, and they are not subjected to frequent shop use. Here's a pic of the stuff I used in this thread. All components are brand new never installed and no animals were harmed in the process, although I may have taken the heavy one to someone's head on occasion
Colnago C64 - The Naked Build; Colnago C60 - PR99; Trek Koppenberg - Where Emonda and Domane Meet;
Unlinked Builds (searchable): Colnago C59 - 5 Years Later; Trek Emonda SL Campagnolo SR; Special Colnago EPQ
Unlinked Builds (searchable): Colnago C59 - 5 Years Later; Trek Emonda SL Campagnolo SR; Special Colnago EPQ
Visit starbike.com Online Retailer for HighEnd cycling components
Great Prices ✓ Broad Selection ✓ Worldwide Delivery ✓
www.starbike.com


