Slagter wrote:Must say, that is a very respectable setup you've got there Calnago.
Calnago wrote:
While a good long rear flap is great, and necessary around here, for group rides or whomever you might be riding with, it's the cold spray from the front tire that is often the most miserable part of any ride rain. Once your feet are cold and freezing, it isn't much fun anymore.
And I totally agree with this. While rear fender is very important to protect others, which will make them want to ride with you again. The front fender is just what makes all the difference for your feet and thus the overall ride quality/experience.
Actually I was riveting everyting before as well. But the fenders just fell apart/broke where I put the rivets in. Not sure it was the rivets fault though. The fender quality was pretty poor. The good thing about bolts and nuts is, it's easier to make adjustments and replace parts. The front part on my front fender, is new this year. I had a shorter one last year. But it turns out, that even a decent long front fender part sprays on the guy in front of you. You typically only spray his rearwheel and his feet, and he wont notice why his feet all of a sudden are wet, but still it's not very friendly.
Do you have a link to those fenders?
Do you have a link to those flaps as well?
And where do you live? I'm in Demnark, and it looks like you're in the need of a very good setup as well where you live.
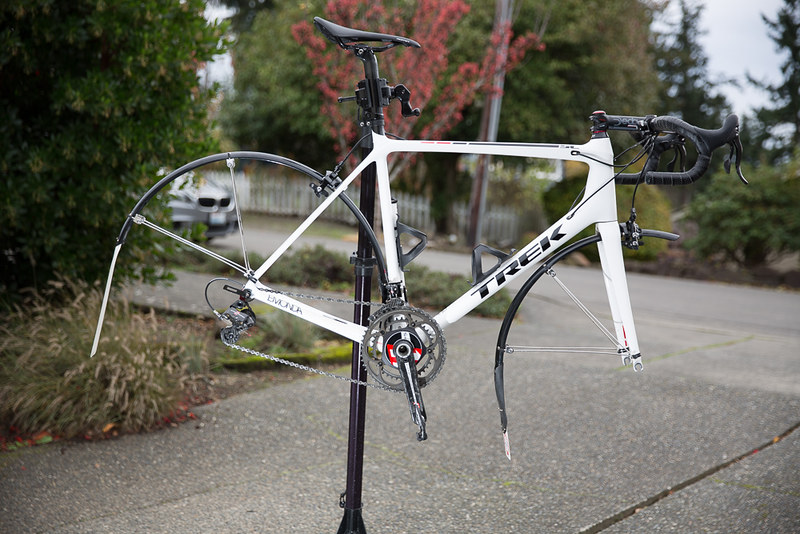
Do you have a shot of the whole bike from the side?
I'm in the Pacific Northwest, so yeah... a dedicated rain bike is pretty common place amongst cyclists here. Don't go on a group ride without fenders.
The fenders themselves are Planet Bike Cascadia fenders. Plastic, round and fit the profile of newer Shimano brake calipers perfectly. I remove all the metal hardware, block the holes with electrical tape, then rivet them on using zip ties around the brake bridge bolts. I specifically wanted regular brakes for my "rain bike", as adding discs can also add complexity with fender mounting. And in the rain as far as I'm concerned fenders are a far more important feature than discs. I tried a disc braked bike, but it was dry out and I saw no advantage. Plus it handled like a sloth. I knew that I needed to try it in the pouring, torrential rain, but you know what... when that day came I just didn't feel like going out in that crap just to try the disc brakes. And that's the rub... people swear by how great they are in inclement weather, and maybe they are... but the fact is, if the weather's that bad out, I probably am not going to gear up and head out just so I can say... "Awesome, sure glad I got these disc brakes... now can I go back home and get dry?". Lol. Sounds silly but it's kinda true. Our winters can be very wet, but more often than not, we go out on the bikes when there's a clearing in the weather. So, while the roads may be wet, it's usually not raining that bad, and no one really looks forward to riding in the rain... but it's nice to have fenders for when you get caught in it. As for discs, I find that caution in the rain is really the important thing, regardless of whether you have disc brakes or rim. I set this bike up to be able to have a riding experience basically the same as in the dry on my nicest road bikes, except for the bad weather of course. When people say half way through the rainy season... "I can't wait to get back on my 'good' bike", I don't relate because the actual riding experience for me is the same. I feel like I am on my "good" bike. That's not the issue... I just want some sunshine and dry weather.
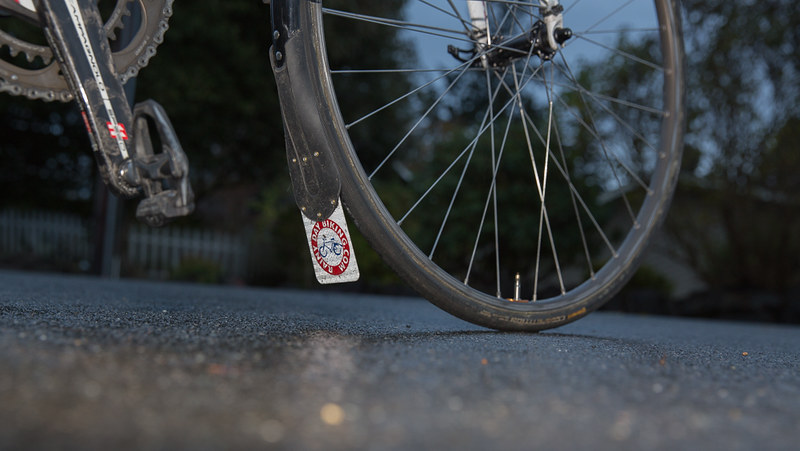
The flaps are from a guy in Seattle, who I've never met, but friends turned me on to his business of providing flaps of different kinds to bicyclists. Really good stuff... the flaps on my bike, when hit by a car's light, show up like a neon white sign on a highway. I cut them up to fit and rivet them on. Since you asked... here's the link...
http://www.rainydaybiking.com/And here's some more pics... sorry if I repeat some from my last post...
Full shot...
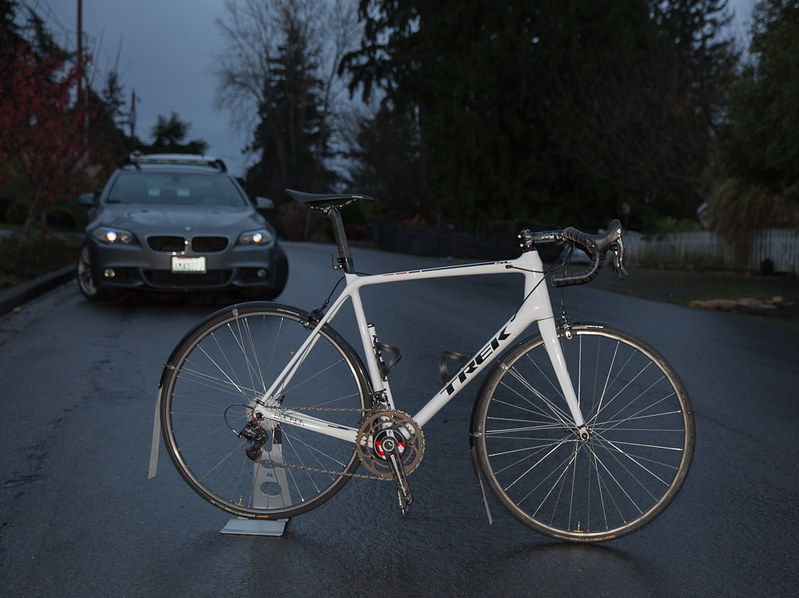
Front fender is both rotated a bit reward from where they intended it to be mounted (I got rid of the original moutning hardware) and then I riveted an additional flap to the existing rubber flap. It extends to within about 3-4cm of the pavement, but is stiff enough to flex but not enough to start hitting your feet on a fast descent from the wind blowing it backwards...
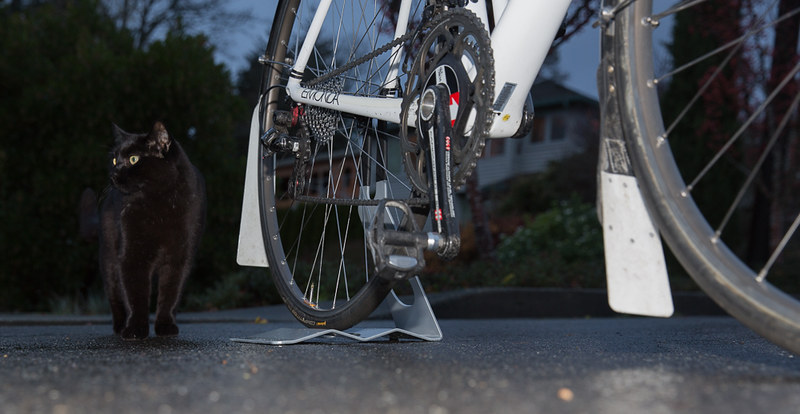
Good shot of both flaps... and a cat...
And from the back...
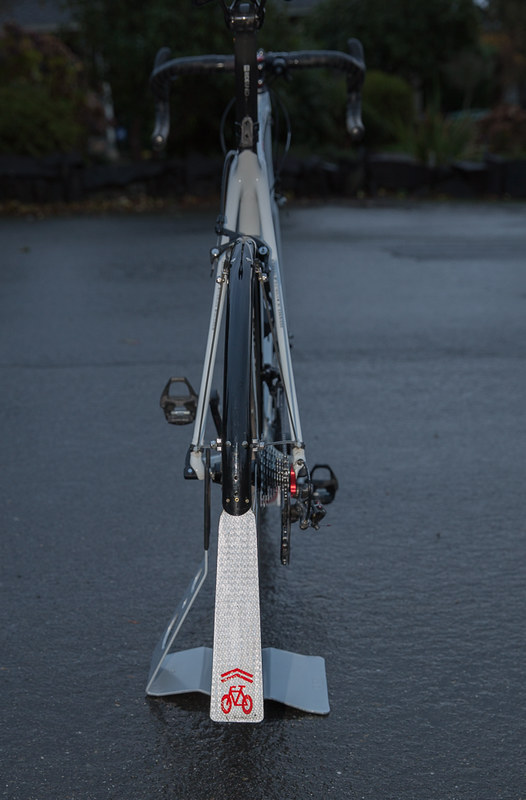
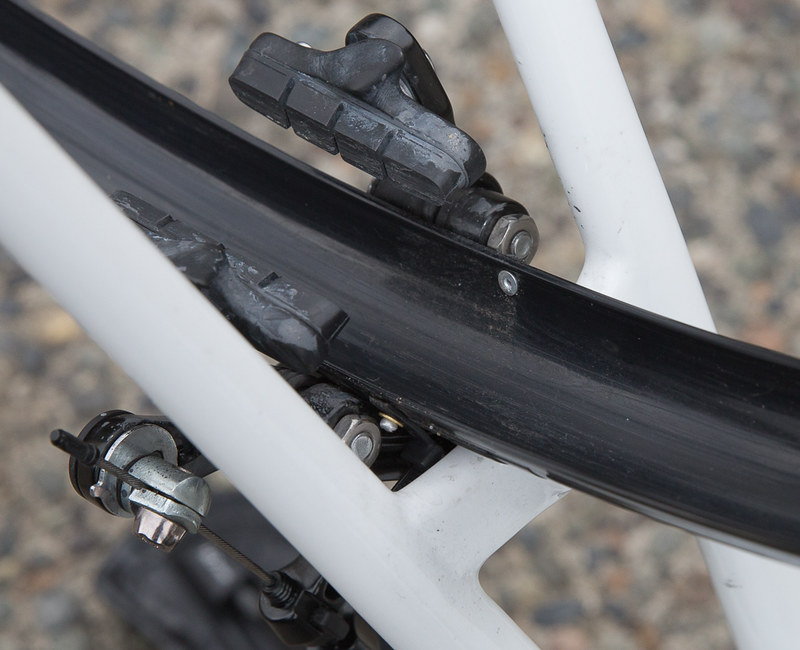
Shots of the installation from all angles. I rivet the fenders with the rivets popping on the outside of the fender. This allow the head of the rivet to sit almost flush with the inside of the fender, giving maximum clearance for the tire... basically the complete install is done with 3/16" pop rivets, some brass spoke washers, some zip ties, and a 3/16" drill (drilling the holes for the rivets, along with using the spoke washers, may be why I don't have any cracking of fenders like you described when using rivets)...
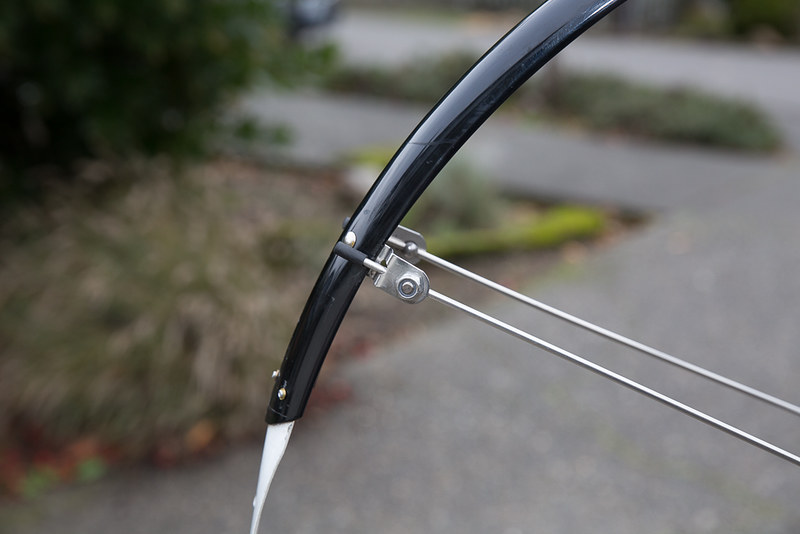
All the ends of the fender stays get snipped off with bolt cutters and the protective rubber pieces put on... so nothing sticks beyond the fender profile to catch things, and just add a whole lot of ugly...
Drilling the holes to rivet the flaps on so that they look perfectly straight from behind is a task for sure. I have one buddy who when behind me will tell me it's an eight of an inch to one side... and of course when I get home I'll have to check. If it really was, I would redo it. Ha... But usually it's just a case of him messin' with me again...
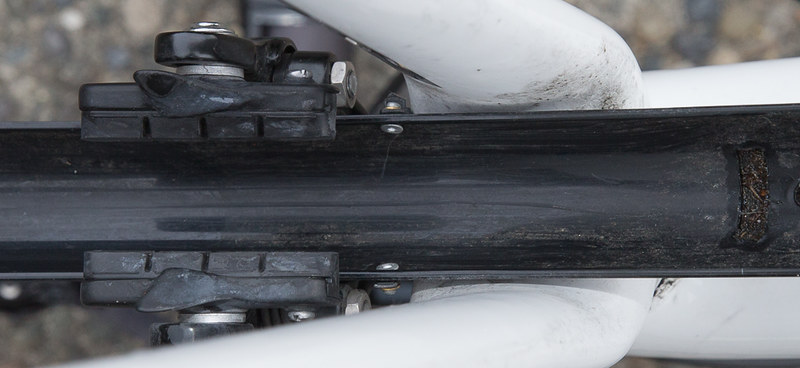
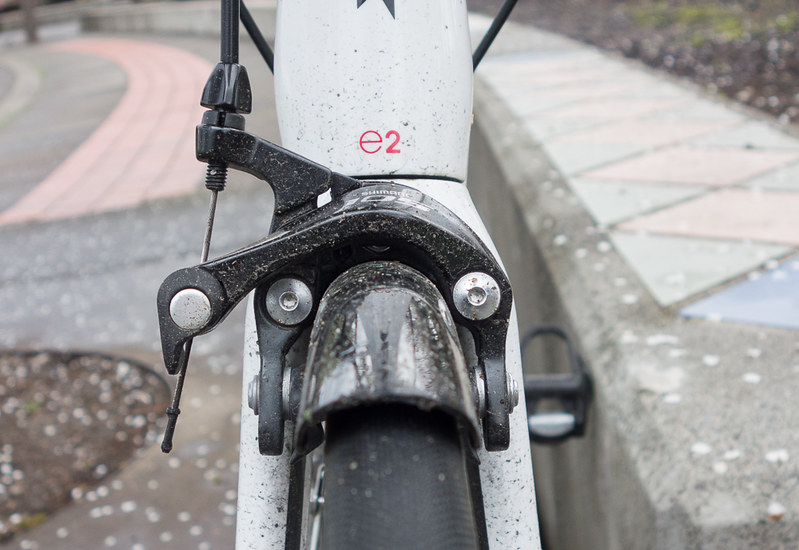
Underneath the rear brake bridge. You can see both the flat almost flush rivet head on the inside and if you look a the other side you can see the outer pop rivet. First I put the pop rivet through from the inside, then the zip tie (pre drilled with a 3/16" hole), then the brass spoke washer so that when the rivet is "popped" it doesn't pull through the softer zip tie and/or fender...
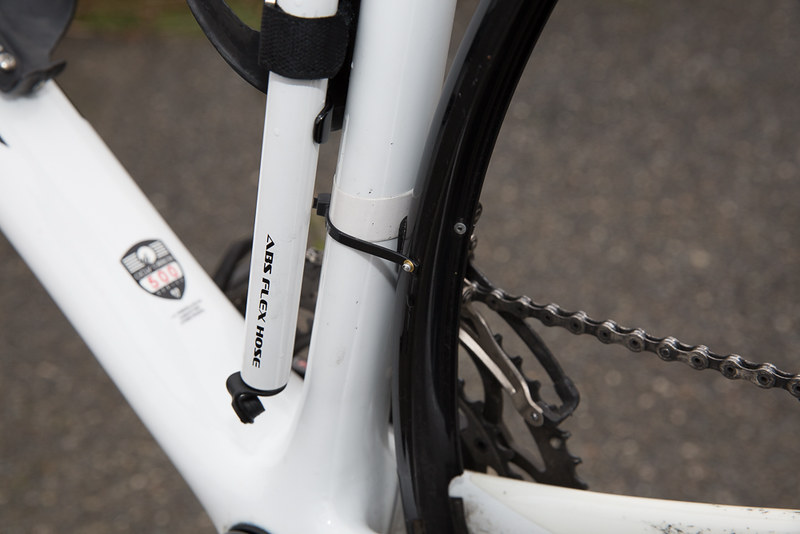
Buttoned up behind the seat tube as well... with tape to give some bite to the tie on the frame, and I use little rubber pieces or "carbon leather" pieces from Lizard Skin Chainstay protectors, to put between contact points between the fender and frame. This eliminates ALL rattles... there are none, even going over bumps...
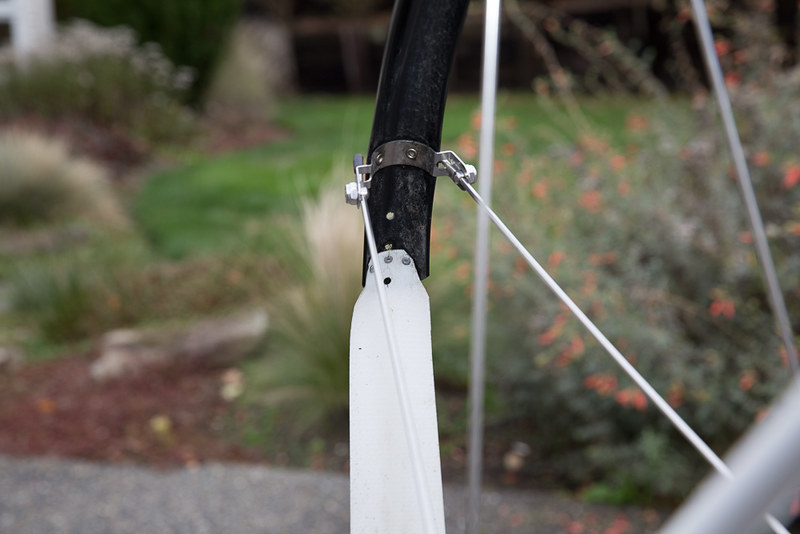
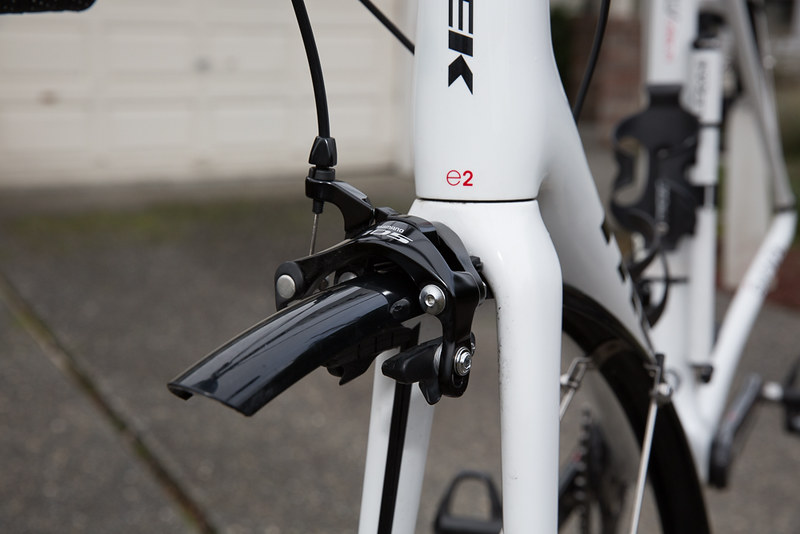
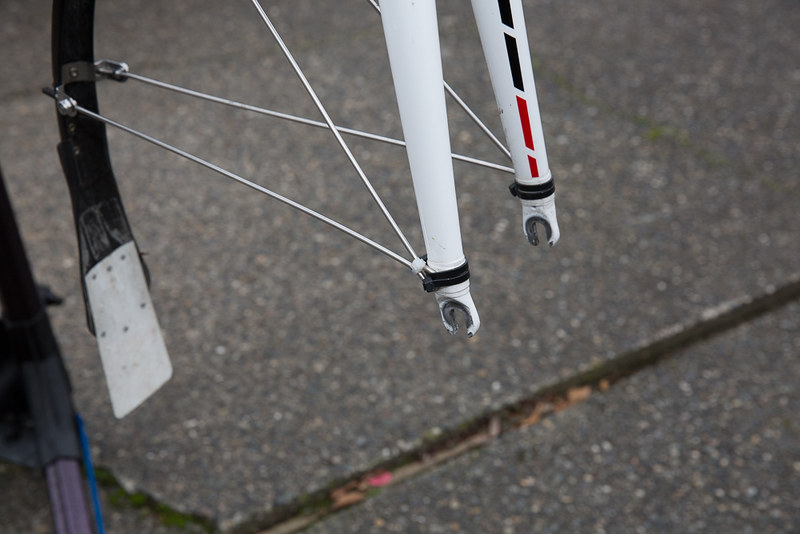
And the front... slides completely under the front fork... no breaks... zip tied around the brake bolt at front. Also, the zip ties riveted to the sides of the fender like they are, when tightened down actually spread the fender a bit allowing for good clearance at the crucial points...
And the underside of the front fork... Continuous fender... no breaks, and good clearance...
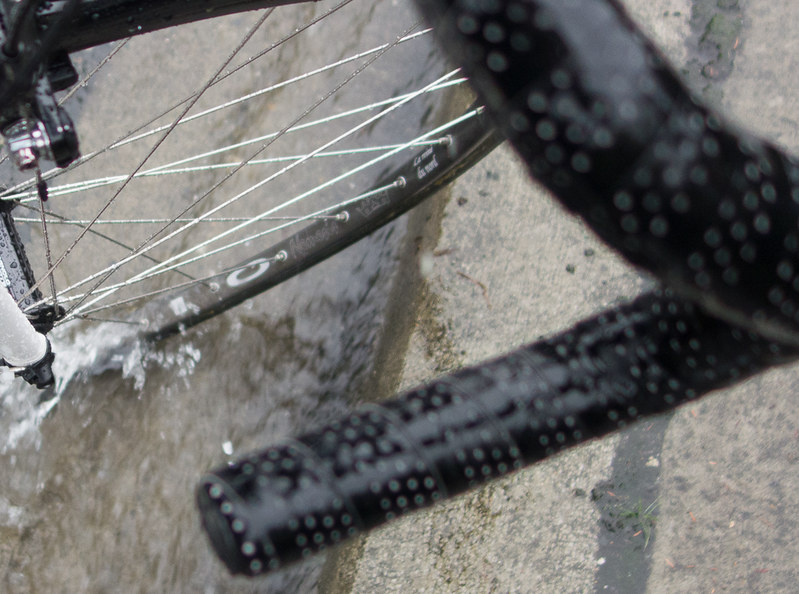
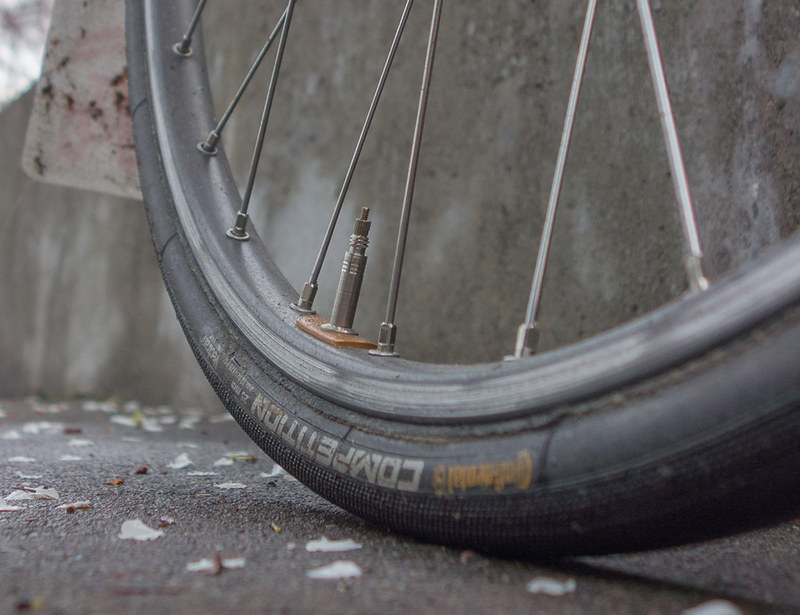
Nice clearance all around the 25c Continental 25mm Competition Tubulars... my favorite wet weather tire....
Just above fork dropouts get wrapped with color matching (to your frame) electrical tape by a good amount (at least 6 or 7 rounds), and that provides the ideal bite for the fender stays to be mounted to. When you tighten up the zip ties, it's as solid as if they were bolted with steel bolts onto brazed on fender mounts... except it's still a road bike, shortish wheelbase, nice handling, all the benefits and now... dry feet as well... Biggest treat of all for wet weather riding...
Favorite foul weather tires and rims (Ambrosio Nemesis, nonmachined brake track... I think these brake so much better than machined brake tracks)...
And there you pretty much have it... finally after all these years I finally got it right. So happy!
And to think several hours ago this bike was filthy... I cleaned it up for the photoshoot. It won't be this clean again until spring. However, with the full coverage fenders, it stays clean. In fact, if I never washed another bike until then, it would be much cleaner than my non-fendered bikes. Most of the surface dirt it accumulates is from the spray from other peoples bikes.
Have fun, and stay dry...