


Colnago C60 rear brake ferrules
Moderator: robbosmans

Maybe it's just the paint that is very thick? I will try next time I'm close to one.
Colnago C64 - The Naked Build; Colnago C60 - PR99; Trek Koppenberg - Where Emonda and Domane Meet;
Unlinked Builds (searchable): Colnago C59 - 5 Years Later; Trek Emonda SL Campagnolo SR; Special Colnago EPQ
Unlinked Builds (searchable): Colnago C59 - 5 Years Later; Trek Emonda SL Campagnolo SR; Special Colnago EPQ


Visit starbike.com Online Retailer for HighEnd cycling components
Great Prices ✓ Broad Selection ✓ Worldwide Delivery ✓
www.starbike.com
-
maverick_1

- Posts: 742
- Joined: Tue Sep 11, 2007 4:20 pm
- Location: Tokyo
Nope, I don't think it's related to thick paint unfortunately.
I had to use Jagwire ferrules on my C60 but they were still a tight fit.....I also get the 'gritty' feel to the rear brake but assumed it was at the shifter end and caused by the routing of the cable in the Deda Presa bars I am using?
To be honest, I do not think about it at all whilst I am riding.....
Rich
To be honest, I do not think about it at all whilst I am riding.....
Rich
-
Nefarious86
- Moderator
- Posts: 3669
- Joined: Sun May 25, 2014 4:57 am
Have you tried using cable a sheath like the Specialized s116500004 sheath? Would provide a degree of protection within the frame from any contact points. They have a flared end so should also protect the frame from the outer somewhat also.

Using Tapatalk
Ok, so I did a little experiment today by taking some campy brake housing, a campy brake cable, and a campy brake cable ferrule, and found this old dusty C60 lying around to play with  . Ferrules fit perfectly in the guides both front and back. Tried, with some assistance, pulling the brake cable back and forth with tension trying to simulate the roughness you guys are talking about. Smooth as silk. No roughness. Did this both with the sheath liner and without. Same smooth operation. So, I'd really double check the very ends of your cuts in the housing to make sure that there are no sharp edges of metal left anywhere in that diameter. Here's a couple pics of perfectly fitting ferrules and campy brake cable and housing in a C60...


Colnago C64 - The Naked Build; Colnago C60 - PR99; Trek Koppenberg - Where Emonda and Domane Meet;
Unlinked Builds (searchable): Colnago C59 - 5 Years Later; Trek Emonda SL Campagnolo SR; Special Colnago EPQ
Unlinked Builds (searchable): Colnago C59 - 5 Years Later; Trek Emonda SL Campagnolo SR; Special Colnago EPQ
I am building a Colnago C60 at the moment and wondered the same thing about the rear brake ferrule. I am running campy and nothing was supplied. I went to my local bike shop with the campy brake cable and they found some metal ferrules that fit the cable perfectly and fit the frame. I got 4 of them. No idea what brand they are unfortunately. I had some other ones at home that fit the cable but not the frame. It's frustrating but you can get them.
I just built a Colnago C60 for a friend and did notice the rear brake was a bit gritty as has been mentioned here. I took the cables out and noticed a build up of white paint on the inside of the cable stop which was rubbing on the cable. I chipped off the paint with a tiny screw driver and that fixed the problem.
I just built a Colnago C60 for a friend and did notice the rear brake was a bit gritty as has been mentioned here. I took the cables out and noticed a build up of white paint on the inside of the cable stop which was rubbing on the cable. I chipped off the paint with a tiny screw driver and that fixed the problem.
Yes, perhaps something is inside causing the roughness as @tids0009 noted with a recent build of his.
As an aside, now that I've spent too much time fondling a C60, I want one!
As an aside, now that I've spent too much time fondling a C60, I want one!
Colnago C64 - The Naked Build; Colnago C60 - PR99; Trek Koppenberg - Where Emonda and Domane Meet;
Unlinked Builds (searchable): Colnago C59 - 5 Years Later; Trek Emonda SL Campagnolo SR; Special Colnago EPQ
Unlinked Builds (searchable): Colnago C59 - 5 Years Later; Trek Emonda SL Campagnolo SR; Special Colnago EPQ
-
bikerjulio

- Posts: 1900
- Joined: Fri Dec 11, 2009 10:38 pm
- Location: Welland, Ontario
For those who are interested, here is Sheldon Brown on cables and ferrules. http://www.sheldonbrown.com/cables.html
There's sometimes a buggy.
How many drivers does a buggy have?
One.
So let's just say I'm drivin' this buggy...
and if you fix your attitude you can ride along with me.
http://www.youtube.com/watch?v=GekiIMh4ZkM
How many drivers does a buggy have?
One.
So let's just say I'm drivin' this buggy...
and if you fix your attitude you can ride along with me.
http://www.youtube.com/watch?v=GekiIMh4ZkM
Ok... I'm repeating this post, which I just did over in my C60 build thread since this is the thread that really first addressed the C60 rear brake routing "roughness" issue...
Brake routing: Front of course was a non-issue... perfectly smooth like silk, nothing to talk about here.
The rear routing is a different story. Up until the C59, all the C-series Colnagos had used external brake cable routing. While the EPQ shared the lugs with the C59 and thus had the same internal derailleur routing as the C59, the top tube was still just a reworked EPS top tube which used the external brake cable stops and external brake cable routing. These work very well, just not internally routed. Then the C59 adopted an internal guide that a full brake housing ran through the top tube with no stops at all. It was free to slide back and forth a bit, but still was smooth to operate because of continuous brake housing with no breaks. No problem, except for photos the brake housing would often have slid forward a bit in the top tube making my perfectly straight line down to the rear brake a bit not so straight. Nothing a bit of adjustment wouldn't fix, but grrr...
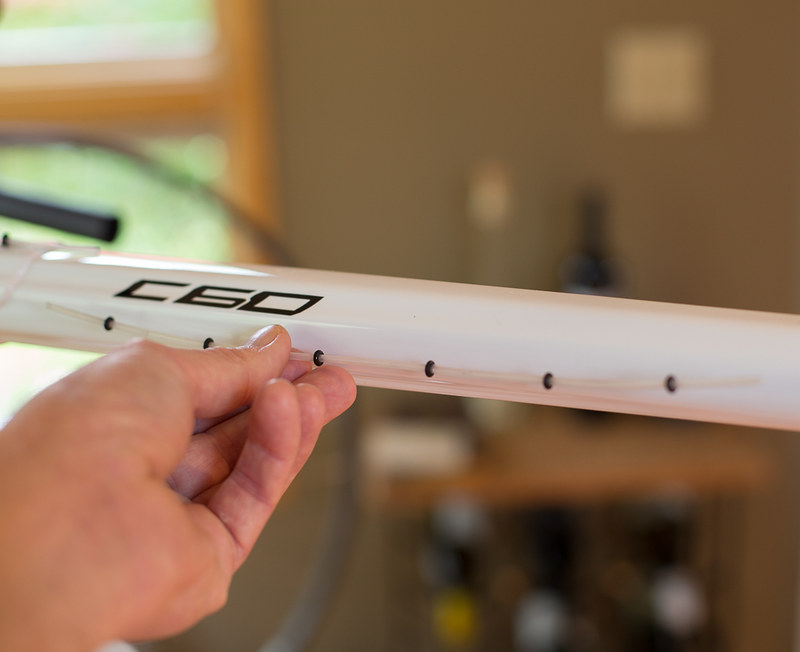
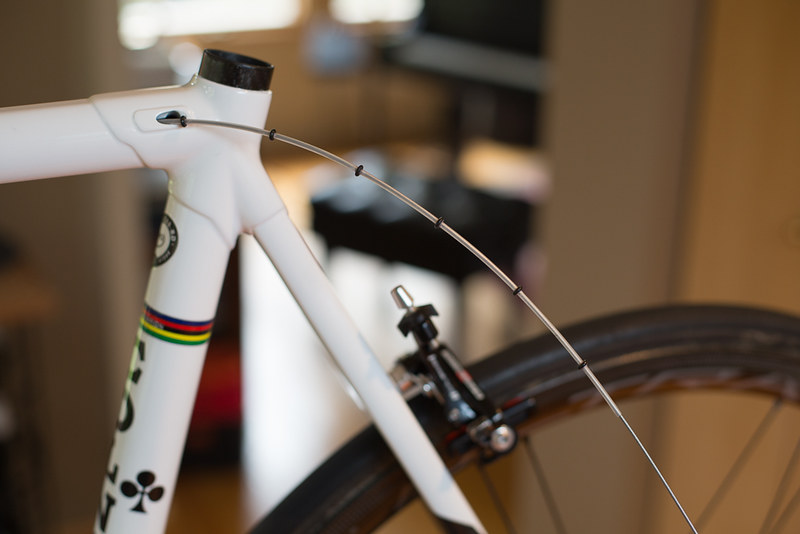
Now the C60 arrives. Internal brake cable routing beginning in the front headtube lug and exiting through the rear seatcluster lug. No internal guides to speak of... just a couple of holes it seems that serve as the brake cable stops. And remember in my last post what I said about there not being a single brake or derailleur housing that comes close to touching the frame on this build. Well, that's nice, but the angle of the brake housing that enters the rear cable stop is such that it creates kind of a sharp turn for the bare brake cable as it enters the top tube. Colnago does not supply any special ferrules with plastic guide extensions or anything. I knew already that some people had experienced rattling of cables inside the frame, and I even commented a bit in a thread started by @Tomcolnago about his very issue.
Well... upon running a brake cable through my perfectly squared and ferruled brake housings all the way to the rear brake, I just gave it a light squeeze (before cutting anything), to ensure that all was good. Well, it was far from satisfactory to me. It felt rough, very rough. Hmmm.... well I knew it couldn't be the ends of the brake housing, so I looked to try a few things... The Colnago User Guide recognizes that the cable can cause some noise inside the tube and hence gives this recommendation... last point on the page...
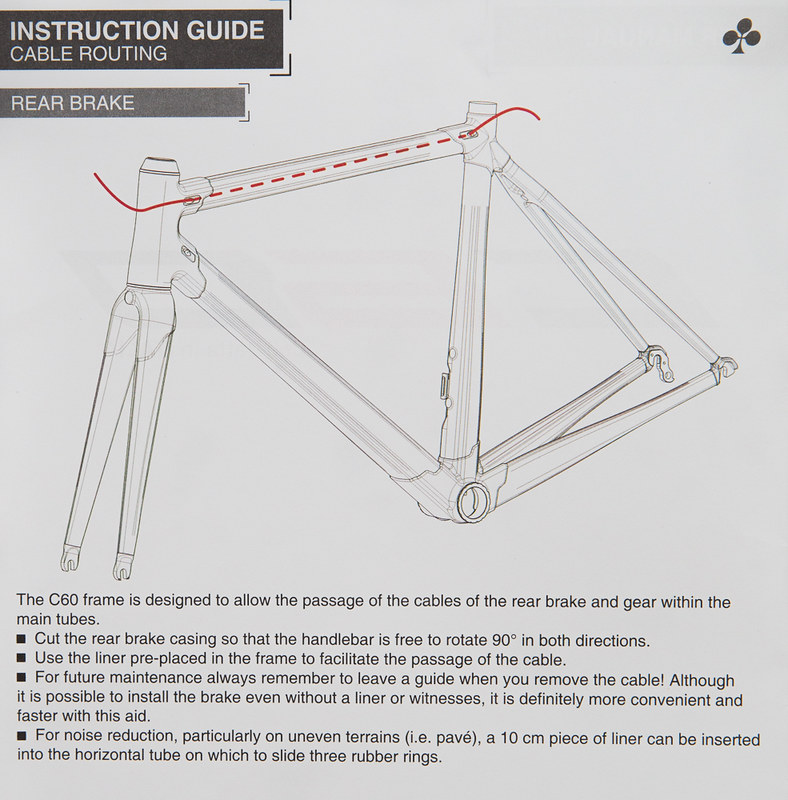
I really didn't understand the bit about only a 10cm length of tubing fully, and just assumed that this was all that was needed to be able to somehowe wedge itself into the section that rattling might originate from. Ok... Tried that. Still, very rough. So next was to extend the length of it and add some more O-rings at set intervals. The little rubber O-rings that I got at a hardware store fit the sheathing perfectly...
It was also somewhat of a pain getting it in the tube without the rubber O-rings sliding off, which would have been a hassle to get out of there. The rear brake cable opening in the seat tube cluster has a larger hole that you can use to guide the O-rings over and then in. Patience is a virtue here. But alas... my first try I made the whole thing too long and it probably squeezed up against both cable stops internally and when you squeezed the brakes it would really "slap" against the top tube. Worse than before. Ok, so shortened that up some and the slap was resolved but it was still really rough feeling. Clearly, the roughness was originating where the steel cable made it's way around the carbon cable stops internally, especially at the rear it seemed. Was driving me nuts, so I went to sit down and think about it some more and seek the wisdom of Cat (yes, that's his name)....
"So, ya see Cal... here's what I think might work... but feed me first...."
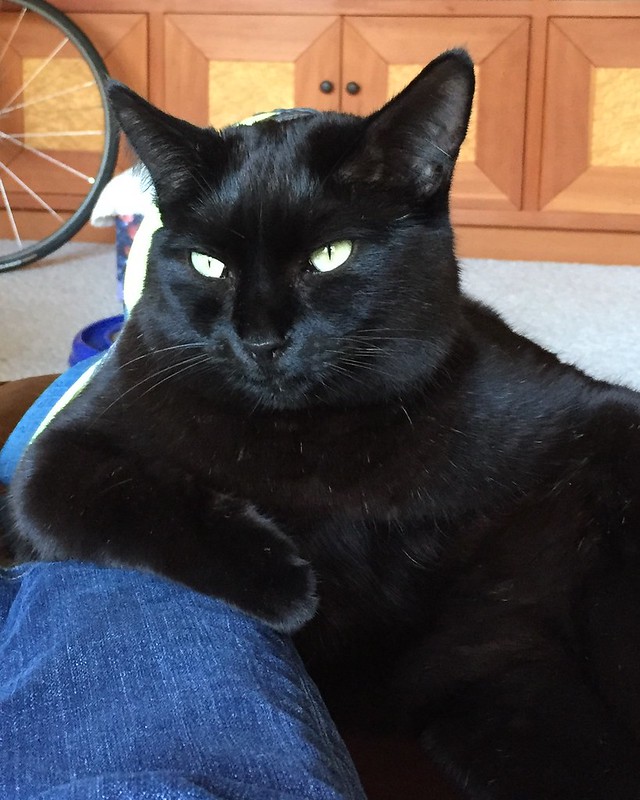
Well, it's amazing what can come to you with a little break in the action and you have the wisdom of a wise old sage such as Cat to guide you through the abyss...
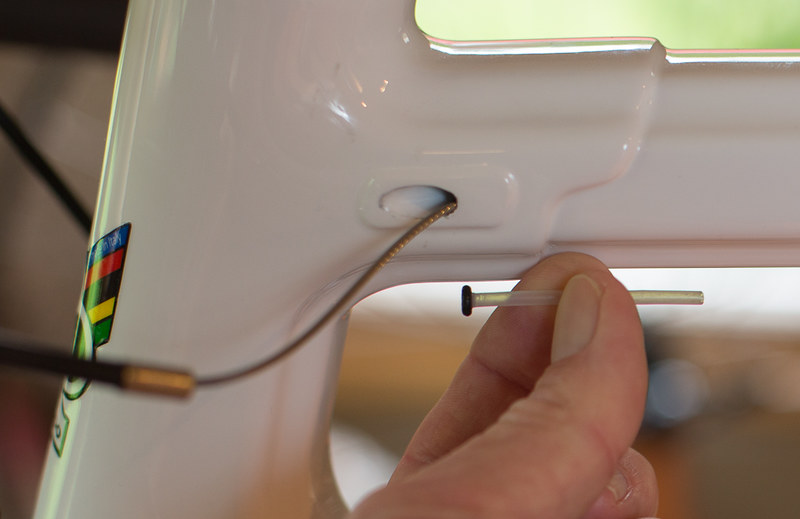
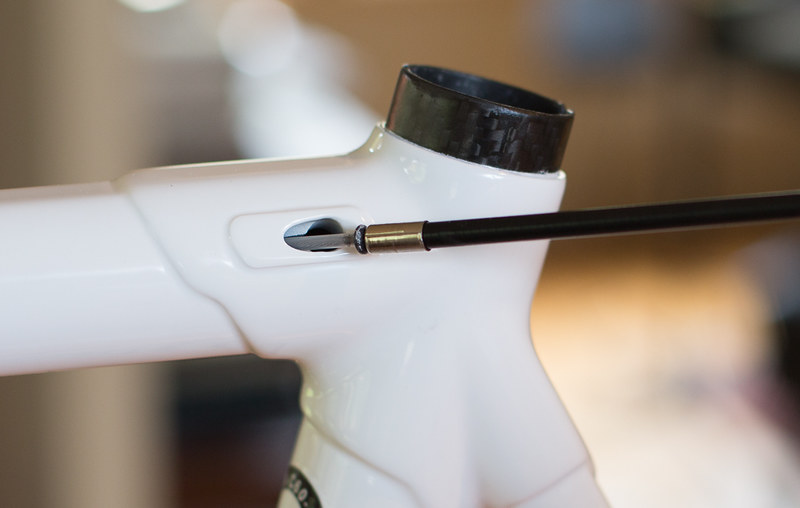
A little Krazy Glue, some sheathing (cutting up the liner supplied as a guide works fine here), some little rubber O-rings and voila... make your own custom cable guides that begin at the outside of the frame to provide a smooth internal guide around the rough internal edge... oh, the little brass ferule that's all blurry in the pic with the attached tubing was something I found lying around far too late, so if you have some of these they might work as well, I just didn't think of that in time. Anyway, I was far too excited about my home remedy solution, plus with the O-rings attached with a little dab of Krazy Glue along the length of the tubing, I didn't have to worry about them sliding off and figured they would provide a kind of bumper between the cable and the top tube, eliminating any chance of noise... Bonus!
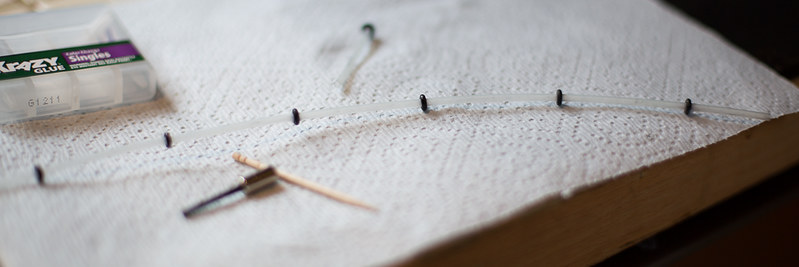
Instant cable guide with it's very own stop that fits flush into the brake routing hole in the frame... perfect... the Krazy Glue was the key here because you need that rubber o-ring on the very end of the liner, and judging by how long it took me to unstick my fingers with a little overglue, I think it will hold these materials extremely well...
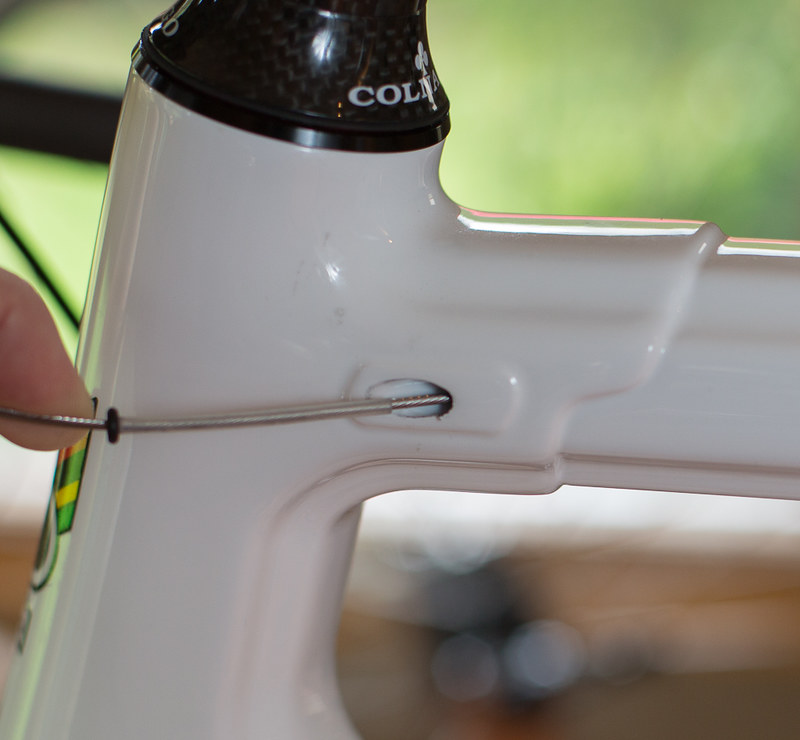
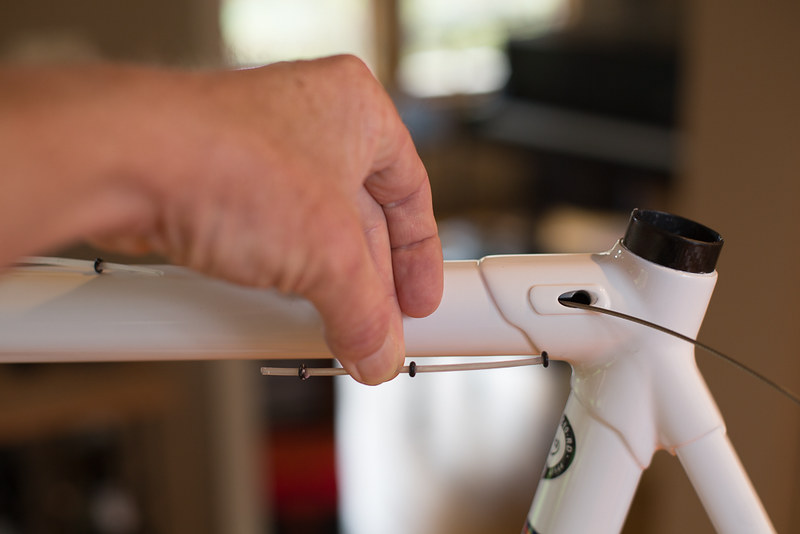
You have to remove the cable entirely in order to get the front guide where it needs to be, but don't fret... with a little effort and a strong magnet you can guide the cable out the rear brake hole without too much difficulty...
I like using the brass ferules wherever the situation causes a cut in the brake housing. Much neater, and prevents that unsightly exposed look of the metal under the housing when the black housing inevitably starts to shrink back a bit over time...
The magnet supplied with Campy/Fulcrum wheels that have no spoke holes in the rim bed, used for guiding spoke nipples through the rim to their rightful place works perfectly to retrieve the end of the brake cable out the rear exit hole...
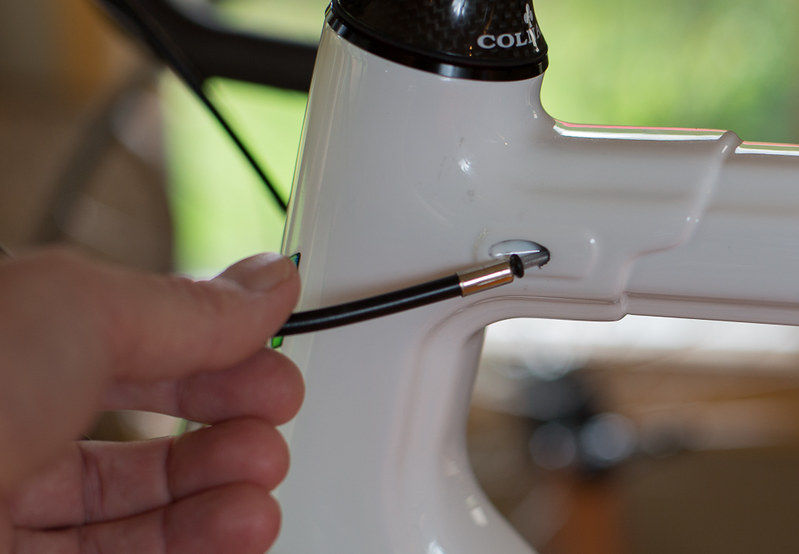
So, now to add the internal length (not really sure this is even needed... still have some experimenting to do here)...
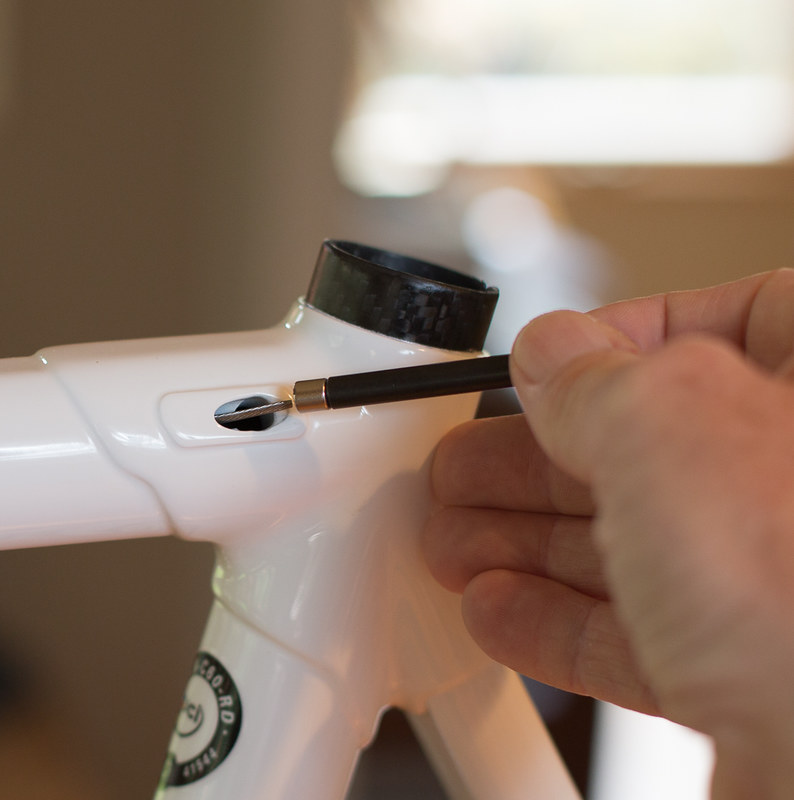
And then the final, and most crucial piece... the short section (with added/glued O-rings) which will prevent all the rough feeling as the cable makes its way around the edge of the internal carbon hole...
Insert final short piece, with stop that fits on OUTSIDE of the hole in and between the ferule on the last piece of brake housing...
Edited: Oh, during all of the above, there was a lot of trial and error going on figuring out the easiest and most efficient way to keep pulling the cable out (without a liner) from the top tube then getting it back in a routed through the rear hole properly. To facilitate this, I'd not cut the brake cable until you've got everything set up. The extra length came in handy for working the inner liner back and forth. For instance, once the inner liner was in, I wondered how I would possibly get it out easily if I had to change cables for example, or for that matter get the new cable routed through it. The solution was to pull the bare cable out from the front a long enough distance and then do one wrap of thin tape or something on it. Then push the cable back in and the wrap of tape will act as a stop against the inner liner and push it out the back. Voila. How to remove an inner liner that you have no access to other than the cable going through it.
Best to keep some length on the brake cable while you're doing all these adjustments is possible, just makes it a bit easier, when pulling the liners in and out while you get things right....
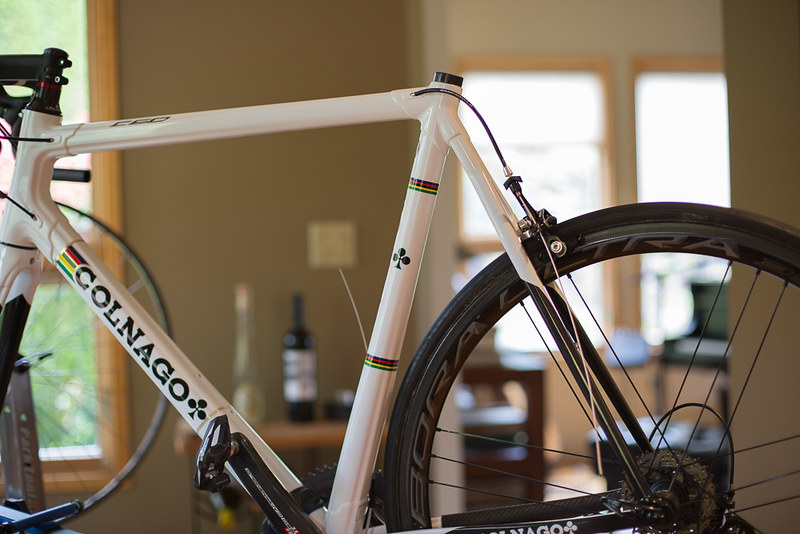
DONE! And am glad to say it's working perfectly so far. Smooth as silk, no different than the front. Very happy. Still want to experiment without the middle section however, as I think it might not be needed at all. For now it's still in there.
I think it's time for another button push... Cat refused to hit the button with me this time. He said I took far too long figuring this one out, so while it seems "easy" now, I was pulling my hair out for a little while. Glad Cat helped me out...

Brake routing: Front of course was a non-issue... perfectly smooth like silk, nothing to talk about here.
The rear routing is a different story. Up until the C59, all the C-series Colnagos had used external brake cable routing. While the EPQ shared the lugs with the C59 and thus had the same internal derailleur routing as the C59, the top tube was still just a reworked EPS top tube which used the external brake cable stops and external brake cable routing. These work very well, just not internally routed. Then the C59 adopted an internal guide that a full brake housing ran through the top tube with no stops at all. It was free to slide back and forth a bit, but still was smooth to operate because of continuous brake housing with no breaks. No problem, except for photos the brake housing would often have slid forward a bit in the top tube making my perfectly straight line down to the rear brake a bit not so straight. Nothing a bit of adjustment wouldn't fix, but grrr...
Now the C60 arrives. Internal brake cable routing beginning in the front headtube lug and exiting through the rear seatcluster lug. No internal guides to speak of... just a couple of holes it seems that serve as the brake cable stops. And remember in my last post what I said about there not being a single brake or derailleur housing that comes close to touching the frame on this build. Well, that's nice, but the angle of the brake housing that enters the rear cable stop is such that it creates kind of a sharp turn for the bare brake cable as it enters the top tube. Colnago does not supply any special ferrules with plastic guide extensions or anything. I knew already that some people had experienced rattling of cables inside the frame, and I even commented a bit in a thread started by @Tomcolnago about his very issue.
Well... upon running a brake cable through my perfectly squared and ferruled brake housings all the way to the rear brake, I just gave it a light squeeze (before cutting anything), to ensure that all was good. Well, it was far from satisfactory to me. It felt rough, very rough. Hmmm.... well I knew it couldn't be the ends of the brake housing, so I looked to try a few things... The Colnago User Guide recognizes that the cable can cause some noise inside the tube and hence gives this recommendation... last point on the page...
I really didn't understand the bit about only a 10cm length of tubing fully, and just assumed that this was all that was needed to be able to somehowe wedge itself into the section that rattling might originate from. Ok... Tried that. Still, very rough. So next was to extend the length of it and add some more O-rings at set intervals. The little rubber O-rings that I got at a hardware store fit the sheathing perfectly...
It was also somewhat of a pain getting it in the tube without the rubber O-rings sliding off, which would have been a hassle to get out of there. The rear brake cable opening in the seat tube cluster has a larger hole that you can use to guide the O-rings over and then in. Patience is a virtue here. But alas... my first try I made the whole thing too long and it probably squeezed up against both cable stops internally and when you squeezed the brakes it would really "slap" against the top tube. Worse than before. Ok, so shortened that up some and the slap was resolved but it was still really rough feeling. Clearly, the roughness was originating where the steel cable made it's way around the carbon cable stops internally, especially at the rear it seemed. Was driving me nuts, so I went to sit down and think about it some more and seek the wisdom of Cat (yes, that's his name)....
"So, ya see Cal... here's what I think might work... but feed me first...."
Well, it's amazing what can come to you with a little break in the action and you have the wisdom of a wise old sage such as Cat to guide you through the abyss...
A little Krazy Glue, some sheathing (cutting up the liner supplied as a guide works fine here), some little rubber O-rings and voila... make your own custom cable guides that begin at the outside of the frame to provide a smooth internal guide around the rough internal edge... oh, the little brass ferule that's all blurry in the pic with the attached tubing was something I found lying around far too late, so if you have some of these they might work as well, I just didn't think of that in time. Anyway, I was far too excited about my home remedy solution, plus with the O-rings attached with a little dab of Krazy Glue along the length of the tubing, I didn't have to worry about them sliding off and figured they would provide a kind of bumper between the cable and the top tube, eliminating any chance of noise... Bonus!
Instant cable guide with it's very own stop that fits flush into the brake routing hole in the frame... perfect... the Krazy Glue was the key here because you need that rubber o-ring on the very end of the liner, and judging by how long it took me to unstick my fingers with a little overglue, I think it will hold these materials extremely well...
You have to remove the cable entirely in order to get the front guide where it needs to be, but don't fret... with a little effort and a strong magnet you can guide the cable out the rear brake hole without too much difficulty...
I like using the brass ferules wherever the situation causes a cut in the brake housing. Much neater, and prevents that unsightly exposed look of the metal under the housing when the black housing inevitably starts to shrink back a bit over time...
The magnet supplied with Campy/Fulcrum wheels that have no spoke holes in the rim bed, used for guiding spoke nipples through the rim to their rightful place works perfectly to retrieve the end of the brake cable out the rear exit hole...
So, now to add the internal length (not really sure this is even needed... still have some experimenting to do here)...
And then the final, and most crucial piece... the short section (with added/glued O-rings) which will prevent all the rough feeling as the cable makes its way around the edge of the internal carbon hole...
Insert final short piece, with stop that fits on OUTSIDE of the hole in and between the ferule on the last piece of brake housing...
Edited: Oh, during all of the above, there was a lot of trial and error going on figuring out the easiest and most efficient way to keep pulling the cable out (without a liner) from the top tube then getting it back in a routed through the rear hole properly. To facilitate this, I'd not cut the brake cable until you've got everything set up. The extra length came in handy for working the inner liner back and forth. For instance, once the inner liner was in, I wondered how I would possibly get it out easily if I had to change cables for example, or for that matter get the new cable routed through it. The solution was to pull the bare cable out from the front a long enough distance and then do one wrap of thin tape or something on it. Then push the cable back in and the wrap of tape will act as a stop against the inner liner and push it out the back. Voila. How to remove an inner liner that you have no access to other than the cable going through it.
Best to keep some length on the brake cable while you're doing all these adjustments is possible, just makes it a bit easier, when pulling the liners in and out while you get things right....
DONE! And am glad to say it's working perfectly so far. Smooth as silk, no different than the front. Very happy. Still want to experiment without the middle section however, as I think it might not be needed at all. For now it's still in there.
I think it's time for another button push... Cat refused to hit the button with me this time. He said I took far too long figuring this one out, so while it seems "easy" now, I was pulling my hair out for a little while. Glad Cat helped me out...
Last edited by Calnago on Mon Nov 14, 2016 7:26 pm, edited 1 time in total.
Colnago C64 - The Naked Build; Colnago C60 - PR99; Trek Koppenberg - Where Emonda and Domane Meet;
Unlinked Builds (searchable): Colnago C59 - 5 Years Later; Trek Emonda SL Campagnolo SR; Special Colnago EPQ
Unlinked Builds (searchable): Colnago C59 - 5 Years Later; Trek Emonda SL Campagnolo SR; Special Colnago EPQ

Calnago wrote:Ok, so I did a little experiment today by taking some campy brake housing, a campy brake cable, and a campy brake cable ferrule, and found this old dusty C60 lying around to play with
That's exactly as I have mine no probs at all
Colnago arabesque campagnolo super record 12
Colnago c64
Cinelli zydeco grx di2
Colnago c64
Cinelli zydeco grx di2
Well, it appears that I didn't notice any problems with that frame I tried it out on months ago, but it was not fully set up and attached to the brakes or levers either. I just stuck some campy cables with ferules on them in the slots and ran some brake cable through by hand. That led me to think it might have been nothing more than the ferrules. On my PR99, the roughness I felt was unacceptable. Hence the solution above. Now it feels exactly like the front, silky smooth. I have another friend with a C60 and I will test out his brakes since I doubt the shop went through the above process when building it up. It could very well be that when they ream out those holes that some end up finished better than others, because the roughness definitely originates at the edges of the carbon internally. I think I suggested earlier in this thread to maybe try sticking a very small diameter round file in the holes to possible remove any roughess. I was going to do that with mine, but I just didn't have a round file tiny enough to fit. Regardless however, after experiencing how silky smooth it is now with the liner (at least at the two points of entry), even if I did remove some internal roughness with the file, I'd still use the liner at both front and rear cable entry points.
Colnago C64 - The Naked Build; Colnago C60 - PR99; Trek Koppenberg - Where Emonda and Domane Meet;
Unlinked Builds (searchable): Colnago C59 - 5 Years Later; Trek Emonda SL Campagnolo SR; Special Colnago EPQ
Unlinked Builds (searchable): Colnago C59 - 5 Years Later; Trek Emonda SL Campagnolo SR; Special Colnago EPQ


