


Greetings,
Does anyone out there have a schematic of the DI2 external BB / internal junction box? Or has someone pulled one apart and know how everything connects?
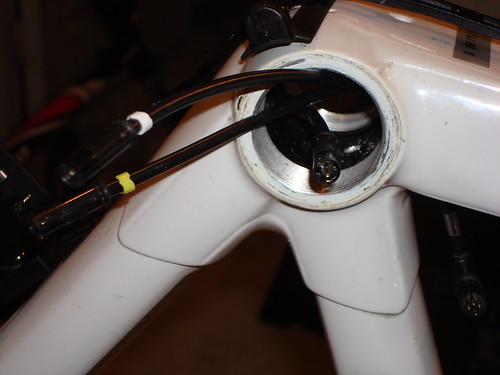
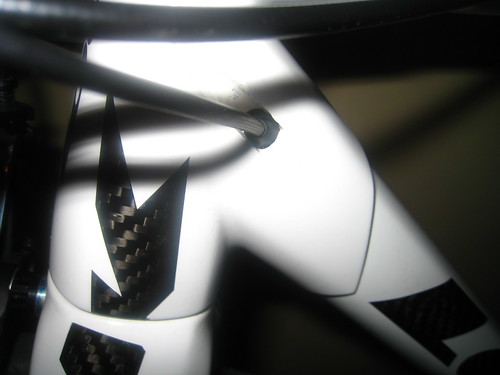
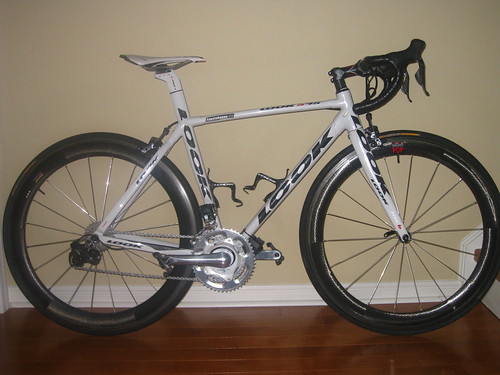
I'm contemplating building a home-made wiring solution to run DI2 with a Look 596 - internally. I posted about this recently but realized the BB area is an issue. Interestingly, this same issue applies to the Look 595. See pic of BB area on said 596.
It's a simple enough matter of running 5 x 30 gauge wires down each of the existing derailleur cable guides. An easy solution would be to use the external DI2 BB junction box BUT I'd have to sever the existing derailleur cable guides just before they enter the BB area. However, I really want to avoid trimming / cutting the derailleur cable guides around the BB area in the event I:
1. Sell the frame at a later date OR
2. Revert back to a regular cable solution.
Any tips about the junction box would be appreciated!
DI2 BB / Internal Junction Box Schematic?
Moderator: robbosmans
I may not need a schematic after all. The existing cable guides are replaceable - fishing them through the frame is easy if a cable is already there. I'm waiting to hear from Look USA about the availability of replacement cable guides before I start shortening my existing set for a DI2 install.
If I get this sorted out, I'll post pics - this install would apply to Look 595 and 596 framesets.
If I get this sorted out, I'll post pics - this install would apply to Look 595 and 596 framesets.


Visit starbike.com Online Retailer for HighEnd cycling components
Great Prices ✓ Broad Selection ✓ Worldwide Delivery ✓
www.starbike.com
-
faustokappy
- Posts: 4
- Joined: Fri Oct 20, 2006 6:57 pm
I have Di2 installed on a Look 595 using the external cabling. Looking at a winter project of reinstalling with the internal cabling. This would necessitate driiling out some rivets in the cable guides on the chain stay and enlargiung the hole to accommodate the internal cable. Do u know if you can fish the cable through the chain stay, over the bb and up the downtube to come out in the cable holes at the top of the downtube. Do you know if there is a hollow passage all the way from the chain stay to the top of the down tubes? Or is it sealed off at the bottom bracket?
-
coloclimber

- Moderator
- Posts: 2875
- Joined: Wed Aug 23, 2006 9:11 pm
- Location: People's Republic of Boulder
PM sent
-Deacon Doctor Colorado Slim
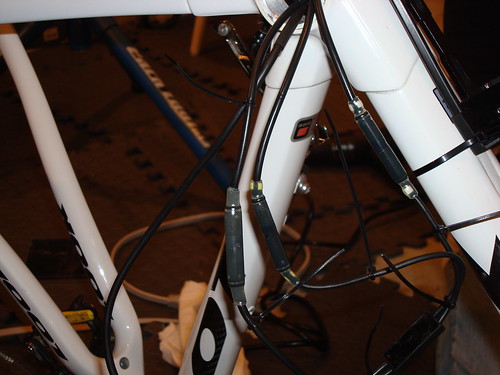
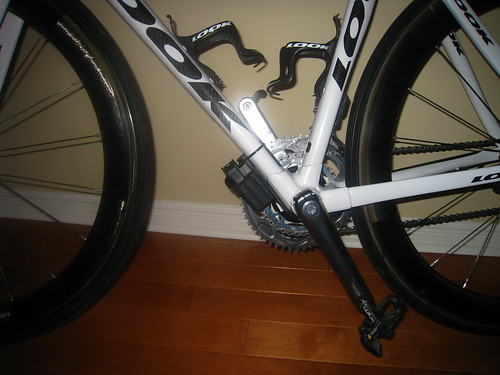
We just finished a full internal Di2 install on a Look 595. We used the EW-7975 internal cabling harness, and mounted the battery just ahead of the BB under the downtube. The challenging part was to get all the internal cabling and JB inside the frame. This frame is filled with some kind of soft foam insulation that needs to be picked out to make room. As well, we did need to slightly enlarge the FD cable guide hole that goes through the big square lug behind the BB area. But we got it done, it looks great and works fine.

goodboyr wrote:We just finished a full internal Di2 install on a Look 595. We used the EW-7975 internal cabling harness, and mounted the battery just ahead of the BB under the downtube. The challenging part was to get all the internal cabling and JB inside the frame. This frame is filled with some kind of soft foam insulation that needs to be picked out to make room. As well, we did need to slightly enlarge the FD cable guide hole that goes through the big square lug behind the BB area. But we got it done, it looks great and works fine.
POST PICTURES OF IT!!!!!!!!!!!!!
The Herd
viewtopic.php?f=10&t=149524
viewtopic.php?f=10&t=149524
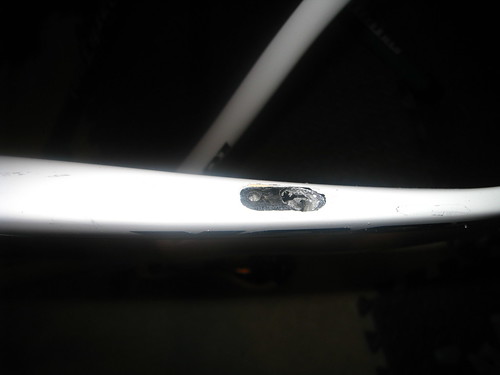
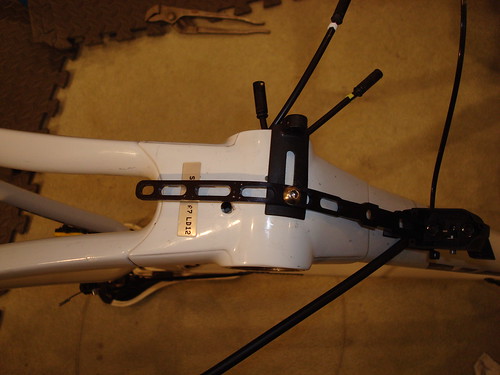
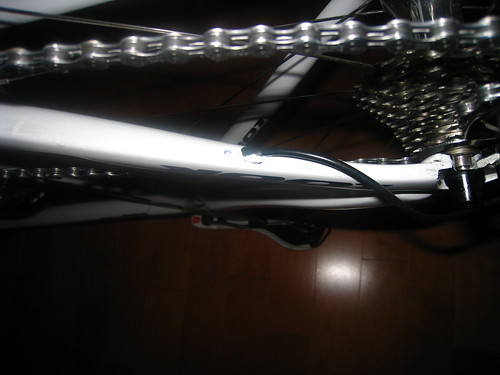
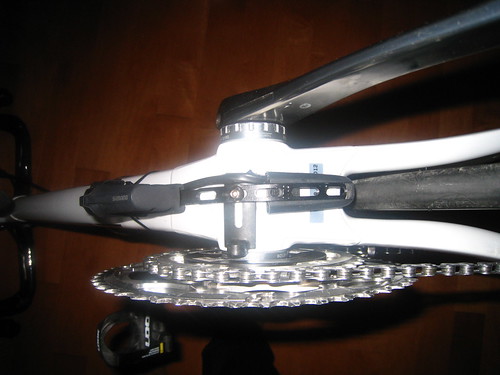
Ok. Here goes. We needed to open two holes inside the BB shell to allow the cables to pass through. Make them large enough to pass cables, connectors and junction box through. The FD and RD cable connectors to the harness go through the rear hole in the BB shell to the inside of the lug behind the BB. The Battery and front connector go inside the downtube through the front hole in the BB shell, with the junction box. The RD cable comes out at the removed cable stop on the chain stay. (you just drill out the two rivets and the cable stop comes off. You then need to open a hole through one of the rivet holes for the cable. You can see in the picture through the hole and see the bits of foam insulation thats inside the frame. use a stiff wire to ream out this soft foam so that the cable will pass through the chain stay through to the BB shell.) The battery cable comes out the bottom of the BB via the FD hole and the battery bracket is shortened and bolted down using the same hole that the cable guide used. FD comes up though same hole as old FD cable, just had to slightly enlarge. Note that there is a metal tube connecting upper and lower FD hole through the bb lug. You will need to drill this out because it will prevent you from passing the cables through and you want to turn this into two separate holes, top for FD cable, bottom for battery cable. Front junction connector comes out of one of two front holes in downtube.


I used a cordless Dremel 8000 with a tungsten carbide bit.
http://www.dremel.com/en-us/AttachmentsAndAccessories/Pages/AttachmentsDetail.aspx?pid=9903
Some tips:
The BB shell is fairly thin aluminum. Brace your hand so that you can hold the bit steady. Start a small hole and then use the side of the bit to "eat' the aluminum. Keep away from the threads of the shell. You don't want to damage those. Once you finish doing the cables, you will have three cables passing through the shell. The FD, RD and Battery. I used rubber grommets from Home Depot to line the edge of the holes to protect the cables from the sharp edges. The internal cable kit EW-7975, comes with a replacement plastic bottom bracket spacer of smaller diameter than the regular Shimano one. That provides room for the cables to go. You can see it in the Shimano Doc. that gives you some detail on the internal cable install.
http://bike.shimano.com/publish/content/global_cycle/en/us/index/tech_support/tech_tips.download.-Par50lparsys-0034-downloadFile.html/10)%20Di2%20Wire%20Kit%20Instructions.pdf
-
coloclimber
- Moderator
- Posts: 2875
- Joined: Wed Aug 23, 2006 9:11 pm
- Location: People's Republic of Boulder
All that for an external battery...... 
-Deacon Doctor Colorado Slim
-
coloclimber
- Moderator
- Posts: 2875
- Joined: Wed Aug 23, 2006 9:11 pm
- Location: People's Republic of Boulder
No more. It is getting new Record 11 on it.
Good work by the way.
Good work by the way.
-Deacon Doctor Colorado Slim
-
coloclimber
- Moderator
- Posts: 2875
- Joined: Wed Aug 23, 2006 9:11 pm
- Location: People's Republic of Boulder
Let me know if you want help internalizing it and saving a bunch of grams. I also have the wiring diagrams.
-Deacon Doctor Colorado Slim
Visit starbike.com Online Retailer for HighEnd cycling components
Great Prices ✓ Broad Selection ✓ Worldwide Delivery ✓
www.starbike.com
-
concept64
- in the industry
- Posts: 52
- Joined: Sun Jun 13, 2010 1:10 pm
- Location: jurancon France
- Contact:
he on my bike the cables cross the bottom braket
and the cranks is the THM Clavicula but i meed the carbone part to protect the cables
you can see the photos (sorry for my bad English)


http://www.concept64.fr/Pieces_Velos_su ... tions.html
and the cranks is the THM Clavicula but i meed the carbone part to protect the cables
you can see the photos (sorry for my bad English)
http://www.concept64.fr/Pieces_Velos_su ... tions.html


