

I am currently doing my own stealth carbon look on an old frame, wet sanding off the paint etc.
is there anyone on the forum who can advise about applying the clear lacquer finish?
specifically, what type of spray gun, optimum needle size and brand of lacquer should i be thinking of using.
i tried search function and google search so far without too much luck. Any help appreciated.
paint spray gun and lacquer advice: new daylight pics page 2
Moderators: robbosmans, Moderator Team
Last edited by dcj9 on Sat Jan 29, 2011 4:03 pm, edited 7 times in total.
Acrylic lacquer is not a very good choice for a bike's clearcoat, since it chips easily. If lacquer is used, it can be had in spray cans that will do just as good a job as a spray gun applied product.
A far better choice would be a catalyzed urethane. That type of product can also be bought in a spray can, but all of the product must be used soon after the catalyst is introduced.
http://www.repaintsupply.com/pd_2_part_2k_aerosol.cfm
A far better choice would be a catalyzed urethane. That type of product can also be bought in a spray can, but all of the product must be used soon after the catalyst is introduced.
http://www.repaintsupply.com/pd_2_part_2k_aerosol.cfm


Visit starbike.com Online Retailer for HighEnd cycling components
Great Prices ✓ Broad Selection ✓ Worldwide Delivery ✓
www.starbike.com
Go take a look at sites such as coastairbrush.com, any of the smaller spray guns from Iwata, Devilbiss, should fit the bill. They also list 2 part clear coats, urethanes, expoxies, etc mostly for auto or hobby use which are great for your application.
cheers for the helpful advice and web links which I looked into - an excellent start.
I am from the UK so will initially try to find local suppliers.
at least i now have some specific product names to search for
I am from the UK so will initially try to find local suppliers.
at least i now have some specific product names to search for
-
dave.chippie
- Posts: 42
- Joined: Wed Nov 22, 2006 9:10 pm
- Location: UK
http://www.movac.co.uk/
Don't know where you are in UK but they might be able to help you
Don't know where you are in UK but they might be able to help you
If its a one time job, easiest way is to get the local auto painter, or motorcycle painter to shoot the clear for you.
To shoot a really quality clear coat, you need to start with clean ventilated environment, any dust that settles on the clear while it is dryng will blemish the clear - you can fine sand that out with 2000-3000 grit, followed by rubbing compound, and then polish - a bit involved and unnecessary and that is why you have a clean room in the first place. An open garage is less than ideal, a closed garage can get quite toxic......masks always recommended.
The spraying equipment starts with the compressor. Airbrush compressors are usually too small (cfm - cubic flow rate) to drive most spray guns, although they work marginally well with the smaller spray guns. And clears are usually shot with a dedicated gun so there's no colour contamination or tinge resulting from previous colour use. So you need a reasonable large compressor, usually about 1/2 hp, clean air supply with moisture and oil trap in the lines, and a spray gun that can shoot a fan pattern of about 2-4 inch setting. Devilbiss are from the UK and make fine spray guns.
Then it comes down to the clear coats, you need to be able to mix the hardeners, reducers, etc to suit the working time and drying time (too quick drying/too little reducer/thinner you get orange peel, etc - too long to dry you get runs, risk of dust, moisture fogginess, etc). Although with the instructions and ratios provided with most paints - its not that hard to get it right.
And first of all, you need to make sure that the surface prep is right, it has to be smooth, clean, and almost sterile - handling should be with gloves so no spots from fingers, etc, and there's a regime of cheese cloths, lint free cloths, and all that is before painting.
Another place to look at equipment are the bigger/more serious RC hobby shops, they typically require spray jobs that are not in the airbrush/plastic model scale, so they would have the smaller spray guns, and some quality paints.
In theory this is a one-off job, although I also have an old steel track frame to sort out in the spring.
based on feedback, I am weighing up between getting the lacquer done by professionals, or doing it myself.
cost of buying the kit is not such an issue since a one-off professional job, done properly will not be that cheap either.
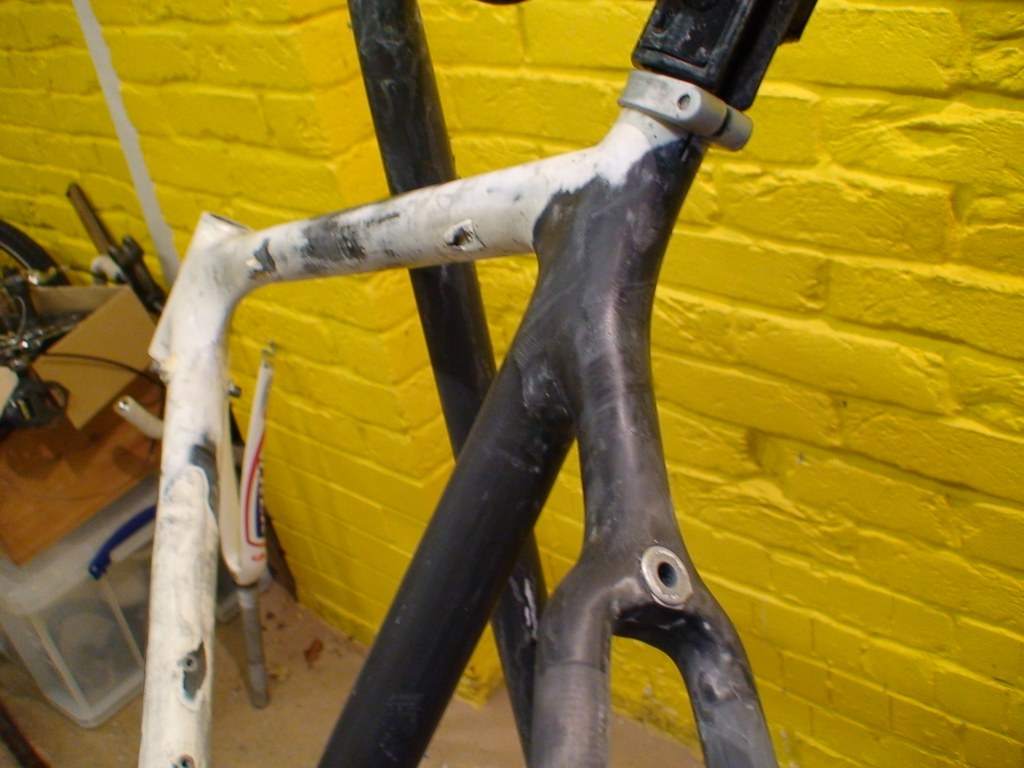
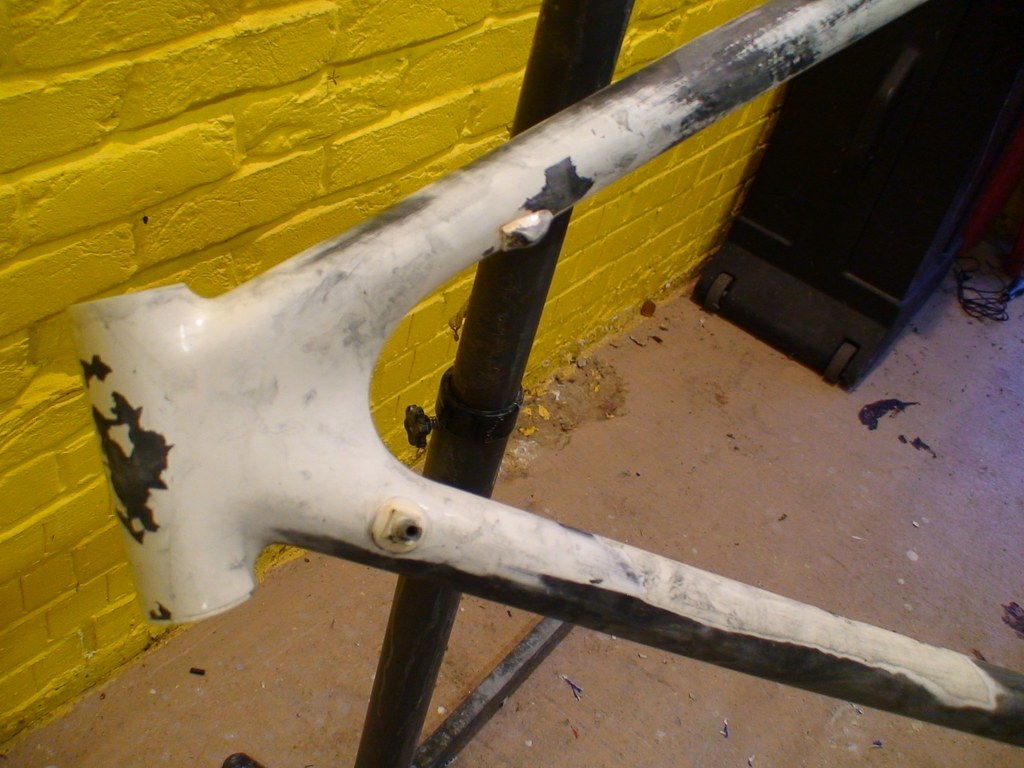
so far i have removed most of the paint which has taken 5 days and counting. probably the same again needed to bring the frame up to the point where I can apply decals - which i still need to source - and the lacquer.
if it works out well I will post some before and after photos
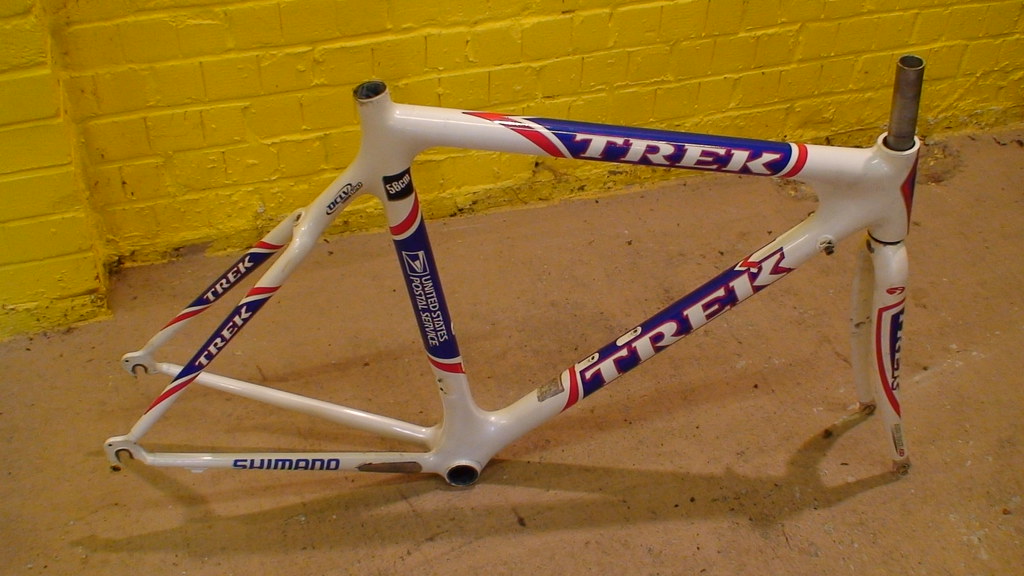
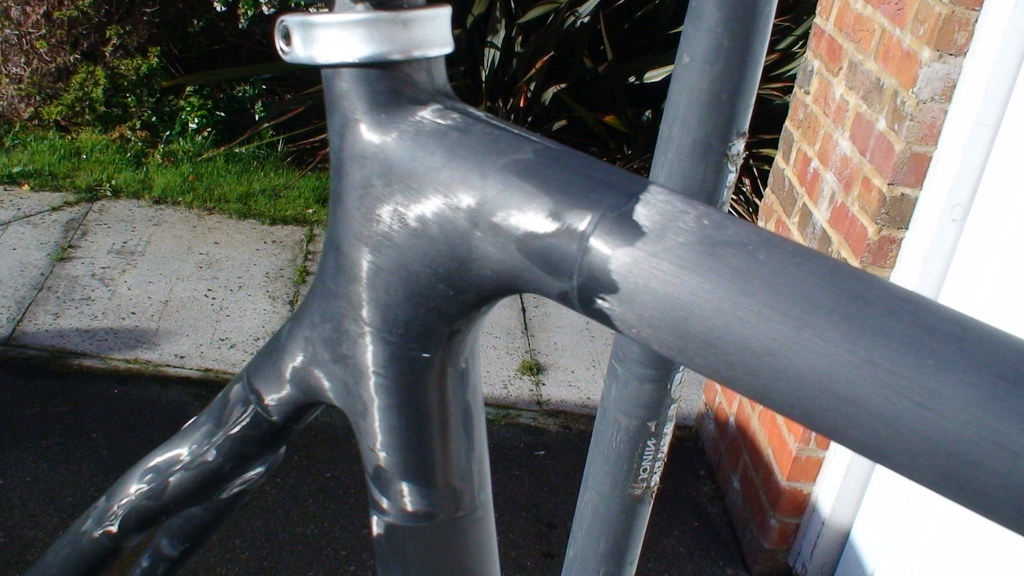
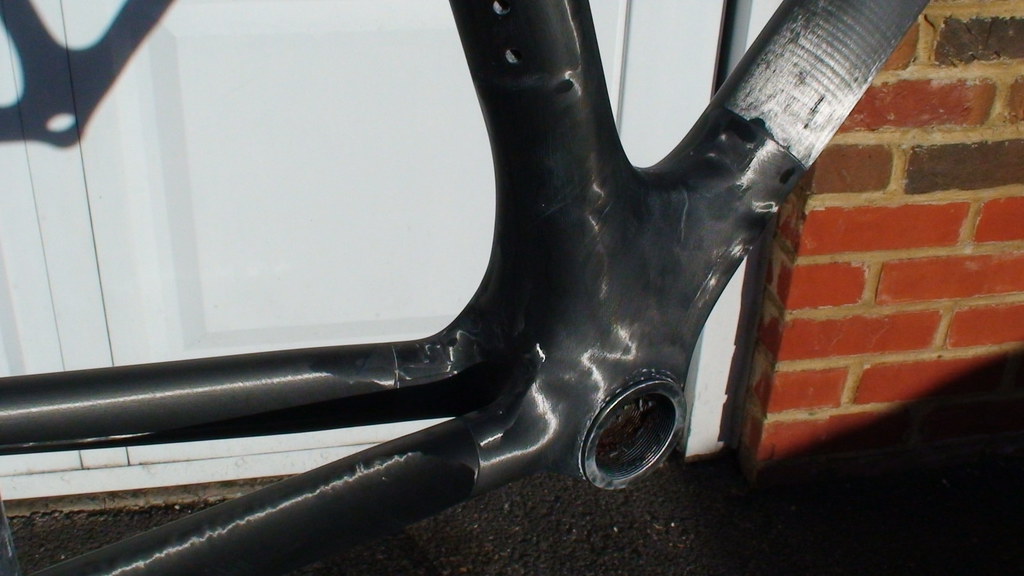
the project is a nine year old Trek 5200 frame and the carbon quality revealed underneath the paint is excellent.
based on feedback, I am weighing up between getting the lacquer done by professionals, or doing it myself.
cost of buying the kit is not such an issue since a one-off professional job, done properly will not be that cheap either.
so far i have removed most of the paint which has taken 5 days and counting. probably the same again needed to bring the frame up to the point where I can apply decals - which i still need to source - and the lacquer.
if it works out well I will post some before and after photos
the project is a nine year old Trek 5200 frame and the carbon quality revealed underneath the paint is excellent.
-
rustychain
- Posts: 3907
- Joined: Tue Jun 22, 2004 11:42 pm
- Location: lat 38.9677 lon 77.3366
- Contact:
The typical paint sprayer found at Home Depot is not really going to work well. A good HVLP system will cost up to a grand. Using a spraygun is a skill. Unlikly that your first attempt will go as planed. I would suggest a pro. That said your putting lots of money into an old frame. Myself, even givin the fact that I own several HVLP systems and have used them for years the hassle of prep work alone would keep the project from ever getting done. If I was going to do anything it would be a very trick "artsy" paint job. I have seen some folks get ok results using a rattlecan but the finish will not hold up as well. If you are intent on this project go to an auto paint supply shop. They can give specific advise regarding viscosity and sprayer specs for the product you intend to use. One last thing, you will need a respirator. You will be handling some toxic stuff. Check to see about local laws regarding disposal of waste.
WW Velocipedist Gargantuan
...hmmm, getting more and more convinced to hand the lacquer job to the pros 
and as this is weight weenies, the painted bare frame was 1175gm (56cm) and fork 510gms.
i will post the pre and post lacquer weights when the time comes.
and as this is weight weenies, the painted bare frame was 1175gm (56cm) and fork 510gms.
i will post the pre and post lacquer weights when the time comes.
Does it have to be perfect? Seriously? Or just pretty good? If the latter is your answer then just do it yourself. You DON'T need an automotive gun. For a bike frame a little paint goes a LOOONNNGG way. Get yourself a decent airbrush/compressor and use some House of Kolor paint in amounts for doing RC or models. Thinned paint sprays for a long time. My airbrush and compressor is less than $100.
The main thing is prep work and practice on some pvc pipe with some cheap paint/water/ just to get used to it. Clear is toxic but the volume is small so I don't think you need a big respirator, etc. Just a mask and some ventilation...outside...stuff is bad stink.
My paint jobs weren't perfect but I did this with an airbrush and some HOK paint. Looks alright and I could have done better with practice.
http://4.bp.blogspot.com/_Udu-1IjbBNE/S7n7s-DtqkI/AAAAAAAAAXQ/cHmtFgbf-_w/s1600/CIMG0741.JPG
If you really want a professional job then call Jack here and get a quote. Tell him Gary sent you and see if you can get a price break (no guarantees).
http://www.kanebikes.com/gallery_index.cfm?ID=6

I did my kirk precision in 2 Pak bought from local auto paint, a £30 epoxy filter mask and Clarke monza spray kit off eBay for £60. It all depends on how practical yoi are and helps if you've done some spraying before otherwise just practice a lot on old broom handles. I just wrapped my shed in polyethylene for a clean environment. Came out pretty good. No compounding required which is what you are after really.


ok, the last two posters convinced me. I am going to do my own clearcoat
main goal is to have a long lasting finish, so based on forum knowledge passed on, I will be looking into using a 2 pack urethane, and working out a strategy to spray in a clean environment, probably using water mist before starting work.
in the meantime, with some finishing work still to do...its looking surprisingly handsome in its pre-clearcoat state.
I hope you like the photos. its been alot of work so far and i probably won't be doing it again in a hurry but it has certainly been an interesting project. thanks for your encouragement and advice.
Trek 5200 circa 2001 model. Frame weight 1175gm
-
rustychain
- Posts: 3907
- Joined: Tue Jun 22, 2004 11:42 pm
- Location: lat 38.9677 lon 77.3366
- Contact:
Water mist? Humidity will create a condition called bloom. A white foggy and very noticeable defect. Also be advised that temperature is important. I suggest a book on automotive finishing may save you time, I used to teach classes and perhaps someone local does this as well. Good luck
WW Velocipedist Gargantuan
just found out my brother in law has a compressor and airbrush he will lend to me. result.
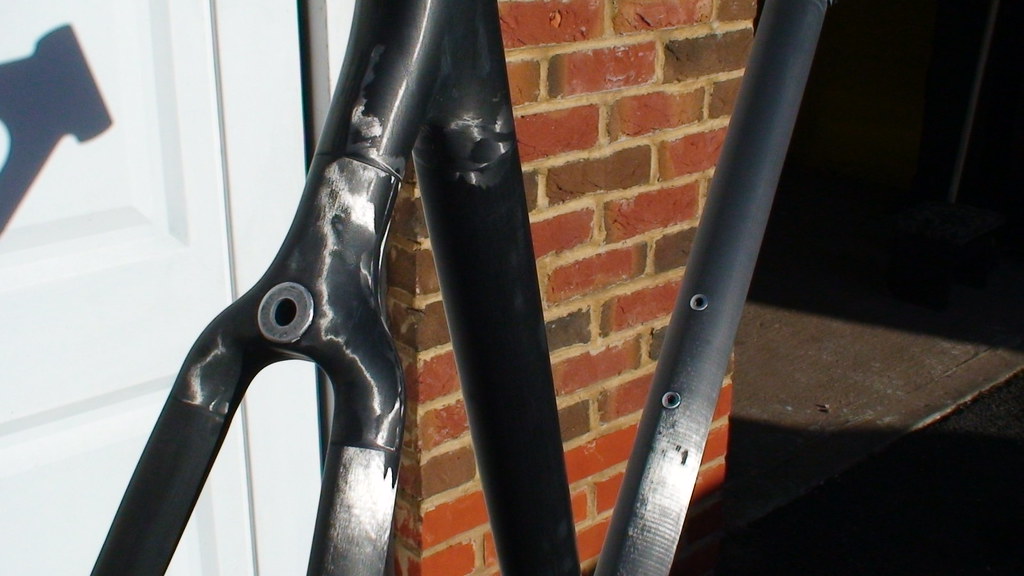
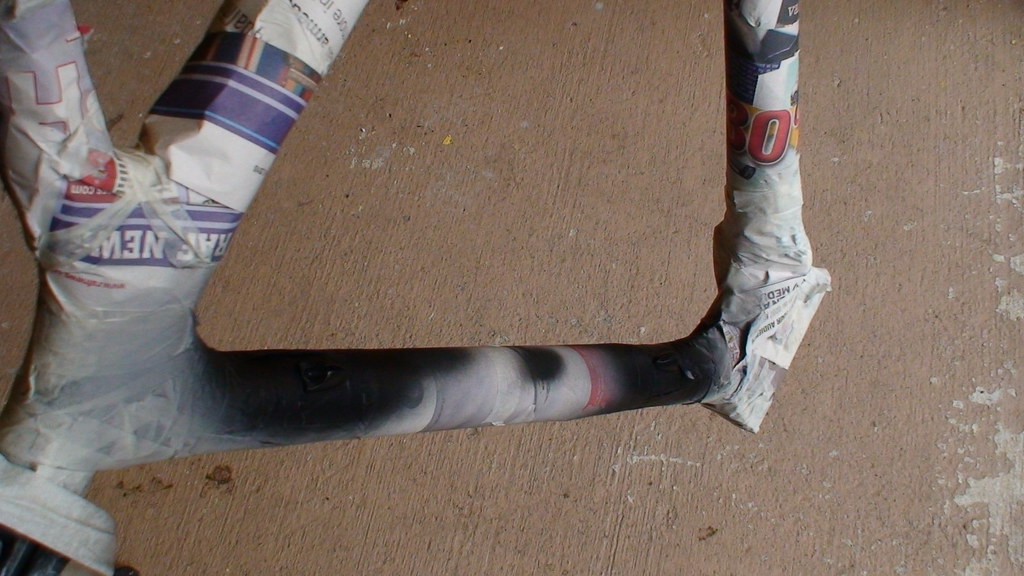
first stage painting the alloy fittings to matt black prior to clear coat.
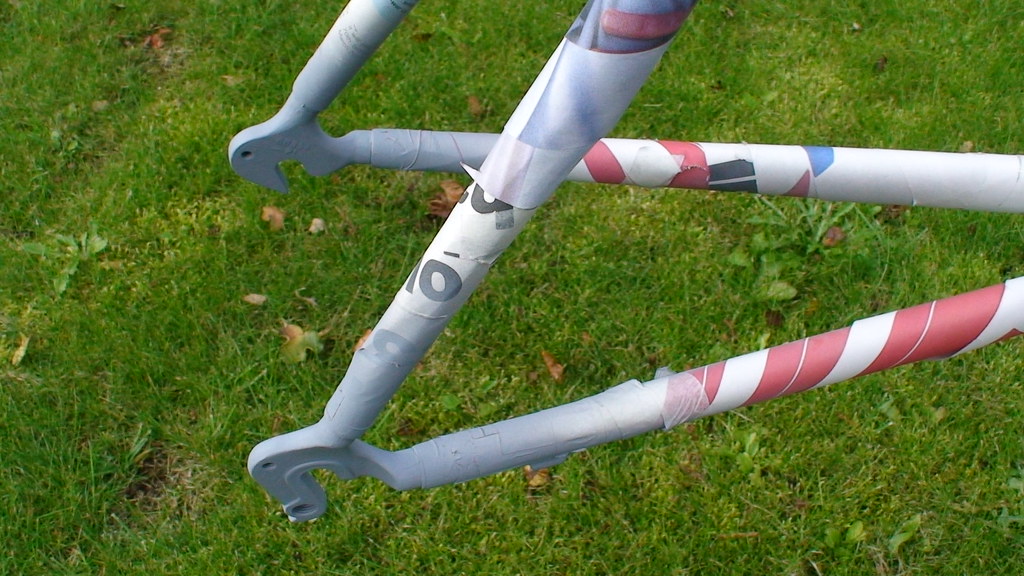
the two rear brake cable fittings on the underside of the top tube
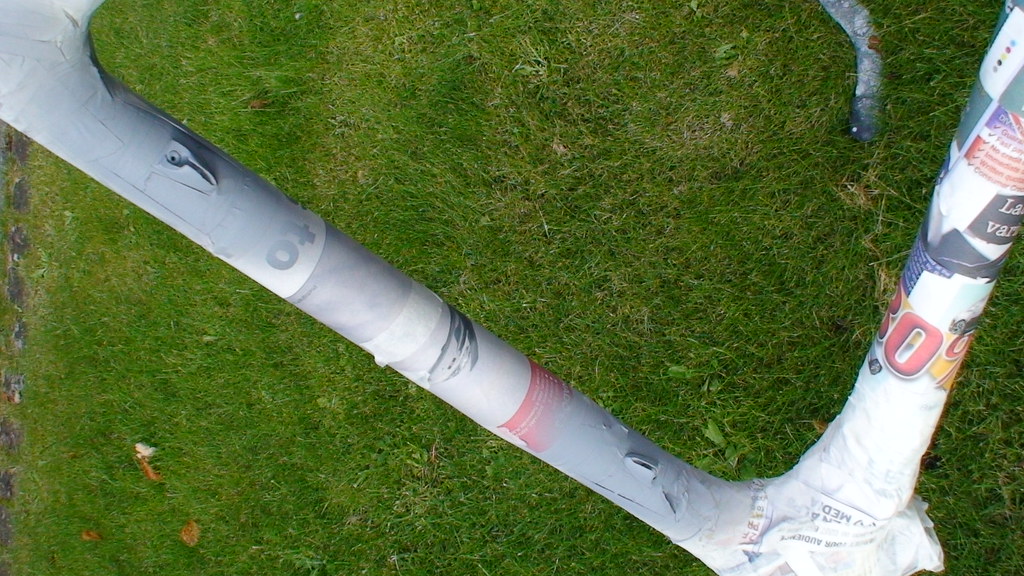
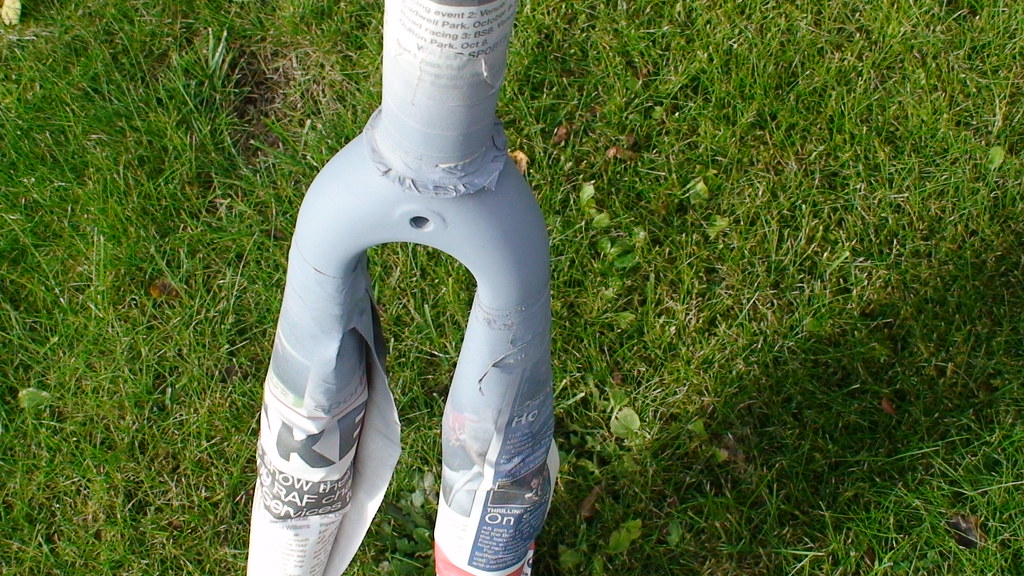
the forks have an alloy crown. not sure if painting the alloy part black will blend in especially well with the carbon blades after clear coat.
so might have to revisit, but for now this is a strategy
first stage painting the alloy fittings to matt black prior to clear coat.
the two rear brake cable fittings on the underside of the top tube
the forks have an alloy crown. not sure if painting the alloy part black will blend in especially well with the carbon blades after clear coat.
so might have to revisit, but for now this is a strategy
Visit starbike.com Online Retailer for HighEnd cycling components
Great Prices ✓ Broad Selection ✓ Worldwide Delivery ✓
www.starbike.com
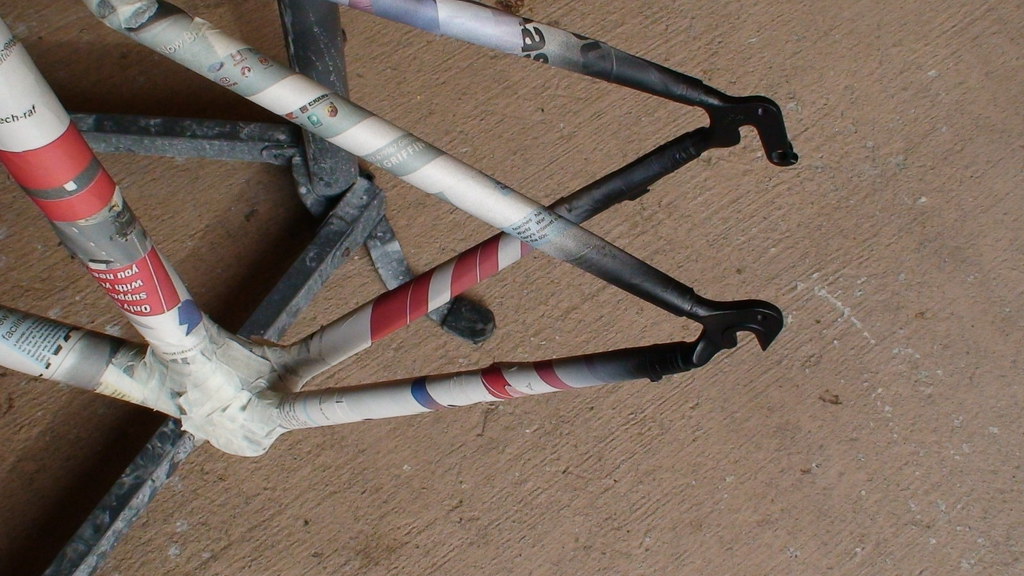
I figure folks are still looking? this is the final stage before the clear coat lacquer is applied.
the alloy fork end and cable stop parts are now sprayed matt black.
based on advice given so far, I will be taking extra care over the clear coat bit to avoid some of the pitfalls rustychain and others warned me about. one difficulty is creating a dust-free room at the correct temperate. as it is winter in the UK that is going to need some thought applied.
anyway, thanks for your help - any comments welcome, even good natured ones like 'why are you bothering, its only a worthless old Trek?'
i will post the 'before and after' bike when the project is done.


