Trek Koppenberg - Where Emonda and Domane meet

Who are you (no off-topic talk please)

Moderators: MrCurrieinahurry, maxim809, Moderator Team

Post Reply
Look565w
Posts: 225
Joined: Mon Dec 27, 2010 1:25 am
Location: West of Scotland

by Look565w

Hi Calnago,

Given the love you've evidently shown both for the Koppenberg & Cancellera over the course of this brilliant thread - for you, is it a case of liking the rider first then the bike, or the bike hence the rider?

Not a critical question, just intrigued as to how it works with fellow cyclist :-)

Regardless, I agree that both rider & bike are phenomenal specimens!

My first road bike was a Trek (alloy one) more than 14 years ago, which I still have but probably not ridable anymore as the drop-outs have all but corroded.
I will always have a soft spot for a beautiful Trek ....... just like yours :-)

Thanks again for all the photos & write up, I have thoroughly enjoy it all ............ looking forward to your "Time" now!

Cheers

Everyone
Posts: 56
Joined: Thu Jun 04, 2015 11:02 am

by Everyone

Love all of your write ups Calnago, the detail you go into is simply fantastic.

How do you manage to get a full size tub folded up that small and neatly? I can't seem to get it that short and tight enough that it doesn't rub on my legs as I'm riding.

by Weenie


Visit starbike.com Online Retailer for HighEnd cycling components
Great Prices ✓    Broad Selection ✓    Worldwide Delivery ✓

www.starbike.com


Look565w
Posts: 225
Joined: Mon Dec 27, 2010 1:25 am
Location: West of Scotland

by Look565w

Hi Calnago,

I have a question & hope you can shred some light into my query - just read back to the part (page 3) where you talked about installing & then re-install the Ultra Torque crankset due to slight creaking. You said initially you had to use the 10mm bolt in the axle to bring the 2-part together because you couldn't get them to go int fully, given that it was "tight" for the crank bearing to fuller sit in to the BB shell, how did you go about removing the 2 half of the cranks?

I have struggled in the pass trying to remove (on winter bikes) UT cranks because the bearings had seized to the UT alloy cups, I recall some not too gentle hammering :-0, can't exactly remember what I did but got the cranks to come out in the end.

I just wondered if you had any neat trick up your sleeve that you can share, thanks in advance!

P.S While you're at it, as what "Everyone" (previous poster) was asking & where did you get that wee neat dry bag from? :mrgreen:

Cheers

glepore
Posts: 1411
Joined: Thu Mar 28, 2013 4:42 pm
Location: Virginia USA

by glepore

Its beautiful work, the depth of field control is very nicely done.
Cysco Ti custom Campy SR mechanical (6.9);Berk custom (5.6); Serotta Ottrott(6.8) ; Anvil Custom steel Etap;1996 Colnago Technos Record

User avatar
themidge
Posts: 1528
Joined: Fri Jan 13, 2017 4:19 pm
Location: underneath sweet Scottish rain

by themidge

Very nice build as always, and fantastically detailed thread :thumbup:
Calnago wrote:
Wed Jan 10, 2018 7:41 pm
One thin coat on the rim and one thin coat on the base tape of the tire, then set aside overnight to cure.... next day... one more thin coat on the rim and mount/centre the tire. Normally it's kind of a fight (especially with a Continental), but with these big 27mm Vlanderens, it's easy to overstretch the tire while mounting and actually end up with too much slack at the opposite side of the valve, so takes just one mounting to get familiar with the difference...
Image
A few questions about tubs:
Do you stretch tyres before you glue them on? It sounds like you don't need to with Vlaanderens, but what about other tyres?
Also, is there any reason in particular to not reuse brushes?

User avatar
Calnago
In Memoriam
Posts: 8612
Joined: Sun Nov 07, 2010 9:14 pm

by Calnago

themidge wrote:
Thu Jan 11, 2018 11:24 pm
Very nice build as always, and fantastically detailed thread Image
A few questions about tubs:
Do you stretch tyres before you glue them on? It sounds like you don't need to with Vlaanderens, but what about other tyres?
Also, is there any reason in particular to not reuse brushes?
Certainly don't need to stretch the Vlanderens at all, like I said in my post earlier, it's actually easy to overstretch them as you're mounting them, ending up with uneveness at the opposite end of the valve.
The other Veloflex tires, I'll usually mount and let them sit on a rim for a day or so, but I if you don't you'll still likely not have much trouble.
Continental Competitions: It's good to start stretching these about a year in advance of when you want to mount them Image . Not really, but these tires definitely do need as much stretching as you can give them in advance, and even then, strengthening exercises on your thumbs and fingers in preparation are probably a good idea Image . They are, however, my favorite wet weather tire as I love the compound and dotted tread pattern, they just seem like they deal with water better from a grip standpoint. But I won't take one as a spare (use something else for that)... I couldn't bear to have old ladies and children laughing at me on the side of the road as I try to mount one in the wild.

Oh, about reusing the acid brushes... why? They’re throwaway items and cost pennies. After one go round on a rim or tire the bristles are already stiffening up from the glue. One coat, one brush is my motto. It’s also the reason I use the small tubes of glue instead of a large can. It’s always “fresh”. The solvents flash off pretty quickly and the can being open and exposed to air just hastens that process. Plus it’s so much neater to just squeeze a bead of glue from the tube then use the brush to spread it, a section at a time.
Last edited by Calnago on Fri Jan 12, 2018 12:23 am, edited 1 time in total.
Colnago C64 - The Naked Build; Colnago C60 - PR99; Trek Koppenberg - Where Emonda and Domane Meet;
Unlinked Builds (searchable): Colnago C59 - 5 Years Later; Trek Emonda SL Campagnolo SR; Special Colnago EPQ

User avatar
Calnago
In Memoriam
Posts: 8612
Joined: Sun Nov 07, 2010 9:14 pm

by Calnago

Look565w wrote:
Thu Jan 11, 2018 10:53 am
Given the love you've evidently shown both for the Koppenberg & Cancellera over the course of this brilliant thread - for you, is it a case of liking the rider first then the bike, or the bike hence the rider?

Not a critical question, just intrigued as to how it works with fellow cyclist :-)
I don't know... I've always liked certain Trek models from way back. And I've always liked Cancellara as a rider, being a Classics star, super time trialist, and a little bigger than your average cyclist. Although by no means is he huge by normal human standards. He's also had his share of detractors for sure. And I'm still not sure if that beefy rivnut holding the bottom bracket cable guide wasn't really used to hold some motor mechanicals in place at one point. I kid, I kid!
Colnago C64 - The Naked Build; Colnago C60 - PR99; Trek Koppenberg - Where Emonda and Domane Meet;
Unlinked Builds (searchable): Colnago C59 - 5 Years Later; Trek Emonda SL Campagnolo SR; Special Colnago EPQ

User avatar
Calnago
In Memoriam
Posts: 8612
Joined: Sun Nov 07, 2010 9:14 pm

by Calnago

Everyone wrote:
Thu Jan 11, 2018 1:45 pm
Love all of your write ups Calnago, the detail you go into is simply fantastic.
How do you manage to get a full size tub folded up that small and neatly? I can't seem to get it that short and tight enough that it doesn't rub on my legs as I'm riding.
Thanks so much for the kind words, all of you...
As for the magic of miniaturizing a tubular for easy carrying, first, you must go watch the new movie "Downsizing". No, don't... it's horrible.

I have to admit that before 2010, I had never used a tubular, even though guys my age grew up with them. And it was one such guy, who upon noticing a barely folded tubular sticking out in all kinds of directions from my jersey pocket outside a Starbucks one day, came over to teach me the proper way to fold one. He hadn't folded one in a while himself but clearly knew the technique, and got me on the right track. To him (Mike), I am eternally grateful... Let me try to pass on his wisdom with a few pics...

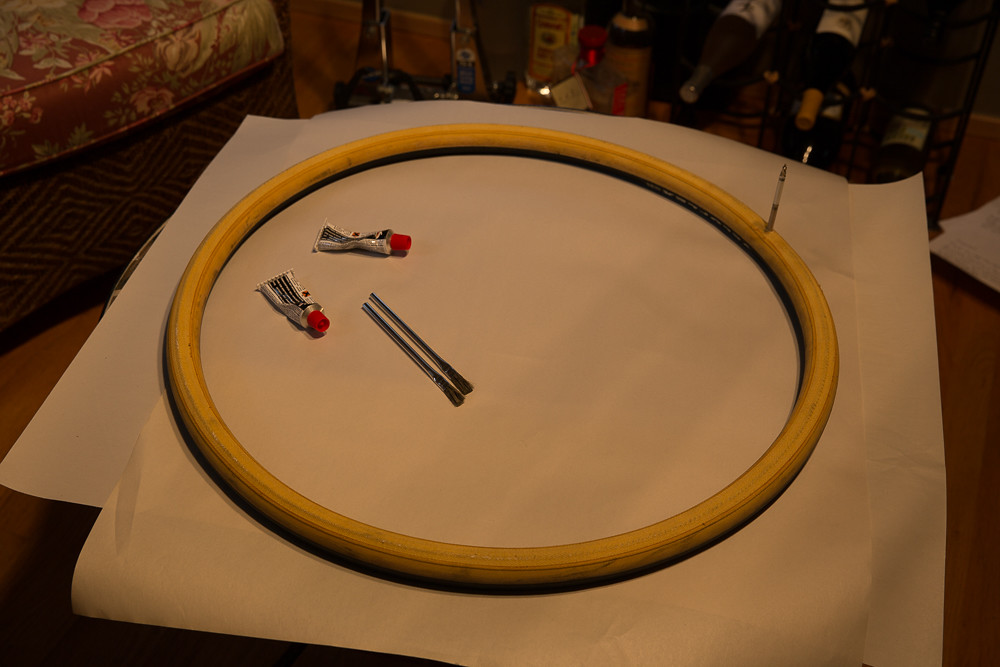
I like to start with a used tubular, they're just more flexible etc. Also, this is the reason I don't use sealant as a preventative measure and only at the time of puncture. If a tire has sealant in it, there's no way you can fold it up and expect it to be useable when you unfold it. So, hopefully I get enough wear from a tire, with no punctures, that I can remove it before it's completley shot and use it as a spare. Take it off, give it fresh coat of glue on the base tape, let it dry, then proceed to fold it up for use as a spare...

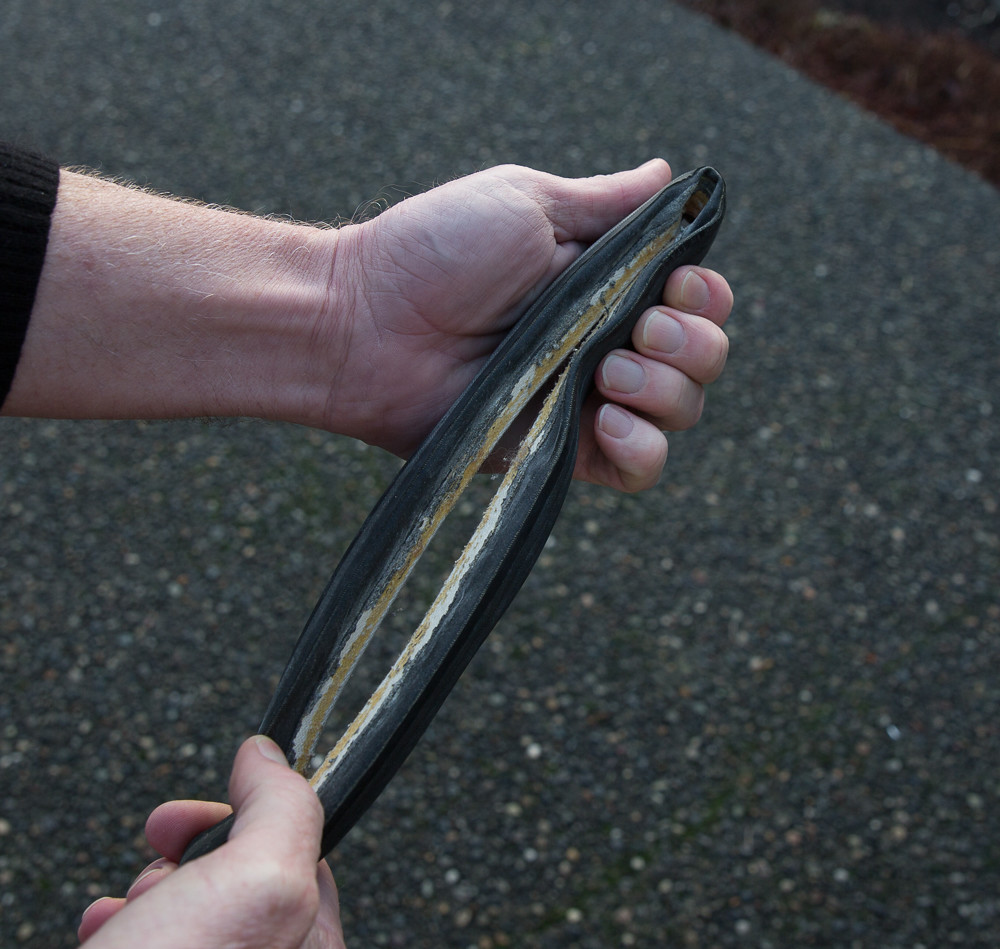
First start like this, valve open so that air can escape as you fold it and start at the opposite end of the valve so as you fold it up, air can escape and you can get it as small as possible... keep in mind that I'm just folding this one up for demo purposes. The glue you see is residue from removing it from the rim it was on... I will put a fresh coat of glue on and let it dry before actually packing it away for a ride spare...Image


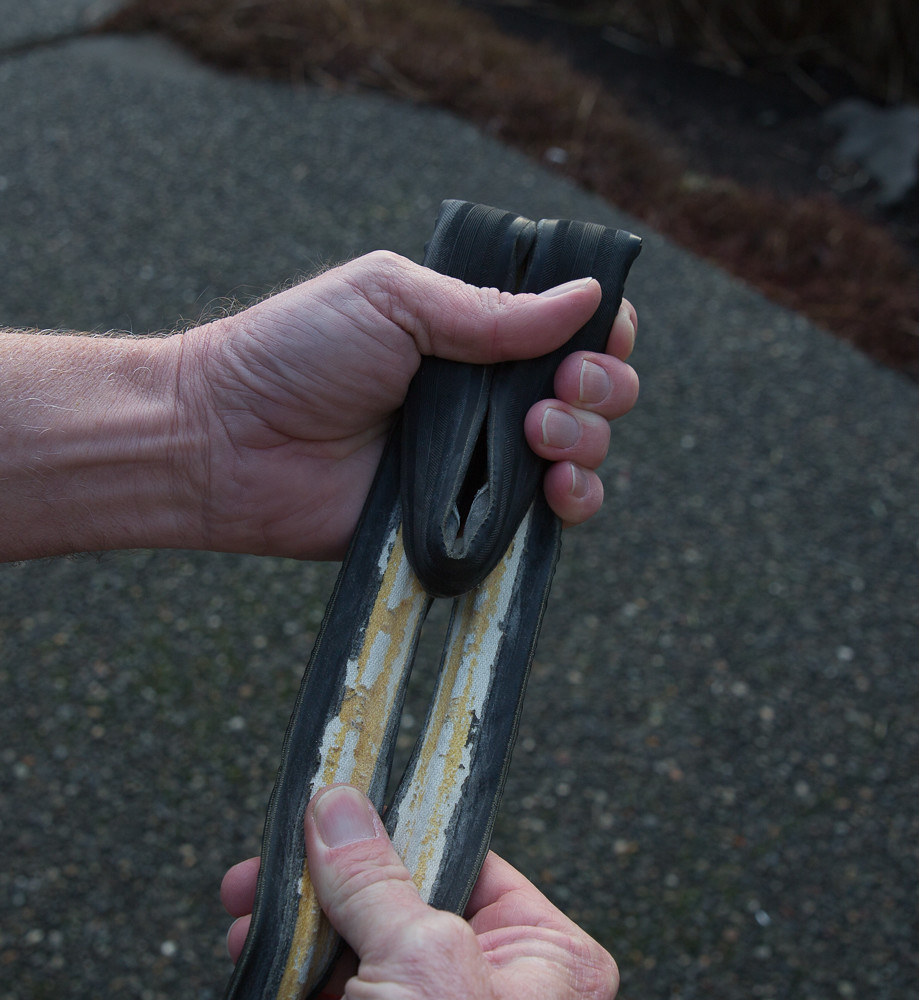
Then twist and fold the first turn so that you have basic two "lines of traffic"...
Image


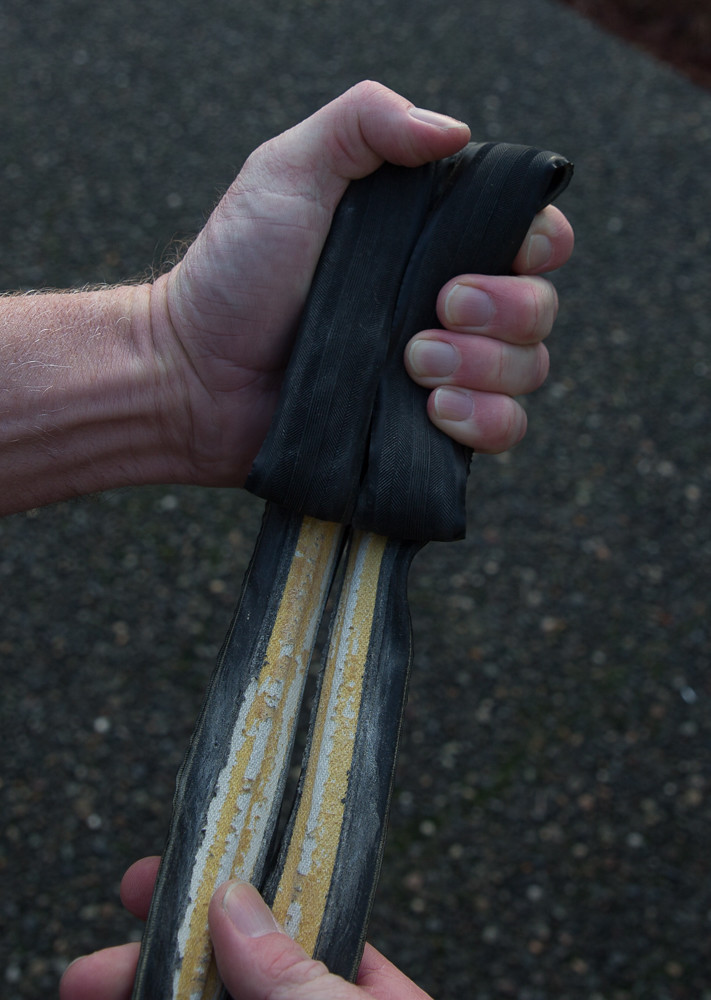
Keep folding until you've got one fold left by the valve...
Image

Make sure you've either already added the appropriate valve extender (if you need one) for the wheels you're riding with, or at least take one with you in your bag of whatever tricks you ride with.
Image

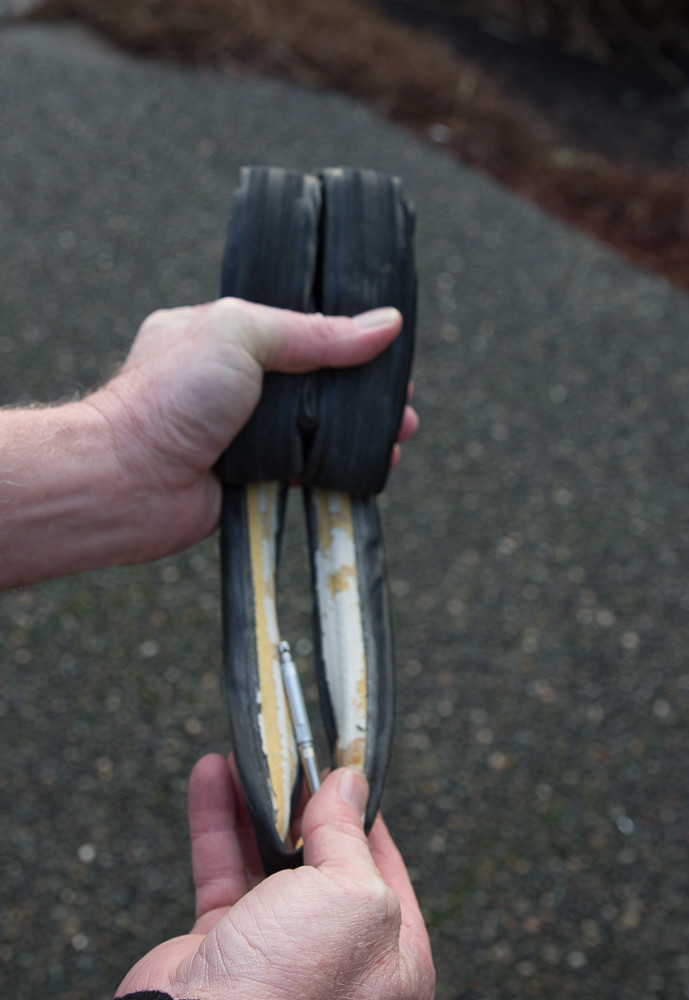
Then the final fold... before you wrap it up tight with a round of blue painters tape, which holds well and is super easy to get off when you need it. I once made the mistake of using grey allweather duct tape... don't do that...
Image


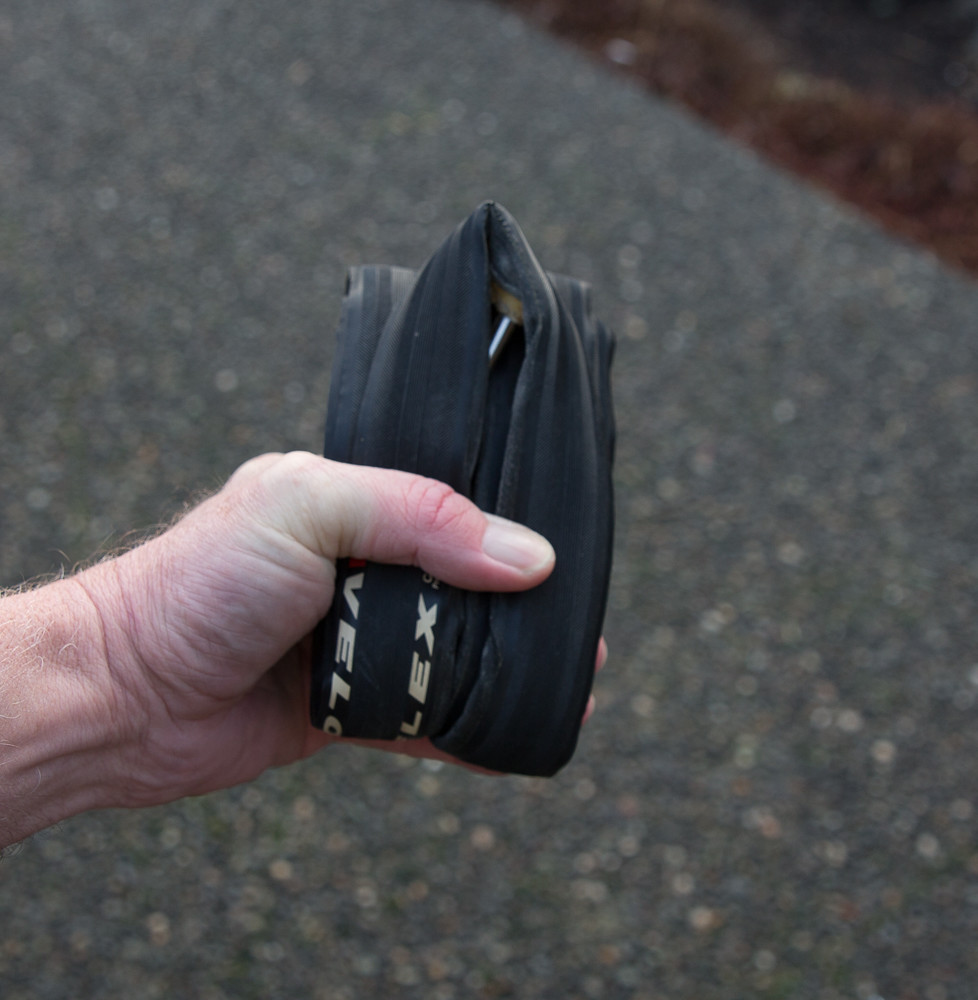
And there ya go... I like to label them now, with the tire that it is and the date it was all folded up...
That's an iPhone 6 by the way...
Image


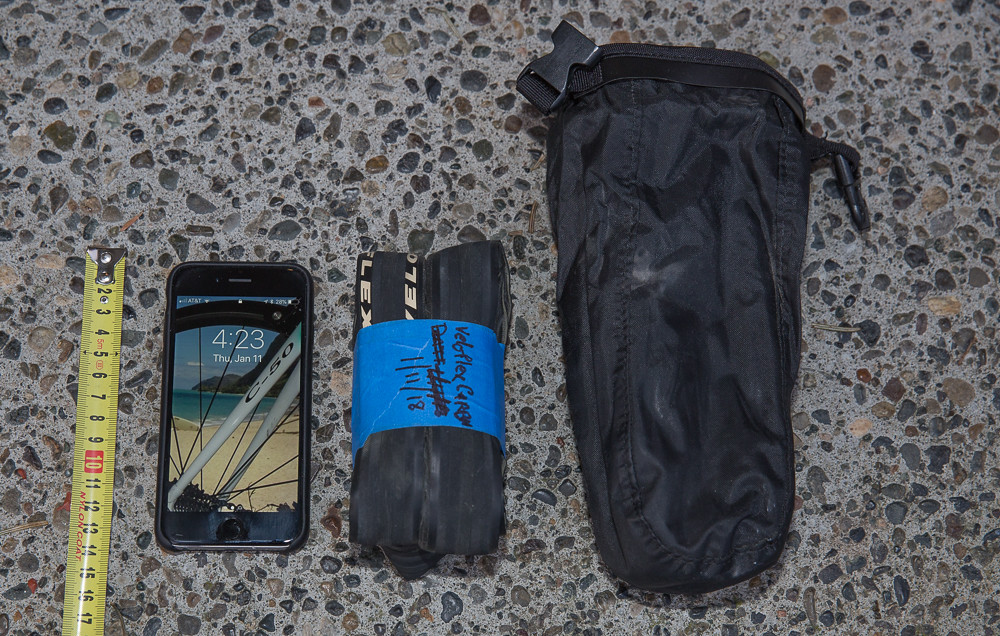
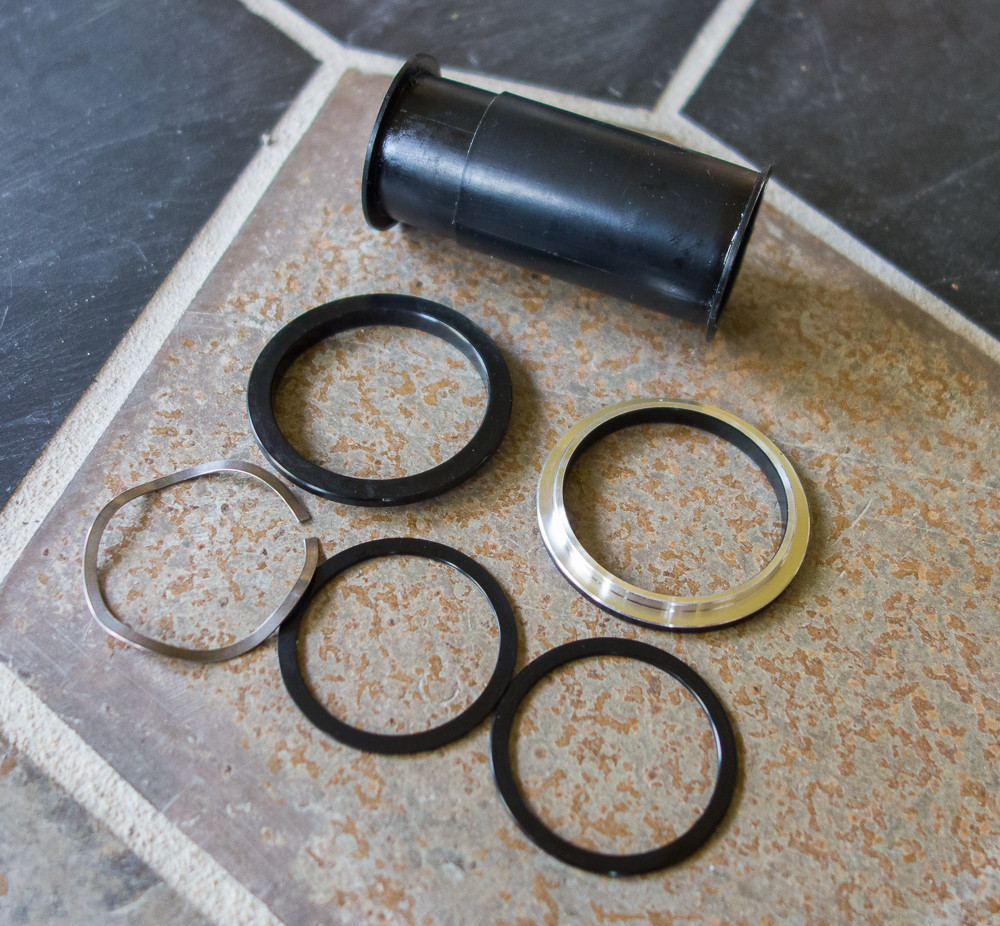
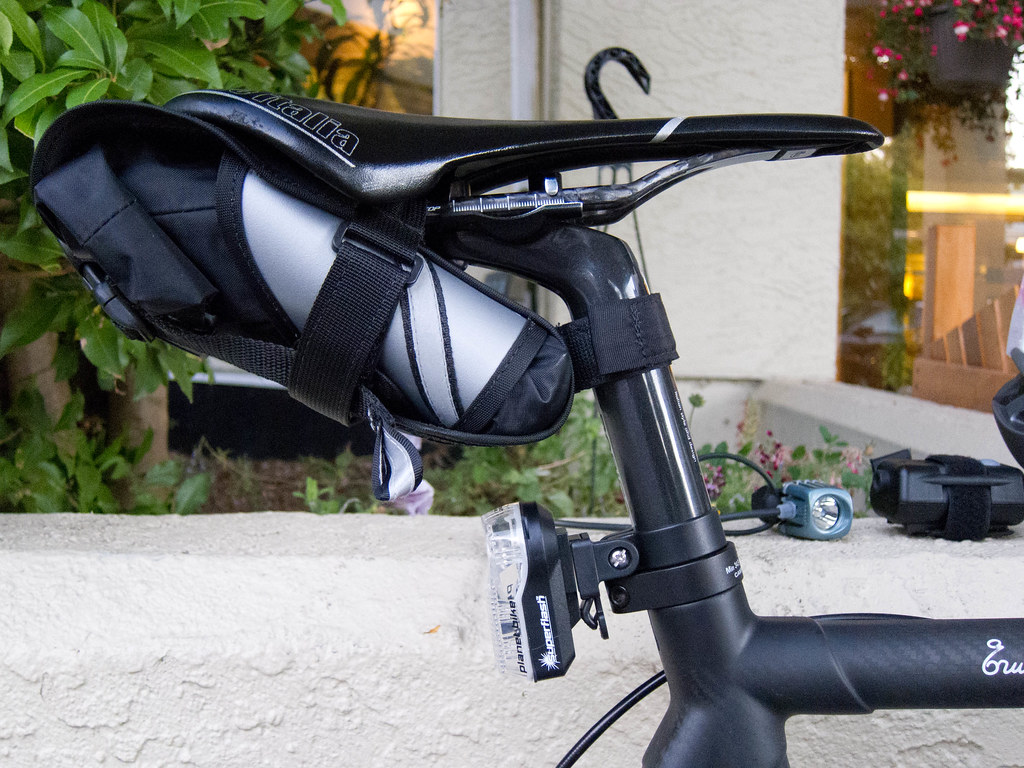
Then tuck it all in the little dry bag and fold it shut then strap it to the underside of your saddle. The little dry bag (I've got three), I obtained at a bike shop that was selling these saddle bags which consisted of these dry bags encased in this hard wrap around piece of plastic that would awkwardly strap to your saddle rails. It was big and bulky, but the dry bag inside was perfect for what I wanted so I bought three, pulled out the dry bags and threw away the rest of the crap. Simpler is better.
Image

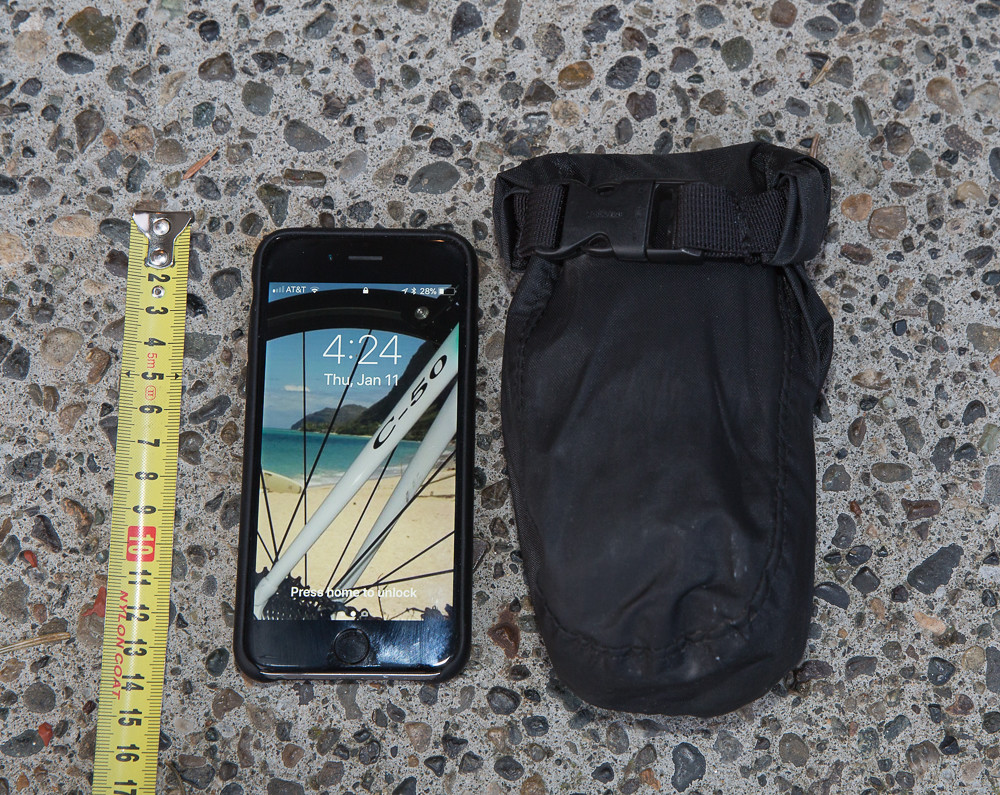
[edit]: I found an old pic of what I had to buy in order to get that little dry bag...
Image


And there you have it...
Image

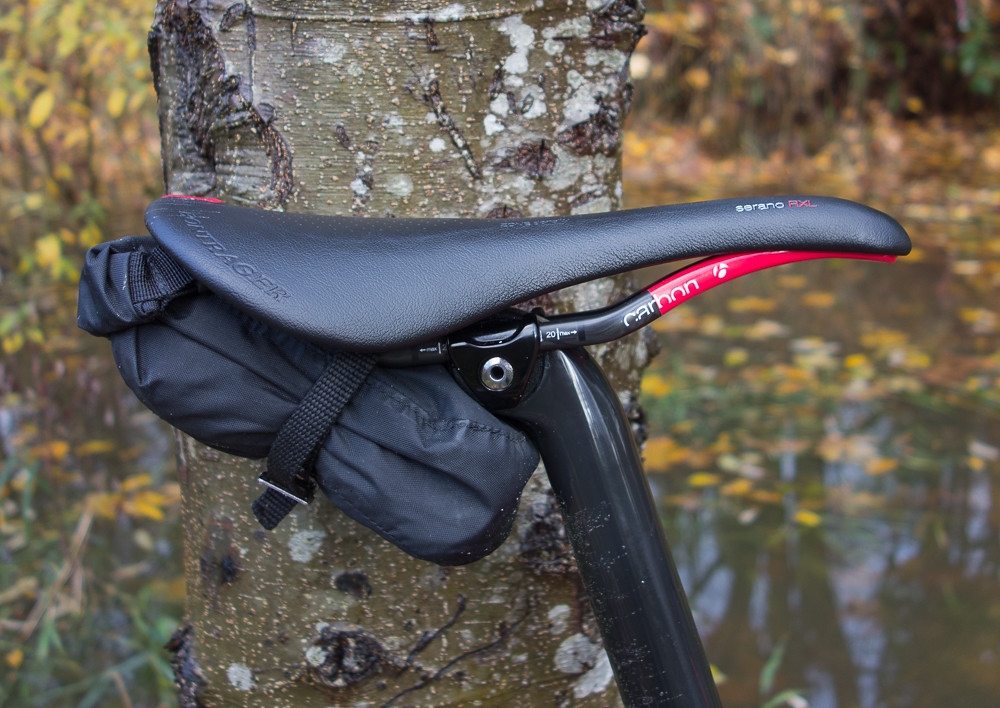
While strapping an exposed tubular with an old leather Christophe or Campagnolo toestrap might seem cool, keeping your preglued tubular clean and dry is far more important, and the nylon toe clip strap works very well and doesn't rot in foul weather, although it probably takes a lot to rot a Campagnolo toestrap. Truth is, I just don't have a Campagnolo toestrap or I'd probably use it. But I love the dry bag... I've used saran wrap in the past but that looked really bad like I was carrying around a half eaten sandwich, saving it for later.
Last edited by Calnago on Fri Jan 12, 2018 5:43 pm, edited 1 time in total.
Colnago C64 - The Naked Build; Colnago C60 - PR99; Trek Koppenberg - Where Emonda and Domane Meet;
Unlinked Builds (searchable): Colnago C59 - 5 Years Later; Trek Emonda SL Campagnolo SR; Special Colnago EPQ

User avatar
Calnago
In Memoriam
Posts: 8612
Joined: Sun Nov 07, 2010 9:14 pm

by Calnago

Look565w wrote:
Thu Jan 11, 2018 3:12 pm
I have a question & hope you can shed some light into my query - just read back to the part (page 3) where you talked about installing & then re-install the Ultra Torque crankset due to slight creaking. You said initially you had to use the 10mm bolt in the axle to bring the 2-part together because you couldn't get them to go int fully, given that it was "tight" for the crank bearing to fuller sit in to the BB shell, how did you go about removing the 2 half of the cranks?

I have struggled in the pass trying to remove (on winter bikes) UT cranks because the bearings had seized to the UT alloy cups, I recall some not too gentle hammering :-0, can't exactly remember what I did but got the cranks to come out in the end.

I just wondered if you had any neat trick up your sleeve that you can share, thanks in advance!
Well, with the Koppenberg, even though I had to use the hirth bolt to get everything in there all the way, I was still able to wiggle out both halves of the crank by hand by normal wiggling and pulling, no big deal. We were only talking hundredths of a millimeter too snug, and everything was still cleaned and well greased.

For regular Campy installs with ultratorque cups, there's no real trick except for removing them every now and then to ensure there's still a layer of grease between the cups inner surface and the bearings' outer surface.
But yes, I have experienced a super seized Chorus ultratorque bearing after a particularly wet winter of riding. Not my bike, but here's how it went...
Took out the hirth bolt. Cranks seemed stuck. Left crank came out with normal wiggling etc.
Ouch, rusted and all kinds of who knows what red substance on the hirth joint...
Image

The drive side was a different story. Wouldn't budge. And it was impossible to get access to the cups and just try to unscrew them from the frame while the drive side crank was still stuck to it. So I resorted to taking a wooden dowel (so as not to damage the hirth joint teeth themselves) to the other side. And hit it. Then hit it harder. Then started swearing, looked around to make sure no one was watching and gave it a good wallop... I knew it had to come out sooner or later, it was the only way. Well, the crank shot out (good thing I was doing it on the grassy lawn). But the bearing, along with the retaining ring was still embedded in the cup. What a mess. But at least I could now remove the cups and replace them along with the Chorus bearings...
Mmmm....yummy...
Image

I asked the owner (an old girlfriend), if she, when cleaning it (since she didn't have me anymore), just blasted a hose at the bottom bracket area. Her response... "Well yeah, how else am I supposed to clean it". Rather than dredge up why we broke up ("it's not you, its me"), I just let it slide, fixed it all and sent her on her way.
Colnago C64 - The Naked Build; Colnago C60 - PR99; Trek Koppenberg - Where Emonda and Domane Meet;
Unlinked Builds (searchable): Colnago C59 - 5 Years Later; Trek Emonda SL Campagnolo SR; Special Colnago EPQ

User avatar
FIJIGabe
Posts: 2241
Joined: Tue Sep 11, 2012 6:07 pm
Location: The Lone Star State

by FIJIGabe

Welcome to the wonderful world of BB90 bottom bracket bearings! I'm not sure how your Campagnolo bearings will work, but I can tell you that with Shimano and GXP compatible bearings, they will rust out, especially if you ride with frozen bottles, or if you ride in the rain. Truth be told, the only thing I've found that extends the lifespan on these bearings is (1) using marine grease, rather than what comes pressed in the bearings (just clean it out and repack it with marine grease), and/or (2) use the new bearings that come on the Madone 9, which has a cover that is pretty effective at keeping the water out (I'm going on 11 mos. on my Madone, and no change in how the bearings feel).

I check the bearings about once/month, remove the crank and check how the bearings feel, and if I see the tell-tale sign of bearing failure (red, rusty stains on the crank arm, usually NDS), then I replace the bearings, and start all over again.

User avatar
Calnago
In Memoriam
Posts: 8612
Joined: Sun Nov 07, 2010 9:14 pm

by Calnago

That pic I showed of the rusted bearings were not from BB90... they were from Campagnolo threaded Ultratorque cups. And they were Chorus. But no bearings would withstand constant water being blasted at them from a garden hose after every wet winter ride then left to sit in a cold garage till the next nasty winter ride, well maybe except for the Campy CULT bearings. Shimano bearings in BB90 actually protrude a bit from the shell, they've improved the seals now however I believe so maybe they're better now. But yeah, pack those suckers, with good marine grease. Not necessarily the bearings themselves, but between the outside of the bearings and the bearing shields that cover them... thick, oozing out the sides. But back to the Campy install...on BB90 there are two black "seal seats" that get bonded to the shell, and the ultratorque bearings sit pretty deep. The seals on the very inner most edge of the campy cranks (not on the bearings themselves), serve to deflect water dripping down the crank arms from continuing on into the bearings. On my bikes, with Super Record, the CULT bearings are seemingly impervious to water, if they had a constant spray of pure water to lubricate them all would be good. But I do like to keep sand and grit out, hence I use the plastic shield that comes with Trek kit that goes through the shell...
The Trek BB90 Campy adapter kit:
Image
The two larger black anodized seal seats (anodized on the outside, unfinished on the bonding side), get bonded to the BB90 shell. They are not providing support for the bearings but rather are just seal seats that the crank seals fit into as you install the crank. They also finish off the BB90 much nicer than without it.
On my Trek Emonda, the dedicated rain bike, I removed the crank after a rainy season just to make sure everything was still ok. Squeaky clean, grease still doing what it's supposed to, and in fact it was probably cleaner than my non-winter bikes, simply becasue it's got full fenders with flaps almost to the ground up front and nothing from the road touches the BB shell.
Image
Colnago C64 - The Naked Build; Colnago C60 - PR99; Trek Koppenberg - Where Emonda and Domane Meet;
Unlinked Builds (searchable): Colnago C59 - 5 Years Later; Trek Emonda SL Campagnolo SR; Special Colnago EPQ

User avatar
Mr.Gib
Posts: 5610
Joined: Fri Mar 18, 2005 4:12 pm
Location: eh?

by Mr.Gib

@FIJIGabe I have had good luck with my BB90 bearings on my winter bike. The bike has a fender set up like Calnago's but I do often hose it off. I do pull the crank occasionally and pack marine grease between the bearing cartridges and the outer drive-side seal and metal non-drive side cover. (GXP)

I do not use the inner plastic sleeve. Whenever I install one, no matter how careful I am or even if it is done by a Trek dealer with top mechanics, it seems to interfere with the free rotation of the crank, so I tossed it. Interestingly I have never found any sign of contamination inside the bottom bracket. In fact water simply doesn't seem to make its way inside the frame (Boone).

And @calnago - is there anything that you don't take a photo of? :P And isn't strange that everytime you take your bike out to photograph it, a minor rain shower seems to cover it with perfect droplets and then the sun comes out. :P Seriously - great to see all this stuff in such high quality images.
Last edited by Mr.Gib on Fri Jan 12, 2018 7:35 pm, edited 1 time in total.
wheelsONfire wrote: When we ride disc brakes the whole deal of braking is just like a leaving a fart. It happens and then it's over. Nothing planned and nothing to get nervous for.

User avatar
Calnago
In Memoriam
Posts: 8612
Joined: Sun Nov 07, 2010 9:14 pm

by Calnago

Ha @Mr.Gib... for the most part those "rain droplets" you see on the photos glistening in the sun are because I took a bunch of pics once just after a wash, in full sun... and I wasn't sure when it would be that clean again. And yes, in hindsight I did take a lot of pics, but I knew that at some point I'd be doing a write up on this bike, and you know the saying... If there's no pics, it didn't happen. When I started this thread I had no idea that it would turn into what it did. I don't think I'll be doing one of these again. It is a lot of work. But I've enjoyed it. So much better I think than the Instagram photo flicks or Twitter stuff, where there's more #Hashtag words than actual words in sentences. That bores me after awhile.

I 'm not sure what your Boone is like, but on my initial build of the Emonda I left the BB sleeve out also. But before I put fenders/flaps on, I spent quite a bit of time riding it around and noticed that some good size chunks of grit were occasionally making their way in through the opening in the BB and sticking to the lightly greased spindle. I didn't wan't any chance of those chunks to somehow find their way into the CULT bearings themselves since they are completely unsealed so I put the sleeve in when I mounted the fenders. Better safe than sorry I suppose. It doesn't add much friction at all, it's just extremely close to the spindle. They have a couple different versions, make sure (if you ever try it again), that you're using the right one for whichever spindle you're using because they vary slightly in diameters.
Colnago C64 - The Naked Build; Colnago C60 - PR99; Trek Koppenberg - Where Emonda and Domane Meet;
Unlinked Builds (searchable): Colnago C59 - 5 Years Later; Trek Emonda SL Campagnolo SR; Special Colnago EPQ

stormur
Posts: 1173
Joined: Tue Aug 12, 2014 3:50 pm
Location: FIN

by stormur

Regardless (fabulous) bike I wonder how come that youre 2 cm higher than me, with 3cm more inseam( so height is compensated ) and you're riding 2 sizes bigger bike than I do... :shock:
Go to Heaven for the climate, Hell for the company.
Mark Twain


I can be wrong, and have plenty of examples for that ;)

Clean39T
Posts: 182
Joined: Sat Oct 22, 2016 5:29 am

by Clean39T

Question regarding the seatmast:

What's your method for getting the saddle tilt you want?

Do you use any carbon paste in the assembly?

How tight do you torque things down?

I'm using a Montrose Pro (so, same rails as your Serano) and am having trouble getting it just right...and keeping it there.

by Weenie


Visit starbike.com Online Retailer for HighEnd cycling components
Great Prices ✓    Broad Selection ✓    Worldwide Delivery ✓

www.starbike.com


Post Reply